
Accessibility in teaching and learning: a practical introduction for faculty
What does accessibility mean at PSU?
Creating an inclusive learning environment is central to our educational mission. Accessible courses help students persist, engage deeply, and thrive academically. At its core, accessibility is about removing barriers before they arise and honoring our students’ civil right to equitable education.
Accessibility standards and Title II ADA rules
Recent updates to Title II of the Americans with Disabilities Act (ADA) from the U.S. Department of Justice require all federally funded higher educational institutions to ensure all instructional materials are accessible. This includes web and mobile content, as well as any materials behind a login. The guidelines specify that all courses, docs, PDFs, slides, spreadsheets, software, technology, video, and audio should meet Web Content Accessibility Guidelines (WCAG) 2.1 AA standards.
Accessibility includes:
- Digital access to course materials, platforms, and technologies.
- Physical access to learning environments, equipment, and classroom layouts.
- Cognitive access to information for students who process or organize information differently.
Accessibility supports students with disabilities, of course, but it also benefits many others, such as multilingual learners, first-generation students, and those managing caregiving or work responsibilities.
Why does accessibility matter?
Accessible teaching is a professional, inclusive, and research-supported practice. Studies show that accessible learning environments improve retention, belonging, and success, particularly for students with disabilities (Fernández-Batanero et al., 2022). Faculty who teach accessibly often report fewer repetitive student questions, better communication, and higher quality engagement.
What PSU offices offer accessibility support for teaching and learning?
Accessibility is a shared responsibility among many campus partners. In particular, the following offerings are geared towards accessibility in teaching and learning contexts.
Responding to DRC accommodations
Students with disabilities must register with the DRC to receive formal, individualized accommodations in your course. Once approved, you’ll receive a Faculty Notification Letter outlining your legal responsibilities. These accommodations are mandatory civil rights protections under the ADA and must remain confidential.
What you need to know
- Legal compliance: Accommodations are federally required. Failure to provide them may constitute discrimination.
- Confidentiality: Never disclose a student’s disability status. Discuss access needs privately.
- You’re not alone: Reach out to the DRC anytime with questions or implementation support.
- Plan ahead: Anticipate common requests like extended time or captioning.
- Be flexible: Some accommodations require adjustments in timing, format, or participation methods.
- Support the student, not just the letter: Center access and individual student needs, not just compliance.
Common types of accommodations
Course materials
- Screen reader–friendly formats
- tactile diagrams
Communication
- Captions
- Interpreters
- Assistive listening devices
Assignments
- Extended deadlines
- Alternatives to group work or presentations
Testing
- Extended time
- Quiet space
- Basic calculator
- Reference sheets
In-class supports
- Peer notes
- Flexible breaks
- Accessible seating
Supporting accomodations at PSU
Explore our full guide for how to Support Students with DRC Accommodations at PSU. It offers clear, actionable strategies to implement common accommodations, uphold equity and access, and support student success.
Core practices for accessible teaching
Accessibility is most effective when built into your course from the start. A few foundational practices can proactively support a wide range of learners and reduce the need for reactive fixes.
Designing for access
Designing accessibly means making your course materials and learning environments work for as many students as possible, including those with disabilities. Two key frameworks can help guide your efforts: the Web Content Accessibility Guidelines (WCAG) and Universal Design for Learning (UDL). Together, these frameworks ensure your course is technically accessible and inclusive of diverse learning needs and preferences.
WCAG’s POUR framework (WCAG)
The WCAG organizes accessibility best practices into four key principles using the acronym POUR: Perceivable, Operable, Understandable, and Robust. These principles provide a helpful lens for creating accessible materials and course environments in any modality.
Perceivable
Content must be presented in ways all users can access.
- Add captions to your recorded lectures and course videos so students who are Deaf or hard of hearing or who experience auditory and/or language-processing challenges can access the spoken content.
- Use alt text (short image descriptions) for visuals like diagrams or photos, so students using screen readers can understand the image’s purpose.
- Ensure sufficient color contrast between text and background to make reading easier for everyone, including those with low vision or color blindness.
Operable
Users must be able to navigate and interact with the content.
- Use keyboard-navigable elements in your course, especially in Canvas; avoid relying on drag-and-drop or hover-only actions.
- Clearly label links with meaningful text like “download syllabus” instead of “click here.”
- Avoid setting time limits for quizzes or participation that can’t be adjusted or turned off.
Understandable
Content must be clear and predictable.
- Structure your documents and Canvas pages using headings and subheadings to guide the reader.
- Use plain, direct language where possible, especially when giving instructions or assignment prompts.
- Keep navigation consistent across weeks and modules so students don’t have to relearn your layout each time.
Robust
Content must work across platforms and assistive tech.
- Choose accessible file formats that work well across platforms (e.g., HTML or accessible PDFs instead of scanned images).
- Use built-in accessibility checkers in Microsoft Word, Canvas, and other tools to spot common issues.
- Avoid using content that only works in a single format or software (e.g., video without captions or transcripts).
The UDL framework
UDL complements WCAG by encouraging instructors to design learning experiences that are flexible and inclusive from the start, rather than making one-off adaptations. The Center for Applied Special Technology (CAST) organizes UDL best practices into three key principles of “multiple means”: Representation, Action & Expression, and Engagement.
Representation
Present information in multiple formats to ensure access for all.
- Supplement readings with visuals, audio, or summaries.
- Break down complex information using diagrams, videos, or step-by-step guides.
Action & Expression
Give students varied ways to demonstrate what they know.
- Allow alternatives to traditional tests, like projects, presentations, or recorded reflections.
- Scaffold assignments to support executive functioning (e.g., checklists, interim deadlines).
Engagement
Stimulate interest, motivation, and persistence through different options.
- Offer choice in how students participate and work with others when possible.
- Build in moments of reflection, check-ins, or other feedback options.
To learn how each principle applies in your teaching, explore our Universal Design for Learning article for instructors at PSU. By applying UDL in your course, you can support student agency, reduce cognitive load, and improve persistence and success for a wide range of learners.

Course materials: Practical accessibility strategies
Organizing and formatting your course materials accessibly ensures all students can understand, navigate, and engage with content. Below are essential strategies to get started:
How do I design accessible documents, slides, and tables?
Accessible documents, slides, and tables use structured formatting elements and other features to enable screen-reader compatibility, as well as improve readability and usability for all students. These strategies improve accessibility, reduce cognitive load, and support students using assistive technology or mobile devices.
- Organize content logically
- Use heading styles (Heading 1, 2, 3) to structure information and support screen reader navigation.
- Avoid using bold or font size alone to indicate section breaks; use real headings instead.
- Keep a consistent format throughout your documents and slides.
- Review accessibility settings
- Set the default language of the document to match its primary content.
- Move essential information from headers/footers into the main body so assistive tech can access it.
- In Google Docs, use the Table of Contents or tabs to consolidate related documents.
- Improve visual accessibility
- Check color contrast using WebAIM’s Contrast Checker.
- Avoid using color alone to convey meaning—add text labels or icons.
- For slides, use a minimum of 24pt for body text and 32pt for slide headings.
- Link text clearly
- Use descriptive link text (e.g., “Access the PSU Library homepage” instead of “click here” ).
- Avoid pasting raw URLs into documents.
- Use consistent formatting for links.
- Use accessible tables
- Use built-in Insert Table tools and include row/column headers.
- Avoid merging or splitting cells.
- Keep the reading order logical: left to right, top to bottom.
- Use clear and consistent spreadsheets
- Name spreadsheet tabs and headers clearly.
- Start data tables in cell A1 and keep the layout linear.
- Use built-in formatting options (e.g., format as currency).
- Make slides screen reader–friendly
- Give each slide a unique, meaningful title.
- Use built-in slide layouts rather than drawing text boxes.
- Use the Tab key to test the reading order.
- Test and get support
- Try screen reader preview tools to simulate different user experiences.
- Ask a colleague or TA to check for clarity.
- Reach out to OAI for support or schedule a consultation.
These checklists can guide your accessibility review.
More support for designing accessible documents, slides, and tables.
- Annotated example of an accessible Google Doc
- Accessible course schedule template
- Accessible Content Template
- Microsoft Accessibility Guide for PowerPoint
- Google Slides Accessibility Features
- Accessibility – Portland State University Library
- Microsoft Excel Accessibility Checker
- Google Sheets – Understanding Document Accessibility
How do I design accessible media (video and audio content)?
Accessible media ensures all students can engage with video and audio content, whether or not they can hear, see, or process information in typical ways. These practices help everyone access your materials more effectively.
- Use clear and high-quality audio
- Record using an external microphone or headphones with a built-in mic for best audio clarity.
- Prepare a script or notes to support clear, organized narration.
- Avoid background noise and speak at a steady pace to support both live listeners and captioning tools.
- Add accurate captions and transcripts
- Always caption recorded videos and review captions for accuracy before sharing with students.
- If recording in Zoom, be sure to enable captions during meetings and class sessions.
- Describe visuals and key content
- Narrate any important text or visuals shown on screen so viewers who are blind or visually impaired can follow along.
- Share your slides alongside the video so students can review content at their own pace.
- Avoid placing essential information only on slides without also describing it in your voiceover or captions.
This checklist can guide your accessibility review:
How do I make my Canvas or other course sites more accessible?
A well-organized Canvas course helps all students focus on learning rather than searching for materials. These strategies improve accessibility, reduce cognitive load, and support students using assistive technology or mobile devices.
- Organize content consistently
- Use a clear weekly format with matching module and assignment names (e.g., “Week 2: Discussion”).
- Include due dates in Canvas to help students manage time, especially when using the Canvas app.
- Avoid timed assessments unless absolutely necessary—if you use them, support students with extended time using the “assign-to” feature.
- Use built-in accessibility tools
- Run the Canvas accessibility checker on Pages to catch missing alt text and color contrast issues.
- Use descriptive link text and check for broken links with Canvas’s “Validate Links” feature.
- Enable course settings that improve access, such as “Auto Show Captions,” “High Contrast UI,” and “Microsoft Immersive Reader.”
- Share accessible media and files
- Use MediaSpace instead of Canvas media recorder for reliable captions and transcript options.
- Give files clear, descriptive names that match how they appear in the course (e.g., “Week 3 Lecture Slides”).
- Allow course content to be downloaded and viewed offline via course settings.
- Non-Canvas platforms (Google Sites, PebblePad, social media)
- Make sure the platform is secure and accessible (screen reader–friendly).
- Host essential materials in a Canvas “hub” course when possible.
- Keep student information private and avoid posting on public-facing sites.
This checklist can guide your accessibility review:
Instruction: Practical accessibility strategies
Accessibility extends beyond course materials into everyday teaching practices. From how you write your syllabus to how you pace your lectures, small choices can make a big difference for students. This section shares practical strategies for creating inclusive assessments, classroom habits, and communication routines that support access for all learners.
How do I design accessible syllabi and assessments?
Accessible course design starts with the first document students see: your syllabus. A clear, inclusive syllabus and flexible assessments help all students (especially those with disabilities, multilingual backgrounds, or unpredictable life circumstances) engage more confidently in your course. These strategies also align with UDL principles by offering clarity, flexibility, and multiple means of representation.
- Make your syllabus clear and inclusive
- Use an accessible syllabus template or a checklist to ensure your syllabus is readable and logically structured.
- Use headings (Heading 1, Heading 2, etc.) to organize sections and support screen reader navigation.
- Include a course calendar or weekly schedule to reduce cognitive load and help with planning.
- Communicate accessibility from the start
- Include the most current DRC syllabus statement and let students know how to reach out for accommodations.
- Clearly describe course policies related to flexibility (e.g., attendance, assignment deadlines, make-up work).
- Use welcoming language that invites students to discuss access needs early in the term
- Design flexible, accessible assessments
- Provide assignment guidelines in multiple formats (written, verbal, visual) so all students can understand expectations.
- Avoid rigid, timed assessments unless absolutely necessary; instead, offer generous windows or untimed alternatives when feasible.
- Use rubrics or checklists that are easy to follow and align with learning goals.
Tip: Keep your syllabus under 10 pages when possible, use at least 12pt font, and avoid complex tables or spreadsheet formats that can’t be easily read with assistive technology.
Tip: Keep your syllabus under 10 pages when possible, use at least 12pt font, and avoid complex tables or spreadsheet formats that can’t be easily read with assistive technology.
- Building an Effective Syllabus and Syllabus Template. Start from the accessible syllabus template and modify it for your own use.
- Request a syllabus review
- Design effective assessments
What accessible teaching habits can I adopt?
Even small shifts in your day-to-day teaching practices can significantly improve access and engagement for all students. These habits help reduce cognitive load, support diverse learning needs, and align with UDL’s emphasis on clarity, flexibility, and multiple means of engagement.
- Share materials in advance
- Upload slides, readings, or prompts before class so students can review at their own pace or with assistive tools.
- Label files clearly and organize them in a consistent place (e.g., weekly modules in Canvas).
- Describe visuals out loud
- When using images, graphs, or videos, briefly describe what you’re showing and why it matters (e.g., “This graph shows student participation increasing over the term, especially after Week Five.”)
- Simplify and structure content
- Break long paragraphs or lists into smaller, digestible sections with clear headings or bullets.
- Use consistent formatting and layout across all materials, including syllabi, slides, and assignment directions.
- Create predictable course routines
- Keep the structure of assignments, discussions, and deadlines as consistent as possible.
- Offer multiple participation formats when feasible (e.g., in-class, discussion board, written reflections).
- Use tech thoughtfully
- Only use digital tools that are accessible and necessary for learning goals.
- Avoid tech that introduces extra clicks, confusion, or platform switching—especially without support or guidance.
How can student collaboration contribute to accessibility?
Accessibility improves when you see students as partners in the learning process. Staying open to feedback and offering small, thoughtful adjustments helps you support students while maintaining your teaching goals. You don’t need to be perfect; simply being open and responsive to the needs in your current class goes a long way.
- Invite feedback
- Ask students what’s helping or hindering their learning, either anonymously or in casual check-ins.
- Consider a short midterm feedback form focused on access, pacing, and clarity.
- Be responsive, not perfect
- If a barrier arises, show students you’re willing to troubleshoot and adapt within reason.
- Even small changes—like clarifying assignment instructions or extending a deadline—can make a big difference.
- Normalize seeking help
- Encourage students to ask for support and use campus resources.
- Offer multiple ways to engage in your course: discussions, written reflections, one-on-one meetings, etc.
Fernández-Batanero, J. M., Montenegro-Rueda, M., & Fernández-Cerero, J. (2022). Access and Participation of Students with Disabilities: The Challenge for Higher Education. International journal of environmental research and public health, 19(19), 11918.
Learn more
Portland State University resources
Checklists for improving the accessibility of documents, slides, spreadsheets, PDFs and more!
Self-paced Canvas course that leads you through practical steps for improving course accessibility. It includes concrete guidance, examples, and checklists for reviewing documents, media, Canvas content, and overall course structure.
Information on how to support students and understand common accommodations issued through PSU's Disability Resource Center.
This microcredential recognizes applied learning in accessibility-focused instructional practices and includes personalized feedback through a consultation. Participants leave with specific recommendations and tangible improvements to their course content that support PSU students with a wide range of access needs.
Information and contact details for PSU's Academic Testing Service.
National and External Resources
Resources for postsecondary faculty to better support students with disabilities.
A detailed framework for applying Universal Design for Learning (UDL) principles in higher education.
National organization offering professional development, guidance, and resources on disability in higher education.
Overview of foundational accessibility standards for digital content.
Next steps
This guide provides an overview of the foundations of teaching accessibly, but there’s more to do! Use our Accessibility course checklist to support your teaching throughout the term.
To continue building your skills and enhancing your courses, check out these other resources:
The Office of Academic Innovation is also here to support you at every stage. Whether you’re setting up your first course, exploring advanced features, or rethinking your course modality, we can help you design an engaging, accessible course that meets the needs of all your students.
Schedule a consultation
Contact the Office of Academic Innovation at Portland State to schedule a consultation with an instructional designer or teaching specialist.
👋Need more help?
Submit a support request through our Faculty Support portal for assistance.

Accommodations in Canvas
Accommodations in Canvas
How to implement common DRC accommodations in Canvas
Supporting students with disabilities through academic accommodations ensures equity, inclusion, and access at PSU. Accommodations remove barriers, foster belonging, and support student success. This article focuses on how to use the technical settings in Canvas to implement common academic accommodations for students.
Each term, faculty receive a Faculty Notification Letter when a student activates their accommodations. This letter lists approved accommodations (e.g., 1.5x extended time) but does not include medical information. Faculty and students are jointly responsible for discussing how accommodations will be implemented, but faculty may not request diagnoses or documentation. These conversations should be handled privately and respectfully, such as over email or in a one-on-one meeting.
This article focuses on how to use the technical settings in Canvas to implement common DRC accommodations for students. Learn more about accessible teaching at PSU or information about DRC accommodations.
Set up accessible quizzes and assignments
If you use timed quizzes or exams in Canvas, you may need to provide extra time for completion. You may also need to adjust availability and/or due dates.
Extra time on quizzes: Moderate quizzes
Use the Moderate Quiz page to manage specific student quiz accommodations. The process and options vary depending on whether you are using Classic Quizzes or New Quizzes.
In Classes Quizzes, use the Moderate This Quiz page to update the settings for individual students. Changes must be made for each quiz.
- extra attempts
- extra time (only available for timed quizzes)
- unlock future attempts
In New Quizzes, use the Moderate tab on the Build page to update the settings for individual students:
- additional attempts
- extra time or no time limit
- reduced answer choices
In New Quizzes, you can apply accommodation settings to a single quiz or to all quizzes in the course. On the Moderate tab on the Build page:
- Click on the pencil icon next to the student's name to change settings for a single quiz.
- Click on the student's name to change settings for ALL quizzes.
Assign alternative deadlines and due dates
You can assign different due dates to assignments, discussions, and quizzes for students with accommodations without changing the due dates for the rest of the class.
Important notes about availability dates
Availability dates: If you use the Available From and Available Until dates, ensure they allow enough time for extended accommodations.
Changing the Available Until date for a published quiz will not alter the auto-submit time for students with in-progress submissions.
- Assignments
- Discussions
- Quizzes (both Classic and New Quizzes)
Gradebook adjustments
Accommodations may require small but important adjustments in Canvas to ensure students are not penalized for extended due dates, flexible attendance, or other approved accommodations. Review these settings in your course gradebook:
- Add alternative due dates for individual students using the +Add option in assignment and quiz settings.
- Remove or override late submission deductions for accommodated students.
- Excuse assignments that should not count toward the student’s grade.
- Manually adjust scores if Canvas applied automatic deductions that should not apply.
- Verify “Missing Submission” policies don’t automatically assign zeros for excused work.
Add notes in the gradebook (visible only to instructors) to track adjustments.
Ensuring students can access course content in formats that work for them is critical. The least restrictive formats include:
- Pages built directly in Canvas
- Google Docs (shared with view access)
- Word documents (Canvas has a built-in viewer)
- Links to external pages and resources
Avoid scanned, unformatted PDFs whenever possible.
Use the Canvas Rich Content Editor (RCE)
Whenever possible, create course materials directly in Canvas using the Rich Content Editor (RCE). The RCE generates accessible HTML content and includes a built-in accessibility checker.
- Use the Accessibility Checker in the Rich Content Editor
- Manage alt text and display options for images embedded in the Rich Content Editor
The accessibility checker only reviews the Canvas page itself. It does not check linked or attached files, external sites, or media.
Formatting your content
While this list is not exhaustive, it covers many of the most common and high-impact practices:
- Use built-in heading structures (H2, H3, etc.) to organize content.
- Use built-in list functions for ordered (numbered) or unordered (bulleted) lists.
- Add brief, descriptive alternative text to every image you use in Canvas, documents, or slides.
- Only use videos with accurate captions
- Create descriptive hyperlinks (e.g., “Canvas Accessibility Checker” instead of “click here”).
Accessible Videos (including editing and requesting captions)
Students with accommodations may need captions, transcripts, or alternative access for video content.
- Use MediaSpace to host and share videos you create.
- Edit captions in MediaSpace.
- Avoid using the Canvas recorder as the available tool does not include adequate captioning options.
Other things to consider
Remote attendance and recordings
Some students may need to attend class remotely as part of their accommodation plan. You can use Zoom within Canvas to broadcast live sessions or record them for later viewing.
Communicate privately with students
When communicating about accommodations, always use private channels rather than public course areas. Canvas provides built-in tools to keep communication confidential.
- Use Canvas Inbox to send private messages.
- Use assignment comments to respond to submissions.
PSU Resources
If you have questions about how to implement an accommodation in your course, you can contact the DRC or the Office of Academic Innovation directly for support. While the DRC focuses on student support, OAI offers faculty consultations and usability reviews, as well as resources on accessibility. OAI can help troubleshoot, clarify course design ideas, and collaborate on solutions that uphold both student access and course integrity. Submit a request here.
This article was last updated .

Create a student-centered syllabus
Create a student-centered syllabus
Set the tone for success with effective, accessible syllabus design

Contributors:Misty Hamideh, Katy Kaszubinski, Brittany Montana, Lindsay Murphy
Some colleges or departments have particular syllabi requirements or expectations. Check with your department chair or program lead for any specific requirements.
Creating an effective syllabus is more than a bureaucratic necessity; it’s a foundational practice that shapes the learning experience. The effective syllabus is a dynamic document that communicates course expectations, fosters student engagement, and reflects inclusive teaching practices. This guide offers research-backed strategies and practical examples to help faculty design syllabi that are clear, accessible, and student-centered.
A note from our Academic Coaches
PSU’s academic coaches work with students on academic success support. We cover skills such as time management, study skills, reading strategies, communication, classroom/PSU navigation, etc. We often hear from students when they are having trouble understanding their syllabi and assignments and are unsure how to approach their professor with their concerns. Developing an effective syllabus using the strategies discussed below and the shared syllabus template can help reduce confusion and support student success.
If you have any further questions or comments for your PSU academic coaches, don’t hesitate to reach out to us (mycoach@pdx.edu). We would love to connect!
Select content and structure your syllabus intentionally
Your syllabus is one of the first classroom impressions you will give students. Therefore, it’s critical that you design it intentionally. Intentional design requires attention to both language practices and document structuring as well as carefully considering and including the right information.
Use inclusive language
Your syllabus is more than a course outline; it’s a chance to welcome students, foster belonging, and set a collaborative tone for the term. The words you choose can communicate warmth, trust, and respect, helping students see themselves as capable partners in the learning process. Inclusive, growth-oriented, and student-centered language signals care and creates the foundation for engagement and success.
- Use inclusive language (I, you, we, us) to invite students into a shared learning experience. These choices foster a sense of community and let students know they are seen as collaborators in their learning, not just recipients of information.
- Emphasize a growth mindset: frame learning as a process and mistakes as valuable opportunities. Phrases that emphasize learning as a process, such as “This course is designed to help you build skills over time” or “Mistakes are a valuable part of learning,” help students see challenges as expected and surmountable.
- Avoid deficit framing (e.g., “students often fail because they don’t keep up”) and instead use language that assumes students are capable and motivated. These subtle shifts can significantly influence how students view themselves and their ability to succeed in your class.
- Help foster belonging, especially for students new to college, with simple welcomes and affirmations, for example, “If this is your first class at PSU, welcome! I’m glad you’re here.” When instructors take the time to make their syllabi welcoming and student-centered, it signals care and builds the kind of trust that supports engagement and success all term long.
Apply best practices for accessibility and readability in document design
When designing your syllabus, applying best practices for accessibility and readability ensures that all students can engage with the content equitably.
- Use structured headings (such as styles in Word or headings in Google Docs) rather than simply adjusting font size or bolding. This helps screen readers navigate the document more effectively.
- Avoid using color alone to convey meaning, as it can create barriers for students with color vision deficiencies.
- Similarly, avoid writing in all caps, which can be difficult to read and is often interpreted as shouting. If you notice students repeatedly missing key details, take a step back and consider whether the syllabus includes too much information in one place. It may help to streamline content or move some items into modules or resources within your course site.
- Use tables sparingly, and only when necessary; if you do use them, make sure they are formatted accessibly by clearly identifying header rows and columns.
Ensure your syllabus can be equally accessed and understood by all students. Visit the Accessible Teaching Resource Hub to learn more about accessible document design.
What to include in your syllabus and how to include it
As you plan your syllabus, ensure that you include the right information and organize that information clearly and intentionally. At the start of a term, students receive syllabi for each of their classes. Not only is this a lot of information to take in at once, but each syllabus is likely organized differently and instructors may have wide variation in how they communicate expectations.
"Be concise: particularly when students are stressed, they have trouble sifting through long paragraphs of information. Bullet points are awesome!" - PSU Academic Coaches
Consider including only the most critical elements that students need to know early in the term. This helps make your syllabus accessible and reliable. The following items are common syllabus elements
- Instructor information: Basics about you and any co-teachers and teaching assistants: contact information, expected response times
- Course offering details: Course name, code, meeting times, and/or modality
- Course information: High-level overview of the course and your approach to teaching; Course learning outcomes, objectives, or goals
- Required materials: Textbooks, software, or other learning materials. If students need to use any tech or platform outside of Canvas, share appropriate support resources
- Assignment information: Overview of major course assignments, grading, and major due dates; community standards or participation expectations
- Anticipated course schedule: If your course schedule is super detailed, consider a separate document with specific accurate dates.
- Student resources: To reduce the length of your syllabus, consider adding a link to the How to Find Help at PSU page.
A top syllabus concern: Due dates are unclear!
Having multiple assignment due dates or not knowing where to find them can be confusing and frustrating for students. Please make sure due dates are consistent among your resources like syllabi and Canvas, and update them every term.
- Include specific dates in the syllabus (not end of week 2, instead Thursday 10/6/2024)
- Follow the PSU academic calendar for weeks: Weeks start on Monday, and conclude on Sunday; avoid shifting your weekly schedule
Consider using a Google Doc for your syllabus
Creating your syllabus in Google Docs and sharing it with students as a view-only link ensures that any updates are immediately visible without needing to resend files. If you prefer a static version, you can also download the syllabus from Google Docs as a Word document and post it in Canvas.
Creating accessible PDFs can require specialized knowledge and software. Therefore, we do not recommend PDF syllabi.
Start with a syllabus template!
OAI has created an accessible Google Doc syllabus template that includes space for all of this information, as well as other common elements to help you get started. We recommend keeping the structure and formatting to maintain accessibility, but add and delete information to make it relevant for your course.
To use the syllabus template:
- Make a copy of the template.
- Retitle the file for your course
- Begin customizing the details as needed. Maintain the included formatting such as headings, lists, and font styling.

Syllabus template
Download and adapt OAI’s accessible syllabus template for Portland State courses, designed for readability, inclusivity, and ease of use.
Engage students with the syllabus
Help students engage with your syllabus by making it easy to find and actively integrating it into your course experience. A well-organized, easy-to-locate syllabus sets the tone for a supportive and transparent learning environment.
- Post your syllabus in a prominent, consistent location in Canvas, ideally both in the syllabus section and in the first module or weekly overview.
- Use the Canvas Syllabus tool
- Add a file or add a link to a Canvas Module
- Make sure the file name is clear and accessible (e.g., “BIO101 Syllabus Fall 2025”).
Also consider experimenting with strategies to help students internalize key course policies and expectations while signaling that the syllabus is a living resource, not a static document.
- Incorporate an activity that encourages students to engage with the syllabus, like a short quiz, syllabus scavenger hunt, or small-group discussion.
Try a “liquid syllabus” (a mobile-friendly, web-based version with welcoming visuals and tone) or a short video introduction to walk through highlights. These formats can increase accessibility and connection, especially for students who are new to college or navigating your course asynchronously.
Reflect student perspectives
Your syllabus can reflect student perspectives by incorporating feedback from past classes and adjusting content to better support current learners. Consider inviting students to co-create aspects of the syllabus, such as discussion norms, assignment topics, or participation policies—an approach sometimes called a “negotiated syllabus.” Even small revisions based on student input can build trust and increase engagement. Including a short FAQ section that addresses common student questions (e.g., “What happens if I miss a class?” or “How can I succeed in this course?”) can also show students that their needs and concerns are anticipated and valued.
Teach with Canvas at PSU
What is Canvas?
Canvas is Portland State University’s learning management system (LMS). It supports all teaching modalities, whether your course is in-person, hybrid, or online. You can use Canvas to organize materials, communicate with students, and create an engaging learning experience — all in one place.
Students appreciate when instructors use Canvas because it helps them stay connected to their courses outside class. More than half of PSU courses use Canvas to share files, assignments, and key resources.
Why use Canvas for teaching?
Even in face-to-face classes, Canvas enhances the teaching and learning experience. It provides centralized access to materials, assignment instructions, grades, and feedback, improving communication and helping students stay organized. Using Canvas ensures students can access course content consistently and remain engaged both inside and outside the classroom.
Each PSU course has a Canvas course shell created automatically. However, this course shell remains hidden to students until the instructor publishes the course and makes it available.
Canvas is mobile: Meet students where they are!
More than 50% of PSU students access Canvas via mobile devices. Designing for mobile helps ensure accessibility, especially for students with limited computer or internet access. For guidance about effective mobile design, reference the Canvas Mobile App Design Checklist .
Canvas is mobile: Meet students where they are!
More than 50% of PSU students access Canvas via mobile devices. Designing for mobile helps ensure accessibility, especially for students with limited computer or internet access.
For guidance about effective mobile design, reference the Canvas Course Evaluation Checklist: Mobile App Design Considerations .
How do I get started with Canvas?
Learning these tips as you get started with Canvas will make navigating the system easier.
1. Log in to Canvas
Log in to Canvas at Portland State by navigating to canvas.pdx.edu. You will be redirected to a page where you will be prompted to enter your PSU Odin name and password. Once authenticated, you will be logged in to your Canvas account.
2. Canvas dashboard overview
Once you’ve logged in, you’ll see the Canvas Dashboard. This is your home base. From here you can:
- View and edit your profile and settings (notifications, pronouns, avatar)
- Access current courses
- View the global calendar
- Submit support requests or access Canvas documentation
Use the dashboard icon in the global navigation menu to return to the dashboard at any time.
Explore more details in the Canvas Dashboard Guide.
3. Personal settings
To stay connected, update your Canvas settings early in the term.
- Add a profile photo and bio. This humanizes your presence and helps build a learning community, especially online.
- Customize notifications. Choose how and when to get updates about course activity.
- Encourage students to do the same to streamline communication.
You’ll only need to make these changes once, unless your preferences change. The following list outlines the main settings you should consider reviewing, and contains links to detailed guides:
New to Canvas?
PSU offers a self-paced orientation course called Growing with Canvas. It’s a great way to explore tools, practice using features, and build confidence before your first course. Also, take some time to explore all of the features and tools in Canvas by visiting the Canvas technology tutorials page.
How do I use Canvas for teaching?
A consistent course structure with clear expectations helps students succeed. This section highlights some of the ways you can accomplish this.
Use Canvas Modules to organize course content
Modules help students find everything in one place. Without them, students may struggle to locate materials spread across different pages. Using modules to organize all of your course materials can lead to fewer “where is” questions for you and less frustration for your students.
You can use modules to organize your course materials in the order that makes the most sense for your content, teaching style, or modality. However, keep in mind that once you choose your organization strategy, the best thing you can do for your students is to implement it as consistently as possible. Here are a couple of examples of organizational strategies you could use:
- Week-by-Week: Each module includes all materials for the week. Great for asynchronous courses.
- Topic-based: Modules grouped by theme (e.g., Poetry, Drama, Prose). This works well when content builds conceptually rather than chronologically.
- Activity-based: Modules grouped by activity type (e.g., Readings, Quizzes, Projects). This structure is best suited to in-person courses that use Canvas as a supplemental tool.
Can I just share the Files page?
Some instructors look to the Files page in Canvas to share content with their students. However, the Files page isn’t designed for students to navigate directly and can quickly become overwhelming or confusing. It displays all uploaded materials in one long list or folder view, without context or guidance on how and when to use them. Using Modules makes it easier for students to find what they need and stay focused on the course’s learning goals.
Manage assignments in Canvas
In Canvas, “assignments” refers both to a specific kind of assessment as well as any Canvas activity associated with a grade. On the Assignments page in your course, you will see all graded activities, including assignments, discussions, and quizzes. Note: Discussions and quizzes will also be visible within their respective tool pages.
In addition to discussions and quizzes, there are several assignment types to choose from when creating a space to provide students with assessment feedback in Canvas:
- No submission: Track offline activities like Zoom attendance
- Online: Accept one or more of the following through the Canvas assignment:
- Text entry: a text box with formatting tools where students can write a submission directly in Canvas.
- Website URL: a space for students to share a URL as their submission.
- Media recordings: allow students to create and submit recordings directly within Canvas or to upload recordings created in another application.
- Student annotations: allow you to provide a file that students can annotate directly in Canvas.
- File uploads: allow students to submit file types including Word documents, PowerPoint slides, spreadsheets, PDFs, images, and videos. (You can restrict file types if necessary.)
- On paper: Track physical submissions
- External tool: Integrate tools like Hypothesis or Turnitin. Note: learn more about external tools available in Canvas in How can I use third-party tools for teaching?
More about assignments in Canvas
Understanding the Canvas Gradebook
The Gradebook is linked to the Assignments index. To add a gradebook column, create an assignment.
By default, assignments are listed in the order you create them. This also determines the order they appear in the Gradebook, but you can drag and drop them into the order you prefer.
You can also create Assignment Groups on the Assignments page. This allows you to not only organize your assignments in a logical way for your students, but also gives you some added functionality in how you grade:
- Group Subtotals. For example, if you want a subtotal for all discussion assignments and another for all quizzes, you could create Assignment groups for each.
- Weighted grades. You could assign a weight to each group (e.g., 20% for discussions, 50% for quizzes).
Auto-dropping grades. Assignment groups allow you to set rules for automatically dropping low/high scores. - Auto-dropping grades. Assignment groups allow you to set rules for automatically dropping low/high scores.
Use Canvas SpeedGrader to evaluate student work
SpeedGrader is the Canvas tool for viewing student assessment submissions and giving feedback. Using SpeedGrader should help cut down on the time you spend grading, and make grading easier.
You can access SpeedGrader either directly from the assignment or through the Gradebook. SpeedGrader can be used to:
- Read written submissions in the DocViewer and use the annotation tools to give feedback within the document.
- Leave text, audio, video, and file attachment feedback comments.
- Enter scores.
- Use rubrics for feedback and grading.
- View individual student responses to quizzes as well as logs of each student’s quiz attempts.
Use SpeedGrader on the go!
Many instructors find SpeedGrader easier to use on tablets or phones, especially for annotation. Use the Canvas Teacher app to try it out.
Communicate with students in Canvas
Strong communication fosters a supportive learning environment. Canvas offers several tools:
- Announcements: Post public messages to the entire class. You can share news and events, remind students of upcoming due dates, or post an introduction at the beginning of a week to help keep students engaged in the course.
- Inbox: Send private messages to an individual student, section, or group within Canvas. By default, you will receive an email notification to your PSU email address with every Canvas Inbox message, but you can customize your notification settings if you like.
- Assignment feedback: Use SpeedGrader to add text, video, or audio feedback on any graded activity in your Canvas course. You can also use the “Message Students Who…” feature in the Gradebook to contact students who have not submitted an assessment, who scored less than a given grade, or who scored more than a given grade.
Regardless of the communication path you choose, it is important to set expectations for how/when students should expect a response. Consider adding a statement to your syllabus that outlines your communication standards. Here’s an example:
- Weekly announcements: Mondays by 8 am.
- Email and Inbox replies: Will respond within 48 hours.
- Assignment feedback: Within one week of the due date
Encourage students to connect with each other, too. Consider:
- Setting up a class discussion board where students can share information, ask questions about assignments, or otherwise reach out to each other.
- Encouraging Inbox messages among peers to coordinate study groups or other collegiality
Next steps
This guide provides an overview of the basic features of Canvas, but there’s more to do to be ready to teach! Use our Canvas course checklist to support your teaching in Canvas throughout the term.
To continue building your skills and enhancing your courses, check out these other resources:


The Office of Academic Innovation is also here to support you at every stage. Whether you’re setting up your first course, exploring advanced features, or rethinking your course modality, we can help you design an engaging, accessible course that meets the needs of all your students.
Schedule a consultation
Contact the Office of Academic Innovation at Portland State to schedule a consultation with an instructional designer or teaching specialist.
👋Need more help?
Submit a support request through our Faculty Support portal for assistance.

Canvas course checklist
Canvas course checklist
Essential tasks for each phase of the term
From basic Canvas settings to content organization to administrative tasks, this Canvas and course checklist outlines essential course tasks for every term at Portland State. This checklist is also available as an interactive Google doc. Make your own copy of the checklist for each of your course reviews!
Before the term: Course prep checklist
Suggested timeline: At least 2 weeks before the term starts
- Add a syllabus that outlines your course expectations and is accessible and culturally inclusive.
- Use Canvas modules to organize content by week or topic. Give each module and item a descriptive title to support navigation and accessibility.
- Publish all course items so students can access them. This includes all pages and links in your modules as well as assignments, quizzes, and discussions.
- Check that all your course materials are accessible. Use the Canvas Accessibility Checker to check materials created in the Canvas Rich Content Editor.
- If you created videos, make sure your videos are properly captioned.
- Use the Canvas Course Link Validator to identify broken links in your course.
- Use Student View to preview your course from a student's perspective.
- Log in to your course through the mobile app to review the mobile experience. More than half of PSU students use the Canvas mobile app.
- Review your discussions, if used. Verify that they:
- Correct due date dates
- Clear instructions with examples and a rubric, if possible
- Correct grade settings, if graded
- Group/peer review settings, if applicable
- Review your assignments, if used. Verify that they have:
- Correct dates
- Clear instructions with examples and a rubric, if possible
- Correct grade settings, if graded
- Group or peer review settings, if used
- Review your quizzes, if used. Verify that they have:
- Accurate availability and due dates
- Clear instructions with examples and a rubric, if possible
- Correct grade settings, if graded
- Review your gradebook. Check that Gradebook reflects your grading policy and is aligned with the syllabus.
- Verify that the calendar tool accurately reflects all assignment due dates and other events.
- Customize your Canvas dashboard to show only the courses you want to display.
- Customize your Course navigation menu to include only relevant tools and hide unused items.
- Upload a course image for your Canvas Dashboard card..
- Update your Canvas profile, including name, profile picture, pronouns (if comfortable), and preferred contact methods. Students in all your courses can read your profile. (You only need to do this once!)
- Review the default Canvas notification settings and adjust them as preferred.
- Publish your Canvas course shell when you're ready. (By default, students can only access it after it's published and the start date has passed.)
- Tip: If you want students to access the course early, adjust the course start date in Settings.
- Make sure your Zoom application is up to date. If you schedule Zoom meetings through Google Calendar using a browser plugin, make sure the plugin is also up to date.
- Reinstall the newest version of Chrome or Firefox.
- Log in to MediaSpace. If you’ve never used your Media Space account, be sure to log in at least once. This allows automatic copies of your Zoom meetings to be stored there. (Note: You do not need to do this each term -- just once during your time at PSU.)
- Schedule your meetings from within Canvas if you’re using Zoom for class. This will create Zoom meeting links for your course that students can access directly in Canvas.
- Schedule an office hour on Zoom before the term begins. A brief check-in can reduce student anxiety and boost early engagement.
- Send a welcome email to your class using Google Groups. Here are sample email templates to help you get started. Let students know:
- When they can access the course in Canvas
- How to get started
- Where to ask questions
During the term: Checklist for engagement
The first few weeks of the term are your chance to set the tone, build community, and help students feel connected to you and each other.
In all course formats:
- Manage your waitlist. On the first day of the term, the automated waitlist function will stop. You’ll need to manually manage enrollment in Banweb by issuing registration overrides. (Learn more about waitlists.)
- Track student attendance. The Department of Education requires instructors to document attendance for each course. Learn more in the Faculty Guide to Initiation of Attendance.
If you're teaching online:
- Introduce yourself. Introductions can help establish a social presence — that someone is real and available. A video is a great way to do this, but even an image and a brief message can help students learn more about you.
- Ask your students to introduce themselves. Invite students to share a bit about who they are. This supports community-building, open communication, and regular interaction throughout the course.
- Record an orientation video. Create a short video overview of your course, including the syllabus, learning objectives, required materials, expectations for interaction, and key due dates.
Staying present in your course is key to student engagement and success. Here are some ways to stay connected:
- Do a midterm check-in. Use a quick Google Form survey to gather student feedback on what’s working and what could be improved. Two simple, effective questions:
- What is one thing your instructor could change to improve your learning in this course?
- What is one thing YOU could change to improve your learning in this course?
- Offer an optional office hour. Holding office hours—in person or via Zoom—can help build rapport and increase engagement. Plan an interactive element to encourage participation.
End of term: Checklist for course conclusion
As the term ends, here are a few things to do before you relax and celebrate your course success! This checklist outlines how to share grades with both your students and the registrar, and how to prepare for the next time you teach the course.
As you approach the end of the term, make sure your Canvas Gradebook accurately reflects students’ work and that all assignment grades are posted for student review.
If you’re using the Canvas gradebook
- Confirm that the grading information in your syllabus matches your Canvas gradebook. A helpful way to check is by entering the maximum point value for each column in the bottom gradebook row for your Test Student. (Note: If you intended to weight grades, but instead have a point-based total, you can still switch to weight grades by assignment group.)
- Enter all grades and post them for your students to review. By default, the Canvas gradebook totals only entered scores. Unsubmitted assignments show as dashes and are not factored into the final grade, which may inflate student totals. Enter zeros manually or apply a “missing submission policy” to assign zeros automatically
- Check your extra credit setup. You can add extra credit by creating an assignment worth zero points. This video shows how to set up an extra credit column for both a points-based and a weighted gradebook.
- Download a copy of your Canvas gradebook. It's good practice to keep a local copy for your records. However, be aware that you are removing FERPA-protected data from a secure site, so be mindful where you store this information.
Canvas users and non-Canvas users:
- Submit final grades. Grades entered in Canvas are not official. You must enter final grades through Banweb.
- Extend access for all students in your course. By default, students lose access to a Canvas course on the first day of the following term (i.e. Winter term courses will be available to students until the first day of Spring term). If you want all students to have access to your course for longer, you can change your Course End date.
- Extend access for a specific student. If you need to keep the course open for a specific student to complete the course, you’ll need to follow the instructions to grant an incomplete student access to a Canvas course.
Now that the term is over, take some time to relax and celebrate your course success!
In most cases, this won’t be the last time you teach this course. Take a moment to reflect on what worked—and what you might revise. OAI+ has many resources to support course improvement and experimentation. Here are some articles to explore:
Go a little further in your course development
The tasks listed in these checklists are just the basics, so don’t stop here! For more considered exploration, check out our many Teaching Guides for instructors at Portland State University.
You can also schedule a consultation with one of OAI’s instructional designers to help you enhance your course design. To schedule an appointment, submit a meeting request.
Frequently Asked Questions
This checklist seems very Canvas-heavy, but I'm not teaching online. Is this still useful to me?
Canvas isn’t just for online courses! Using Canvas for in-person or hybrid courses provides students with a consistent place to access materials, submit assignments, and track their progress in a course. For instructors, Canvas streamlines communication and simplifies the management of a course, making it easier to support students both inside and outside the classroom.
I'd like to start working through this checklist, but I don't see my Canvas course yet. When can I expect to have access to it?
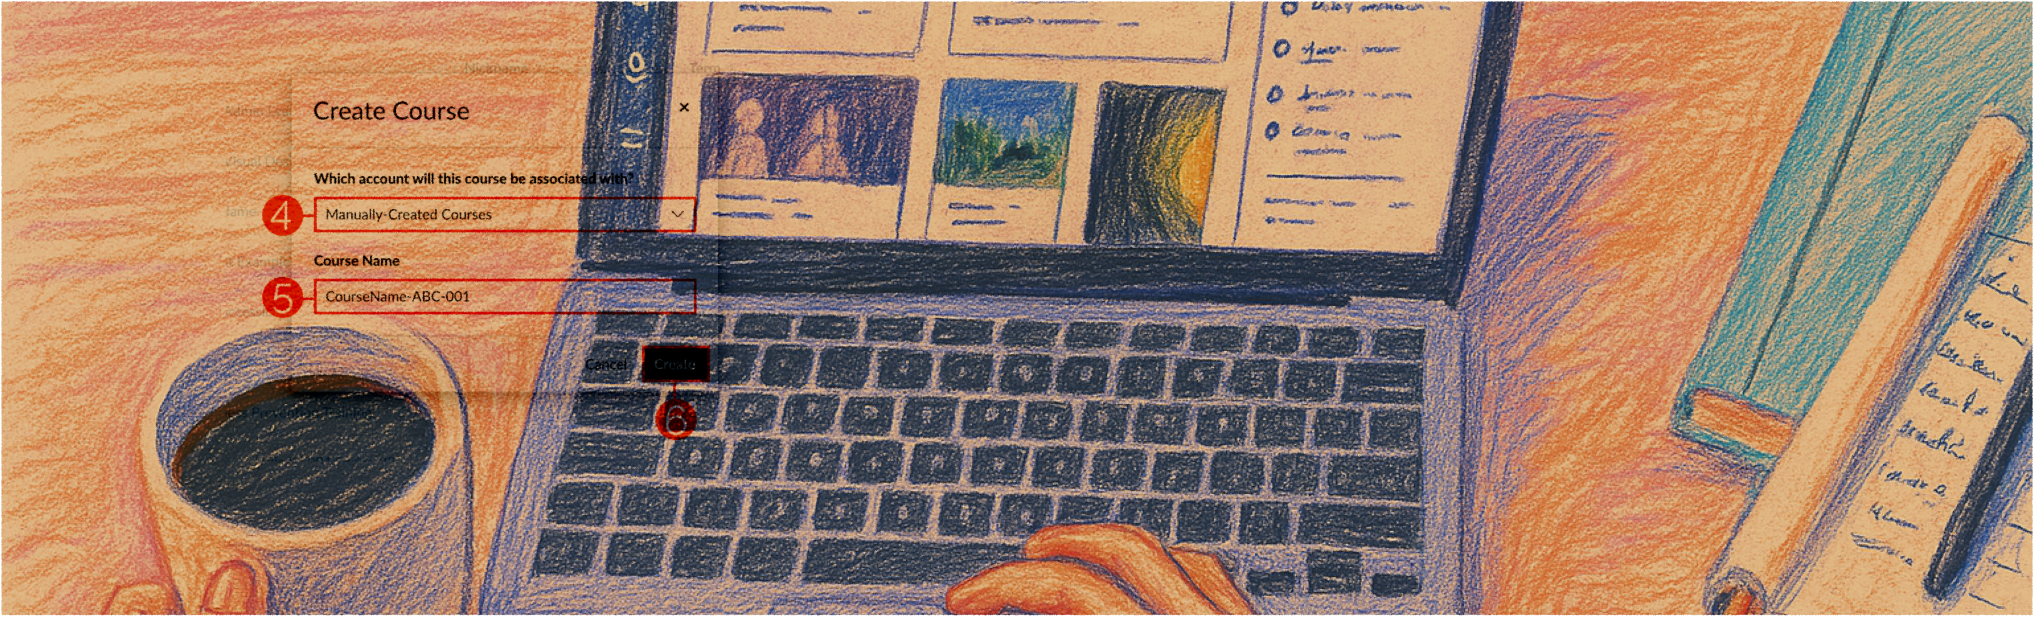
Canvas course shells are typically created the week students begin registering for the upcoming term. Visit the PSU Academic Calendar, select the appropriate term, and look for the Priority Registration – Group A date. This is when you can expect to see courses begin to appear. Due to the number of classes created, Canvas course shell creation may take a few days. You may see courses show up on your Dashboard slowly throughout the week, instead of all at once. If you need a place to work on your course sooner or just want a sandbox where you can test new ideas, create a new Canvas course shell from your Canvas Dashboard.

How to support students with DRC accommodations

Contributors:Megan McFarland, Kari Goin Kono, Gracie Sheets, Disability Resource Center
Supporting students with disabilities through academic accommodations ensures equity, inclusion, and access at PSU. These accommodations remove barriers and support student belonging and success. This guide, developed with Disability Resource Center (DRC) staff, offers clear, actionable strategies for implementing common accommodations across teaching formats.
Faculty can expect to receive a Faculty Notification Letter when a student activates their accommodations each term. This letter outlines the specific accommodations the student is approved for (e.g., “Extended time (1.5x) on timed exams and quizzes”). It does not include the student’s diagnosis or medical information.
Faculty and students are both responsible for discussing how accommodations will be implemented. However, under federal law faculty may not ask students to disclose their disability or provide medical documentation to verify an accommodation. Conversations about accommodations should be handled discreetly and respectfully—for example, in a private meeting or via email rather than in front of the class.
How to communicate about accommodations
Do:
- Review the Faculty Notification Letter promptly when you receive it.
- Discuss how accommodations will be implemented—privately and respectfully.
- Contact the DRC with any questions or concerns about logistics or implementation.
- Treat accommodation conversations as a normal part of supporting student learning.
Don't:
- Don’t ask the student for their diagnosis or medical documentation.
- Don’t share a student’s disability status with others (including TAs or classmates).
- Don’t delay implementing an accommodation while waiting for a conversation.
- Don’t assume students will remind you about their accommodations each time—plan ahead.
If you have questions about how to implement an accommodation in your course, you can contact the DRC or the Office of Academic Innovaiton directly for support. While the DRC focuses on student support, OAI offers faculty consultations and usability reviews, as well as resources on accessibility. OAI can help troubleshoot, clarify course design ideas, and collaborate on solutions that uphold both student access and course integrity. Submit a request here.
What accommodations might students need?
In the sections below, you’ll find an overview of common DRC accommodations organized into five key categories:
Alternative formats
Assignments
Communication
Classroom
Testing
Each section highlights what the accommodation does, why it matters, and how to implement it.
Alternative formats
Some students access information in ways that don’t rely on vision or traditional print. This section offers guidance on how to design your materials for alternative formats so every student can meaningfully engage with course content.
Screen reader–accessible materials are structured so that all content (i.e., text, images, charts, and tables) can be read aloud and navigated by screen reading software. This requires proper formatting, such as heading styles, alt text, and readable document structures.
Accommodation purpose: This accommodation removes access barriers for students who are blind, have low vision, or experience print-related disabilities. It allows students to independently access and navigate course content using screen readers.
Tips for implementation:
- Use built-in heading styles to organize content clearly and consistently, just like chapters or headings in a book.
- Provide concise alternative text (alt text) for all images, charts, and meaningful visuals.
- Structure tables simply, with clear headers and no merged cells. Use only one row at the top that explains what each column means.
- Use true formatting tools (e.g., bullet list and column functions) rather than manual spacing or styling.
Tactile materials (e.g. Braille, textured diagrams, or haptic feedback) use the sense of touch to provide access for students who cannot access visual information.
Accommodation purpose: These accommodations use raised surfaces, textures, or other tactile cues to convey meaning. This ensures that students who are blind or have significant visual impairments can receive and interpret content in a non-visual way, preserving the meaning and structure of the original material.
Tips for implementation:
- Use heading styles and structural formatting to support accurate conversion.
- Provide detailed alt text for images and diagrams so that tactile versions convey essential information.
- Avoid inserting critical content into untagged images or visual-only formats that can’t be translated into tactile media.
Text-to-speech software converts written text into spoken words, allowing students to listen to digital content instead of reading it visually.
Accommodation purpose: Text-to-speech supports students with reading disabilities, attention-related challenges, or vision impairments by providing an alternative, auditory means of accessing course materials.
Tips for implementation:
- Follow the same formatting practices used for screen reader accessibility (e.g., heading styles, alt text, and list formatting).
- Only upload scanned PDFs or image-based documents that can be read by text-to-speech software.
- Provide digital versions of materials in editable formats (e.g., Word or tagged PDFs) when possible.
A note on roles: What do I do, and what does the DRC do?
The DRC is responsible for providing accessible versions of textbooks and ensuring students can access course materials in their preferred format. However, faculty play a key role in making supplemental materials—like journal articles, handouts, slides, and Canvas content—accessible. Because faculty are the content experts, they are best suited to add meaningful alt text or clarify complex visuals. If you’re unable to make a supplemental resource accessible and need DRC support, please provide the materials at least five days in advance to allow time for conversion. While OAI doesn’t provide direct remediation services, we’re happy to support you through the process.
Assignments
Assignment accommodations help students manage executive functioning, communication, and processing needs. This section shares strategies for offering clarity, flexibility, and alternative options that maintain academic integrity while removing unnecessary barriers to learning.
Provide assignment details, requirements, and deadlines earlier than usual to support planning and time management.
Accommodation purpose: This practice minimizes barriers for students who experience difficulties with executive functioning, memory, or health fluctuations that impact their ability to manage timelines.
Tips for implementation:
- Post assignment descriptions and deadlines as early as possible.
- Ensure updates or changes to assignments are communicated promptly and in multiple formats.
- Provide written assignment timelines and expectations to prevent misunderstandings.
When disability-related barriers make group participation difficult, students may complete an alternative individual assignment designed to meet the same learning objectives.
Accommodation purpose: Providing alternative options ensures students are not excluded from meeting course expectations due to challenges with communication, coordination, or sensory environments.
Tips for implementation:
- When possible, design alternative individual assignments in advance to prevent delays.
- If collaboration is a core learning objective, discuss possible adjustments with the student and the DRC.
- Be clear about expectations for the individual assignment and ensure it aligns with the learning outcomes of the original group work.
- Maintain confidentiality; do not disclose to peers why a student is completing individual work.
All assignment expectations and instructions must be provided in writing, even if they are discussed verbally during class or meetings.
Accommodation purpose: Providing key information in writing supports students who experience challenges with auditory processing, memory, or attention, and ensures equitable access to assignment information.
Tips for implementation:
- Provide assignment details and instructions consistently through written formats (such as a Canvas announcement, email, or printed handout).
- Avoid relying solely on verbal announcements to communicate expectations.
- Use clear, consistent templates or formats to present assignment information to reduce confusion.
Include detailed instructions, deadlines, grading criteria, and any submission expectations.
Students are allowed reasonable extensions (often 2–3 days) on assignments when disability-related impacts interfere with their ability to meet standard deadlines.
Accommodation purpose: Additional time allows students to demonstrate mastery of content while accounting for disability-related barriers that may temporarily affect their work pace.
Tips for implementation:
- Clearly communicate the process for requesting an extension, including how far in advance to notify you if possible.
- Acknowledge that students may not always be able to provide advance notice due to the nature of their disability.
- Be flexible with automated due dates in Canvas and be prepared to adjust them manually as needed.
Communication
For some students, access to course content depends on communication supports like captions, interpreters, or amplification. This section outlines ways to ensure your spoken and visual materials are accessible to students who are Deaf, hard of hearing, or have other information processing-related access needs.
Accessible media includes videos or audio content with accurate captions or transcripts to ensure that spoken language is available in a visual format.
Accommodation purpose: Captions and transcripts are essential for students who are Deaf or hard of hearing, as well as for students with auditory processing challenges or language-related learning disabilities. They support equitable access to audio content.
Tips for implementation:
- Use a hosting platform that offers captioning (e.g., MediaSpace or Zoom).
- Review and edit auto-generated captions for accuracy and completeness.
- Provide transcripts for audio-only content like podcasts or recorded lectures.
- Request accessible media through the DRC
An amplification device increases the volume and clarity of sound for students with hearing impairments.
Accommodation purpose: These devices reduce background noise and enhance speech comprehension by delivering optimized audio directly to the listener, often through a hearing aid or a personal sound amplification device.
Tips for implementation:
- Speak clearly and at a moderate pace during lectures or recordings.
- Test audio equipment and microphone placement to reduce background noise.
- When possible, ensure captions are available to supplement audio amplification.
ASL interpreting provides a real-time translation of spoken English into American Sign Language, a fully distinct visual-spatial language used by many in the Deaf community and others who have difficulty accessing spoken language.
Accommodation purpose: Interpreting ensures that students who are Deaf, hard of hearing, or who experience other disabilities that impact a person’s access to spoken language can fully access spoken content and engage in classroom discussion.
Tips for implementation:
- Work with the DRC to coordinate interpreter logistics in advance.
- Speak at a natural pace and avoid covering your face so interpreters can follow clearly.
- Address the student directly, not the interpreter, when communicating.
Communication Access Realtime Translation (CART) provides live, synchronous captions of spoken content during classes, meetings, or events.
Accommodation purpose: CART provides synchronized text from spoken words during a live event. This allows people to read text of any spoken words used.
Tips for implementation:
- Turn on captioning features in Zoom , Google Slides , or select the “always use subtitles” option in PowerPoint to ensure participants can follow along with your presentation during a live event.
- Ensure microphones are working properly and limit overlapping speakers.
- Pause briefly when switching topics to allow the captions to stay caught up.
Audio descriptions are spoken narrations of important visual information in video content (e.g., on-screen text, actions, or scene changes) that are not conveyed through dialogue.
Accommodation purpose: Audio descriptions provide blind or low-vision students with access to visual elements that are essential to understanding the content of the video.
Tips for implementation:
- Verbally describe key visuals (e.g., graphs, on-screen text, images) during your recordings.
- Use clear, concise language that fits naturally within pauses in speech.
Classroom
Whether you teach in-person, online, or hybrid, classroom accommodations help ensure students can physically and cognitively access the learning environment. In this section, you’ll find guidance on how to implement supports like flexible attendance, accessible seating, and note-taking assistance with confidence and care.
The classroom must have seating or workstations that meet a student’s disability-related needs (e.g., adjustable-height tables, ergonomic chairs).
Accommodation purpose: Accessible furniture provides physical access and comfort, reducing barriers to participation caused by standard classroom furnishings.
Tips for implementation:
- Leave accessible furniture in place once assigned.
- Avoid using accessible furniture for general seating or storage.
- Contact the DRC immediately if the furniture is moved or missing.
Students are provided an alternative assignment to replace an oral presentation if disability-related barriers prevent participation.
Accommodation purpose: Alternative options for presentations ensure students can meet course objectives in ways that are accessible to their abilities, particularly where speech, anxiety, or sensory disabilities are factors.
Tips for implementation:
- Design alternatives that align with the learning objectives of the presentation. For example, if the original goal is to assess how well students can explain a concept and engage an audience, you might offer a recorded video, a detailed slide deck with speaker notes, or a one-on-one presentation in a lower-stress environment.
- Use the same grading criteria or rubric for both the original and alternative assignments to ensure consistency and fairness.
- Clearly communicate expectations for the alternative assignment, including due dates, format, and how it will be evaluated.
An assistant may accompany a student to provide physical or communication support in classroom or lab settings.
Accommodation purpose: Having another person to assist facilitates full participation in environments where manual tasks, mobility, or communication may otherwise be a barrier.
Tips for implementation:
- Avoid calling attention to the assistant’s presence in front of the class. Treat them as a natural part of the learning environment, rather than someone who needs explanation or justification.
- Speak to the student, not the assistant, during instruction, group work, or check-ins. The assistant is there to support access, not to serve as a stand-in.
- Avoid asking the assistant to perform tasks unrelated to the student’s access needs.
- Keep any planning or questions about the assistant private (e.g., in email or one-on-one meetings) instead of bringing it up during class time.
Students are permitted to take breaks during class or lab activities without penalty.
Accommodation purpose: The ability to take breaks supports students whose disabilities require intermittent rest, movement, or symptom management.
Tips for implementation:
- Position the student near the door when possible so they can exit and re-enter with minimal disruption.
- Avoid drawing attention to the student when they leave or return. Continue teaching as normal rather than pausing or commenting on the break.
- If the student will miss important material during breaks, offer to share notes or allow them to audio-record that portion of class so they can review it later. You can also point them to Canvas resources or slides.
Instructors should not call on the student unless the student has indicated readiness by raising their hand.
Accommodation purpose: Being able to decide when they can be called on prevents stress, anxiety, or access issues for students who experience communication-related disabilities.
Tips for implementation:
- Include this expectation in your teaching notes or attendance roster so you remember not to call on the student spontaneously, even during group discussions or cold-call activities.
- Adjust any teaching strategies that involve randomly selecting students to speak. For example, use volunteer-based discussions, polling tools, or small-group activities instead.
- Brief any guest speakers, co-instructors, or teaching assistants on the accommodation to ensure the student’s accommodation is respected consistently.
Provide printed materials or classroom documents in a larger font size as specified by the student’s accommodation plan.
Accommodation purpose: Enlarging the print on written materials supports students with low vision or other visual impairments.
Tips for implementation:
- Coordinate with the DRC to determine the preferred font size and format.
- Provide accessible copies of any printed handouts or exams.
- Allow digital copies whenever possible
Students may receive extended time to complete in-class assignments due to disability-related impacts on processing speed, stamina, or mobility.
Accommodation purpose: Extending the allotted time for in-class activities provides equal opportunity to demonstrate knowledge without time-based barriers.
Tips for implementation:
- Clarify expectations and deadlines for in-class assignments early.
- Arrange alternate submission options if class time constraints are inflexible.
- Work with the student to identify a plan in advance whenever possible.
Students may occasionally miss class due to disability-related reasons without penalty, as approved through the DRC process.
Accommodation purpose: Flexible attendance expectations allow students to manage dynamic, unpredictable symptoms or medical treatments without losing academic standing.
Tips for implementation:
- Clarify your communication expectations early. Let students know how you prefer to be notified of absences (e.g., via email, Canvas message), keeping in mind that flexibility is also important.
- Collaborate with the student on how they can stay engaged if they miss a class. This might include accessing lecture slides, recorded sessions, discussion boards, alternative readings, or a brief written reflection on missed content.
- Be transparent about essential course components. If certain class sessions, activities, or participation elements are considered essential to meeting learning outcomes, make that clear in the syllabus and offer options for how students can meet those requirements if they miss a session.
Students must be given access to presentation slides or lecture materials prior to the start of class.
Accommodation purpose: Having access to class materials in advance supports students with disabilities that impact note-taking, processing speed, or attention.
Tips for implementation:
- If your slides aren’t finalized until just before class, consider sharing a rough draft a few days in advance with key terms, frameworks, or visuals that are unlikely to change.
- Use recurring templates or slide structures to make it easier to reuse and share consistent materials in advance, even if the specific examples or data change each week.
- Upload materials to Canvas or email them in advance when feasible, and communicate clearly with the student about when they can expect access. Let them know if content will be updated and when the final version will be available.
- Consider offering an outline or lecture guide that previews the topics or learning objectives for the day in place of full slides if needed.
A peer note taker may be recruited to share their class notes with the student.
Accommodation purpose: Having another person take and share class session notes provides equitable access to lecture content for students who cannot take their own notes effectively due to disability.
Tips for implementation:
- Facilitate recruitment by making a general class announcement (without naming the student).
- Coordinate with the DRC to manage note distribution securely.
- Use teaching strategies that support note-taking for all students. These practices also improve the quality of peer-provided notes:
- Clearly signal transitions and major points by saying them aloud and/or writing them down.
- Use headings, bullet points, or outlines on slides or whiteboards to visually structure the lecture.
- Repeat or rephrase key ideas to give students time to catch up or clarify their notes.
- Avoid moving too quickly through dense information without breaks or summaries.
Students may attend a class remotely in real time when disability-related impacts prevent in-person participation.
Accommodation purpose: When students can access your class remotely, it allows them to fully participate when physical attendance is difficult or unsafe. This accommodation can support students with a wide range of access needs, such as chronic illness, mobility limitations, severe fatigue, post-surgical recovery, or heightened sensitivity to environmental stimuli (e.g., light, noise, or scent). It removes barriers related to commuting, navigating physical campus spaces, or managing flare-ups of unpredictable symptoms that could otherwise force students to miss class entirely.
Tips for implementation:
- Avoid assumptions. If a student uses this accommodation regularly, remember that it is based on documented disability-related need, not convenience. Treat remote participation as a legitimate form of engagement.
- Coordinate logistics early. Work with the student and the DRC to determine the best way to access class remotely.
- Make sure the Zoom link is easy to access and consistently available.
- Ensure audio and visuals are accessible. Speak clearly and repeat in-person comments or questions so remote students can follow the conversation. If you’re writing on the board or using physical demonstrations, consider offering a verbal description or sharing a digital version of the material.
- Create opportunities for remote participation. Invite remote students to participate in discussions via chat or voice.
- Consider assigning an in-person classmate to monitor the chat and help flag questions or comments.
- Set expectations clearly. Let students know how they should participate remotely: whether cameras are expected to be on, how they should signal they want to speak, and how to notify you if technical difficulties arise.
- Be flexible with interactive activities. If you’re planning group work or hands-on activities, think in advance about how remote students can join (e.g., breakout rooms, Google Docs collaboration, alternate formats).
Testing
Traditional exams can pose a range of barriers, from time pressure to sensory overload to inaccessible formats. This section outlines accommodations that help students demonstrate what they’ve learned in ways that reflect their knowledge, not their disability-related limitations, and offers tips to simplify implementation.
Extended time provides students with additional time to complete exams or assignments. It may also allow for breaks during testing to support stamina and focus.
Accommodation purpose: This accommodation supports students who process information more slowly, require more time for reading, writing, or typing, or who need breaks due to physical, cognitive, or sensory disabilities. It allows students to demonstrate their knowledge without the barrier of artificial time constraints.
Tips for implementation:
- Plan ahead for extended time needs. If you’re using Canvas quizzes, use the “Moderate Quiz” function to adjust the time for individual students. If your assessments are in-person, coordinate with the DRC and Academic Testing Services early to arrange proctoring support.
- Clarify expectations in advance and avoid placing unnecessary administrative burdens on the student.
This accommodation allows students to complete exams in an environment with minimal sensory or cognitive distractions.
Accommodation purpose: A quieter, more controlled setting can help students with attention-related disabilities or sensory processing challenges better focus, manage anxiety, and complete work without unnecessary interference.
Tips for implementation:
- Coordinate with the DRC and Academic Testing Services for alternate testing locations.
- Offer remote or take-home assessments when appropriate, with flexible access windows.
- Ensure your Canvas course materials are clearly organized to minimize cognitive load.
This accommodation allows students to use a reference sheet, class materials, or a dictionary during exams.
Accommodation purpose: This supports students with disabilities that affect memory retrieval, vocabulary recall, or spelling (e.g. dyslexia or dysgraphia) by reducing barriers and instead focusing on the individual’s understanding of the core concepts.
Tips for implementation:
- Communicate discreetly and collaboratively with the student about what materials are permitted. Clarify expectations with the student privately and adjust their exam conditions accordingly.
- Ensure access to necessary materials. If the student is allowed course notes, make sure your lectures or slide decks are accessible and available in advance. If you’re permitting a dictionary, ensure students know which one(s) are acceptable (e.g., online vs. physical, English only vs. bilingual).
Students may need to take exams at a different time than the rest of the class, either through PSU’s testing center or within an extended availability window in Canvas.
Accommodation purpose: This allows for flexible scheduling to meet medical, sensory, or processing needs while ensuring a quieter or more supported testing experience.
Tips for implementation:
- Use Canvas to offer extended testing windows or flexible start times.
- Connect with Academic Testing Services for proctoring accommodations, as well as a guide to enhancing exam accessibility and inclusivity through Canvas.
- Submit testing requests promptly, as the DRC and testing center require advance notice and scheduling coordination.
This accommodation allows a student to complete an exam in multiple sittings or sections, with breaks in between.
Accommodation purpose: It supports students who experience fatigue, cognitive overload, or medical issues that make it difficult to complete an entire exam in one sitting. It ensures they can demonstrate their knowledge over time and are not limited by stamina.
Tips for implementation:
- Break the exam into clearly defined sections in Canvas and allow students to complete them with pauses between.
- Coordinate timing with the student and/or DRC to ensure breaks don’t impact content exposure or exam security.
- Be flexible with grading timelines if students require extra time to complete all sections.
Students may eat or drink during testing as a necessary part of their disability management plan.
Accommodation purpose: Eating or drinking during assessments helps students maintain blood sugar, energy, or hydration levels. This can prevent health complications and support cognitive performance during long or stressful testing periods.
Tips for implementation:
- Remind students to choose quiet, non-disruptive options to minimize distraction.
- If other students are impacted, consider alternative seating arrangements.
Permits the use of a basic calculator with addition, subtraction, multiplication, and division functions.
Accommodation purpose: This removes or minimizes barriers related to basic arithmetic computation (addition, subtraction, multiplication, and division) so that an individual’s understanding of deeper mathematical concepts and problem-solving skills can be more accurately assessed. Specifically, it allows instructors to assess whether a student understands the underlying concepts and can apply them to solve problems, rather than just their ability to perform basic calculations accurately and quickly without tools.
Tips for implementation:
- If the exam is online, allow the use of a virtual four-function calculator or embed one in the test instructions.
- If other students are not allowed to use a calculator, ensure that the accommodation is implemented discreetly (e.g., providing a paper test version or calculator only to the eligible student without announcing it to the class).
Supporting students with disabilities isn’t about perfection. It starts with awareness, flexibility, and a collaborative mindset. By understanding the purpose behind DRC accommodations and implementing them with care, you help remove barriers that might otherwise limit student success. Your efforts not only uphold students’ rights but also strengthen your teaching, build trust, and create a more inclusive academic community where all students can thrive.
Learn more
Portland State University resources
Guidance on implementing accommodations and working with the DRC.
General information about working with the DRC when you have a student with accommodations
Information on how to support students using Academic Testing Services for accommodations.
University-wide accessibility resources, policies, and contact information.
National and External Resources
Resources for postsecondary faculty to better support students with disabilities.
A detailed framework for applying Universal Design for Learning (UDL) principles in higher education.
National organization offering professional development, guidance, and resources on disability in higher education.
Overview of foundational accessibility standards for digital content.
Tools and Tutorials
Comprehensive explanations and tutorials for creating accessible digital materials.
Comprehensive explanations and tutorials for creating accessible digital materials.
Guidance on accessibility in Google Docs, Slides, Forms, and more.

Supporting students through trauma in the classroom

Contributors:Megan McFarland, Student Health And Counseling, Trauma Informed Oregon, and Members of the Suicide Prevention Collaborative at Portland State University
Traumatic events—whether campus-wide incidents, local tragedies, or community disruptions—can impact students in profound and varied ways. We may find ourselves navigating students’ emotional responses, misinformation, shifting academic needs, and our own reactions, all while continuing to lead a classroom. This resource provides guidance on how to acknowledge trauma, foster safety and support, and offer structure and care within an instructional setting.
Common emotional and behavioral responses to trauma
Everyone responds to trauma differently; there is no single “right” way to process distress. Trauma may appear in various ways:
- Emotional: Irritability, anger, anxiety, sadness, guilt, emotional numbness
- Cognitive: Difficulty concentrating, trouble making decisions, memory lapses
- Behavioral: Increased restlessness, withdrawal, avoidance, hyper-productivity
- Physical: Fatigue, headaches, muscle tension, sleep disturbances
- Social: Increased need for connection or, conversely, isolation from peers
Avoid making assumptions about how students—or colleagues—are processing trauma.
How to support students
You don’t need to have all the answers to support students. It begins with presence, flexibility, and care. The strategies below offer tangible ways to foster emotional safety, support autonomy, and guide students toward healing while respecting the varied ways trauma can manifest.
Acknowledge the event in class
Create space for optional discussion or reflection. Ensure students do not feel pressured to engage.
Example response: “I want to acknowledge the recent events in our community. This may be affecting each of you differently, and it’s okay to take time to process. If you’d like to talk or reflect, I’ll make space for that today.”
Consider a brief mindfulness practice or a written reflection prompt to support private engagement.
Extend grace and normalize emotional responses
Promote self-compassion by reassuring students that different reactions are normal.
Example response: “Trauma affects everyone differently, and there is no ‘right’ way to feel. If you’re struggling, please know that I am here to support you, and we have campus resources available if you need them.”
Encourage a similar approach among colleagues, teaching assistants, and peer leaders.
Offer brief mindfulness exercises
Even a few minutes of grounding or quiet reflection can help students self-regulate and re-engage. These short mindfulness exercises can be easily led at the beginning or end of class to support emotional balance and create space for care. They are optional, adaptable, and inclusive. You may adapt the language to suit your teaching context.
Instructions: “Let’s take a moment to ground ourselves by focusing on our five senses. You don’t have to close your eyes, but if you’d like to, you can. Take a deep breath in and out. Now, silently name:
- Five things you can see around you
- Four things you can feel (your chair, clothing, temperature, etc.)
- Three things you can hear
- Two things you can smell (or recall a comforting scent)
- One thing you can taste (or remember a favorite flavor)
Take one more deep breath in and out. Thank you for taking that moment for yourself.”
Instructions: “If you’d like to, take a moment to focus on your breathing. We’ll use a simple technique called box breathing. Imagine drawing a square in your mind as we breathe:
- Inhale for a count of four.
- Hold the breath for a count of four.
- Exhale for a count of four.
- Hold for a count of four again.
Let’s repeat that two more times. If you prefer, you can simply sit in silence and breathe at your own pace.”
Instructions: “Take a moment to send kindness to yourself and to others. If it helps, place a hand over your heart or take a deep breath. Silently repeat these words to yourself:
- May I be kind to myself in this moment.
- May I allow myself to feel whatever I need to feel.
- May I offer the same kindness to others.
If you know someone who’s struggling, you can imagine sending them kindness as well. Let’s take one more deep breath together before we move forward.”
Use reflection prompts to support private processing
Not all students will want to share their experiences out loud, but many may benefit from quiet, private opportunities to reflect. Writing exercises can offer a low-pressure way to process emotions, build self-awareness, and tap into inner strengths. The following prompts are adaptable and can be used at the start of class, during a pause, or as part of an asynchronous activity. Emphasize that sharing is optional and that these are for personal reflection, not evaluation.
“Take a few minutes to write a letter to yourself as if you were comforting a close friend. What words of encouragement or support would you offer? If this moment is difficult, what gentle reminder might you give yourself?”
“On a piece of paper, draw a simple outline of a person (or write words across the page). Without judgment, notice where emotions show up in your body. If you’re feeling anxious, where do you feel it? If you’re feeling sadness, does it have a place? You don’t have to share this with anyone, but noticing where emotions sit in our bodies can help us process them.”
“Even in difficult times, we carry strengths and support systems with us. Take a moment to write about one or two things that bring you comfort or resilience. This could be a person, a place, a memory, or a personal strength you’ve relied on in the past.”
Balance flexibility and structure
Trauma can create a sense of helplessness.Some students may struggle with focus, attendance, or deadlines, while others may find normal routines grounding. Offering choices can help students regain a sense of control. We can and should provide reasonable flexibility while maintaining structure. Support can look like:
- Adjusting workload (e.g., asynchronous options)
- Providing structured work time or small executive functioning supports
- Offering sensory supports (e.g., fidgets, lighting, calming music)
- Connecting students with support services
- Sharing meals or mutual aid boards
Facilitate social processing and release
We can offer—but not require—opportunities for students to process emotions in different ways:
Social processing options
- Group discussions about the impact of the event or personal experiences
- Collaborative art using prompts related to trauma, healing, or community
- Check-ins using emotion wheels, scales or symbols
Social release options
- Games that evoke laughter and play
- Group physical activity (e.g., dance, yoga)
- Shared meals or time with animals
- Lighthearted videos or communal creative expression
Support individual students one-on-one
Some students may want one-on-one conversations, especially if they’re more directly affected. In these moments, it’s helpful to offer calm, compassionate presence without trying to “fix” anything. The following scripts can guide supportive check-ins, helping you respond with empathy while staying within your role as an instructor. Adjust the wording to fit your voice and the student’s needs.
Example response: “That’s completely understandable. Trauma can make it hard to concentrate. Let’s talk about some adjustments that might help—like breaking tasks down or shifting deadlines.”
Example response: “It’s normal to feel overwhelmed, but please be gentle with yourself. You couldn’t have predicted this. If you’re open to it, I can help you find someone to talk to.”
Example response: “I am sorry this has been so difficult. If you need to talk or take time for yourself, please let me know how I can support you. Have you had a chance to connect with a counselor or someone you trust?”
Refer students to support services
We don’t have to be counselors to help students access meaningful support. One of the most impactful things we can do is normalize help-seeking and offer to connect students with resources. The following strategies and sample language can help you encourage students to explore counseling, peer support, or identity-based services, especially if they seem unsure about reaching out on their own.
- Encourage students to use peer support programs or identity-based support spaces.
- Emphasize that using mental health resources is a sign of strength, not weakness.
Example Response: “I know this is a really difficult time, and it’s completely okay to seek support. SHAC offers free counseling, and I’d be happy to help you connect with someone who can assist.”
Portland State University resources
Confidential mental health support for faculty and staff.
Available for student referrals, but can also provide faculty guidance on supporting grieving students.
Trauma-Informed Oregon collaborates with providers, individuals with lived experience, and families to advance trauma-informed policies and practices in health systems while promoting strategies for wellness and resilience
Confidential mental health support for faculty and staff.
Office of the Dean of Student Life
Guidelines for faculty when responding to a student death or tragedy
External mental health and crisis resources
Crisis lines
- Lines for Life (Oregon-based crisis line): Call 1-800-273-8255
- Multnomah County Mental Health Crisis Line: 24/7 support at (503) 988-4888. Crisis Text Line: Text HOME to 741741
Clinics & Centers
- Cascadia Urgent Walk-in Clinic: Check website for current hours and contact information. Suicide & Crisis Lifeline (Call, text or chat): Dial 988
- Portland Mutual Aid Network – A volunteer-led group that distributes food, personal care items, and survival supplies to unhoused individuals, prioritizing direct engagement and community-driven support.
- Mutual Aid PDX – A network compiling mutual aid resources across Portland, including food distribution, tenant support, and direct financial assistance initiatives.
- The Dougy Center – Provides support groups and resources for children, teens, young adults, and families grieving a death. Services are designed to offer a safe space for sharing experiences and finding support.
Culturally-specific crisis resources
- People of Color Crisis Text Line (The Steve Fund): Text STEVE to 741741
- Amala Muslim Youth Hopeline: 1 (855) 952-6252 (1-855-95-AMALA)
- Ayuda en Espanol: 24/7 support at (888) 628-9454
- Thrive Text Line (support for people with experiences of oppression): Text THRIVE to 1 (313) 662-8209
- Amala Muslim Crisis Text Line: Text SALAM to 741741
- The Trevor Project Crisis Line (Mental health support for LGBTQ young people): Call (866) 488-7386 or text "START" to 678-678
- Warm lines that don't use police

Supporting ourselves after trauma: A guide for faculty
Supporting ourselves after trauma
A guide for faculty

Contributors:Megan McFarland, PSU Student Health And Counseling, Trauma Informed Oregon, and Members of the Suicide Prevention Collaborative at Portland State University
Faculty and staff often play a key role in supporting students during times of trauma or crisis. In the process, we may overlook our own emotional needs. This guide offers tools to help faculty recognize, respond to, and recover from the personal impact of trauma in the community.
Faculty experience trauma too
Faculty and staff may experience personal grief or secondary trauma while managing academic responsibilities and supporting students. It’s important to seek support, model healthy coping strategies, and remember that our role is to provide structure and connection—not to serve as a counselor.
Common trauma responses
Everyone processes trauma differently. Common responses may include:
- Irritability or quick anger
- Numbness or disconnection
- Anxiety or increased urgency
- Sadness or tearfulness
- Fatigue or low energy
- Restlessness or hyperactivity
- Physical aches and pains
You might feel fine at first, then overwhelmed days later. There’s no correct timeline.
Trauma processing strategies for faculty
Supporting students through trauma while managing our own well-being can be deeply taxing. Prioritize your needs by practicing self-compassion, setting clear boundaries, and seeking support. The strategies below offer both immediate tools and long-term approaches. Try different techniques and pay attention to what brings relief, connection, or clarity—your needs may shift over time.
1. Prioritize self-compassion and boundaries
- Extend yourself grace and non-judgment—your emotions and behaviors may look different than expected.
- Set emotional and professional boundaries while supporting students. Example scripts:
“I care about what you’re going through, and I want to support you. I also want to connect you with the best resources. Would you be open to meeting with a counselor?”
“I want to be here for you, but I also need to take care of myself. Can I check in with you later?”
Allow yourself to ask for support from colleagues when needed.
2. Try processing and releasing strategies
Everyone processes trauma differently. Consider combining language-based (linguistic) and body-based (somatic) techniques. Reflect on how each affects your well-being.
Language-based strategies
For processing:
- Freewrite by setting a timer for 5-15 minutes, and writing without editing.
- Journal with prompts related to grief, loss, and community.
- Talk aloud while alone or in a trusted space.
- Cry, yell, or express strong emotions verbally.
- Watch emotional media (e.g., sad movies) to facilitate release. If you feel “stuck” in sadness, set a limit (e.g., one episode, one movie), and follow it with a “releasing” activity.
Releasing and shifting:
- Journal about joy, connection, and safety.
- Sing or listen to uplifting music.
- Say affirmations aloud (e.g., “I am safe, I am cared for”).
- Watch light or humorous media.
- Engage in simple mental tasks (e.g., crossword puzzles, data entry).
Body-based strategies
For processing:
- Release stored tension — punch a pillow, throw ice into a bathtub.
- Take warm baths or showers to soothe your nervous system.
- Engage in self-massage, yoga, or stretching.
- Listen to emotionally intense music (e.g., sad, angry, or cathartic music). If you feel “stuck” in these emotions, set a time limit (e.g., three songs) and transition to a releasing activity.
- Create art about grief, loss, or connection.
Releasing and shifting:
- Exercise (e.g., running, weightlifting, cardio workouts).
- Take cold showers or plunges for nervous system reset.
- Complete grounding exercises (e.g., breathing techniques, mindful movement) such as ventral vagal techniques, mental grounding exercises, or physical grounding exercises.
- Dance or listen to joyful music.
- Create art that reflects joy, love, or safety.
- Complete simple motor-based tasks (e.g., cleaning, organizing, puzzles).
- Spend time in nature to regulate emotions.
- Wear clothing that feels comfortable and grounding.
Reflect on your grief and resilience
“After several traumatic events in my life and career, I’ve noticed I become calm and focused in a crisis. That helps me support others and make quick decisions. But I also know the emotional toll hits 1–3 days later, leaving me low-energy and anxious.
Now I try to complete cognitively demanding tasks the day after a crisis so I can rest and process later. When emotions surface, I journal, exercise, maintain routines, eat protein-rich foods, ask colleagues for executive function support, and attend therapy.”
– Anonymous, Adjunct Faculty, College of Education
The hard truth is that traumatic events will happen again over the course of a career in education. Reflecting on past experiences can help build resilience for future events.
Guiding questions:
- What impact did the loss have on my brain and body?
- Did I feel tired, numb, foggy, anxious, dissociated, or hyper-focused?
- What coping strategies helped?
- Did linguistic or body-based techniques feel more effective?
- Did I need more solo or social processing?
- What activities provided relief? What activities made me feel worse?
When to seek additional support
If distress significantly impacts daily functioning for more than two weeks, please consider accessing formal support like counseling, group therapy, or a consultation with your primary care provider.
Signs that additional support may be needed:
- Ongoing disruptions to sleep, appetite, or focus
- Persistent irritability or emotional numbness
- Feeling stuck in a loop of distressing thoughts
- Increased isolation or avoidance of usual responsibilities
- Difficulty regulating emotions in class or professional settings
External mental health and crisis resources
Crisis lines
- Lines for Life (Oregon-based crisis line): Call 1-800-273-8255
- Multnomah County Mental Health Crisis Line: 24/7 support at (503) 988-4888. Crisis Text Line: Text HOME to 741741
Clinics & Centers
- Cascadia Urgent Walk-in Clinic: Check website for current hours and contact information. Suicide & Crisis Lifeline (Call, text or chat): Dial 988
- Portland Mutual Aid Network – A volunteer-led group that distributes food, personal care items, and survival supplies to unhoused individuals, prioritizing direct engagement and community-driven support.
- Mutual Aid PDX – A network compiling mutual aid resources across Portland, including food distribution, tenant support, and direct financial assistance initiatives.
- The Dougy Center – Provides support groups and resources for children, teens, young adults, and families grieving a death. Services are designed to offer a safe space for sharing experiences and finding support.
Culturally-specific crisis resources
- People of Color Crisis Text Line (The Steve Fund): Text STEVE to 741741
- Amala Muslim Youth Hopeline: 1 (855) 952-6252 (1-855-95-AMALA)
- Ayuda en Espanol: 24/7 support at (888) 628-9454
- Thrive Text Line (support for people with experiences of oppression): Text THRIVE to 1 (313) 662-8209
- Amala Muslim Crisis Text Line: Text SALAM to 741741
- The Trevor Project Crisis Line (Mental health support for LGBTQ young people): Call (866) 488-7386 or text "START" to 678-678
- Warm lines that don't use police
More about managing trauma as educators

How to design effective assessments
What is assessment design?
Assessment design involves the intentional planning and structuring of activities, assignments, and tools that measure student learning and evaluate the effectiveness of educational programs. While assessment itself includes a range of practices—from direct evaluations of student work to indirect measures like surveys and reflections—assessment design focuses on aligning these assessments with your course learning objectives. Thoughtful assessment design ensures that the methods you choose provide meaningful insight into student progress and that your instructional strategies effectively support the outcomes you want for your students.
Assessment is the process of gathering and analyzing evidence to understand and improve student learning and academic programs.
Why is quality assessment design important?
Assessment is a cornerstone of quality education, providing critical insights into the efficacy of teaching methods and how well course objectives align with student needs. It helps identify learning gaps, refine instruction, and support continuous improvement. Notably, assessment promotes transparency and accountability—ensuring students, faculty, and institutions can work toward shared goals.
As told by an instructor:
“Incorporating ongoing feedback into my course design has been invaluable. I ask students to record reflections every two weeks responding to four prompts—commenting on content and giving feedback on what’s working or not. I also name my positionality and reassure students that I truly use their input to improve their experience. In ED 519: Inclusive Secondary Classrooms, their feedback helped me diversify readings and refine a cross-teaching assignment to encourage student agency and self-directed learning through authentic learning tasks. Afterward, I asked if they found it useful and whether they’d do it again. The overwhelming response was yes—which genuinely surprised me! I’ll definitely continue this practice.”
- Grant Scribner, Adjunct Faculty, PSU College of Education
How to design quality assessments
In this section, we apply the principles of backward design, an approach that begins by identifying desired learning outcomes before developing assessments and instructional strategies to support those goals (Wiggins & McTighe, 2005).
1. Define clear learning objectives
Clear learning objectives, also sometimes referred to as “learning outcomes,” clarify what students should know or be able to do by the end of a lesson, module, or course. Well-crafted objectives use measurable verbs and focus on specific knowledge or skills.
Start with course goals: Identify the overarching goals of the course by asking yourself, “What should students know, do, or believe after completing this course?” In many cases, course-level learning objectives are set at the department or university level—such as through Faculty Senate-approved curriculum—and may not be easily changed. However, you can still design assessments and assignments that align with these goals while tailoring the day-to-day learning activities and module-level objectives to your course context. Focusing on what success looks like for students in your particular classroom can help make assessment design more actionable and relevant.
Break goals into specific outcomes: Use frameworks like Bloom’s Taxonomy or Fink’s Taxonomy to write specific, measurable, and student-focused learning outcomes (Fink 2013).
- Instead of: “Students will understand ecosystems”
- Use: “Students will analyze the interdependence of organisms in ecosystems using case studies.”
Use the ABCD Framework: Ensure each learning outcome specifies:
- Audience: Who is learning? (e.g., “students”)
- Behavior: What will they do? (e.g., “analyze ecosystem dynamics”)
- Condition: Under what context? (e.g., “using case studies”)
- Degree: How well must they perform? (e.g., “apply principles accurately in 3 out of 4 examples”).
Limit the number of objectives: Focus on 3-7 outcomes per course to keep assessment measurable
Example learning objectives
Students will…
- Identify and explain the key components of the U.S. Constitution.
- Analyze primary source documents to construct a historical argument.
- Evaluate the credibility of scientific research articles.
2. Align assessments with learning outcomes
In assessment, alignment means that the task students complete directly matches what the learning outcome says they should demonstrate.
Match each outcome with an assessment:
- Outcome: “Evaluate research methods” → Task: critique a research article
- Outcome: “Demonstrate effective oral communication” → Task: deliver a presentation
Use the right type of assessment:
- Direct assessments (e.g., papers, projects) measure observable skills.
- Indirect assessments (e.g., surveys, reflections) offer insight into student attitudes or perceptions.
Ensure appropriate scaffolding: Lectures, activities, and readings should prepare students for assessments. For example, if students must write a research paper, include instructional support on research and writing.
Review and adjust: Use student feedback, reflections, and peer review to ensure assessments are effective.
Want to look at an example?
Check out this example of an authentic assessment that is well-aligned to course learning outcomes. This example is of an Assistive Technology Implementation Assignment and was contributed by Megan McFarland, adjunct professor in Portland State’s College of Education.

Resources for aligning assessments
3. Use a variety of assessment types
Assessment variety includes differences in purpose, cognitive demand, deliverable, and format.
Include both formative and summative assessments:
- Formative assessments: Use low-stakes quizzes, draft submissions, or in-class activities to provide ongoing feedback. These help identify and address learning gaps before final assessments.
- Summative assessments: Use exams, final projects, or presentations to evaluate students’ mastery of course content.
Vary cognitive demands: Balance assessments across Bloom’s levels of complexity. For example:
- Lower level: Multiple-choice quizzes for “Remembering” and “Understanding.”
- Higher level: Essays or case studies for “Analyzing” and “Evaluating.”
Use authentic assessments: Design assignments that simulate real-world tasks, such as conducting interviews, solving case studies, or creating portfolios, to promote deeper engagement.
Diversify formats: Incorporate a mix of traditional (e.g., essays, tests) and creative (e.g., multimedia presentations, group projects) assessments to cater to different learning styles.
Assessment type examples
These PSU examples show varied formative and summative assessments across different course contexts.


More on assessment types
4. Incorporate effective rubrics
Effective rubrics help communicate clear expectations and highlight the most important criteria for success.
Create rubrics for major assignments: Include specific criteria for each component of an assignment.
- For example, a research paper rubric could include categories like “Thesis Statement,” “Evidence Integration,” and “Organization.”
Use descriptive performance levels: Clearly describe what constitutes excellent, good, fair, or poor performance for each criterion.
- Instead of: “Needs improvement”
- Use: “Evidence is cited with proper formatting and integrated into the analysis.”
Provide rubrics in advance: Sharing rubrics when you assign a task helps clarify expectations.
Involve students: Allow students to contribute to rubric design, fostering transparency and ownership. For example, hold a class discussion to identify what constitutes good performance on a group project.
Use rubrics for feedback: Highlight specific areas where students excel or need improvement. This makes feedback actionable and encourages student growth.
Resources for incorporating rubrics
5. Analyze and apply assessment data
Use assessment data to identify learning patterns and make adjustments, both during the term and in future terms.
Collect and organize data: Gather results from both formative and summative assessments. Use tools like gradebooks, surveys, or spreadsheets to track performance trends.
Identify patterns and gaps: Analyze results to determine which outcomes students struggled with. For instance, if most students performed poorly on a research paper’s “Evidence Integration” criterion, review whether the course sufficiently taught this skill.
Adjust instruction:
- Revisit difficult topics
- Add practice opportunities
- Rebalance assessment weights if needed
Refine course design: For example, if students consistently underperform on oral presentations, consider adding a formative practice round with peer feedback before the final presentation.
Communicate changes: Let students know how their feedback or performance has shaped your course.
More on analyzing and applying assessment data
6. Foster a culture of reflection
Reflection helps you and your students close the learning loop and build metacognitive skills that deepen insight and growth.
Incorporate reflection assignments: After major assessments, ask questions such as:
- What was challenging?
- What strategies did you use?
- How might you improve?
Model reflection as an instructor: Share your own reflections on teaching practices and how you adapt based on assessment results.
- For example, “I noticed the class struggled with concept X, so I will include more examples next term.”
Use reflection for metacognition: Encourage students to analyze their strengths and weaknesses.
- For example, have them identify which study strategies worked best for their midterm exam preparation.
Provide feedback on reflections: Highlight meaningful insights in students’ reflections and suggest actionable next steps.
Create a safe environment for reflection: Reassure students that reflections are low-stakes and growth-focused. Avoid grading reflections rigorously.
Resources for analyzing and applying assessment data
Examples of quality assessment design practices
Fink, L. D. (2013). Creating significant learning experiences: An integrated approach to designing college courses (Revised and updated ed.). Jossey-Bass.
Wiggins, G., & McTighe, J. (2005). Understanding by design (2nd ed.). ASCD.
You might also like


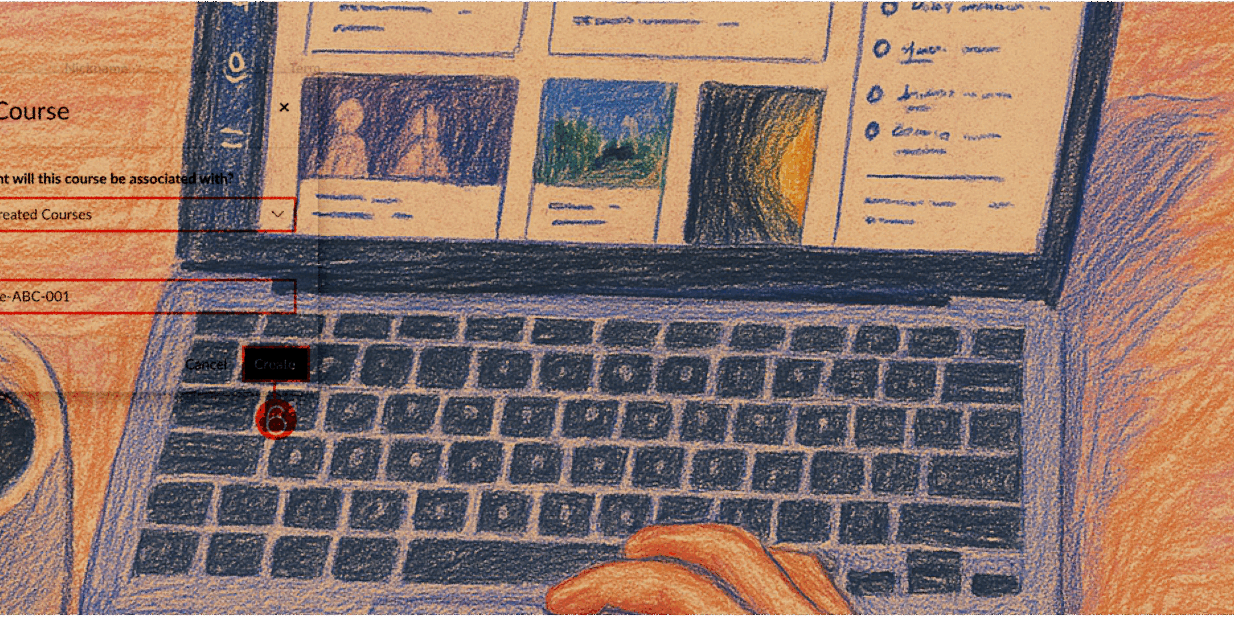


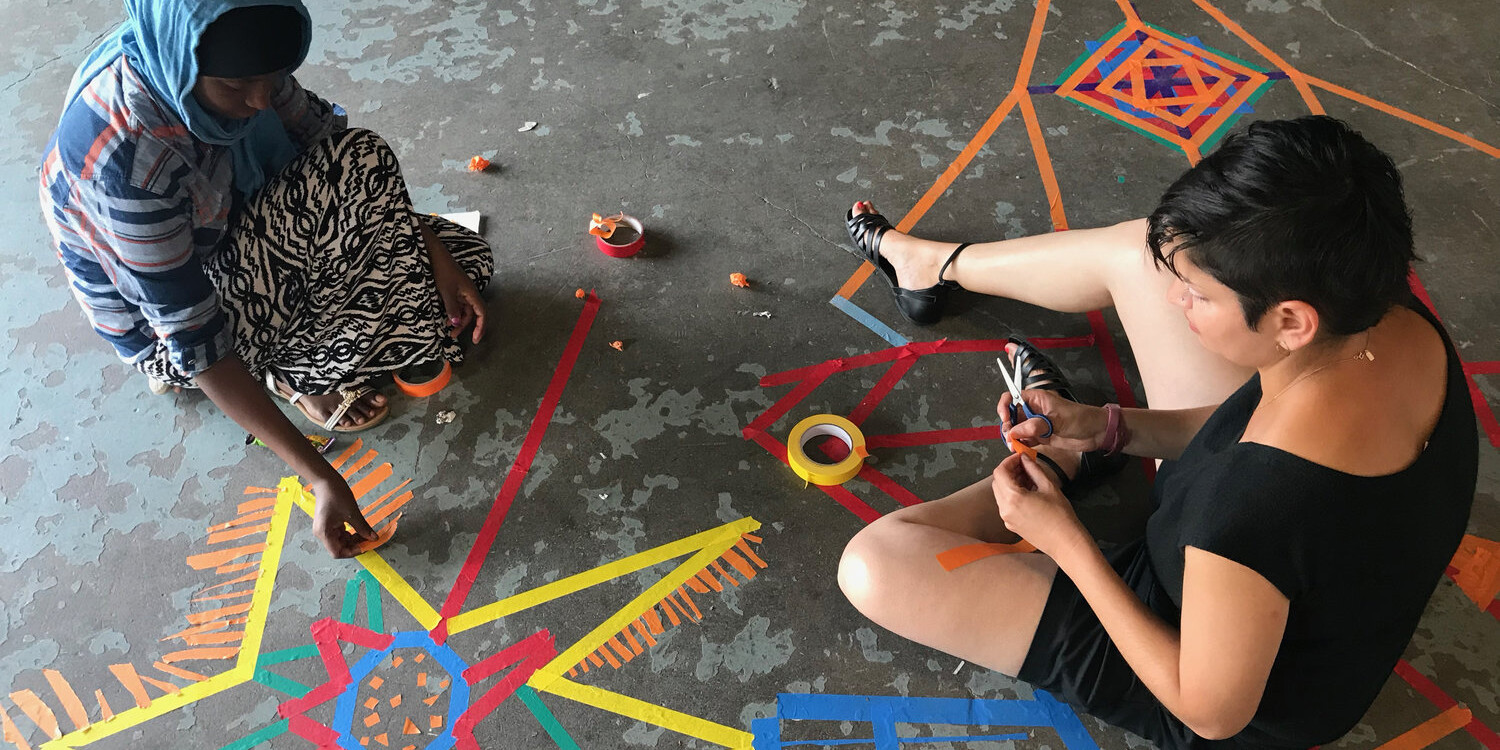


👋Need more help?
Submit a support request through our Faculty Support portal for assistance.

Manage breakout rooms
Manage breakout rooms
Note: You can also Pre-Assign Participants to Rooms.
Breakout room basics
- You must have breakout rooms enabled on your Zoom account settings to start breakout rooms. This setting is enabled by default for PSU users. You can adjust your personal account settings through the Zoom web portal at pdx.zoom.us
- You must be the meeting host and use the Zoom client to start breakout rooms.
- You can have up to 50 breakout rooms per meeting and up to 200 participants total in breakout rooms.
- Hosts can move from breakout room to breakout room and send messages to all rooms.
- Participants can request help from a host while in a breakout room with the Ask for Help button.
- Participants who joined the meeting through a web browser are not able to join breakout rooms. As a workaround, those participants can use the main meeting room as their breakout session space.
Create breakout rooms during a meeting
- Start the meeting.
- Click Breakout Rooms in the meeting host controls to access the breakout rooms you created.
- Select the number of rooms you would like to create and how you would like to assign your participants to those rooms:
Automatically: Let Zoom split your participants up evenly into each of the rooms.
Manually: Choose which participants you would like in each room. - Click Create breakout rooms.
- Click Options to view and select additional options.
- Click Open all Rooms to send participants to assigned breakout rooms.
Learn more about managing breakout rooms.
This article was last updated .