
Setting up an ATLAS Workspace in Canvas that auto-enrolls students
Setting up an ATLAS Workspace in Canvas that auto-enrolls students
Before you begin this process, you will need to make sure you have creator privileges in an ATLAS region. If you do not have these privileges (or are not sure if you do), contact your department PebblePad coordinator or the OAI Faculty Support Desk .
Create a PebblePad LTI Express Assignment
- Navigate to the Assignments area in your Canvas course and select the +Assignment button to create a new assignment.
- Enter a name for the assignment and any other details you want to include in the spaces provided.
- In the Submission Type menu, select External Tool.
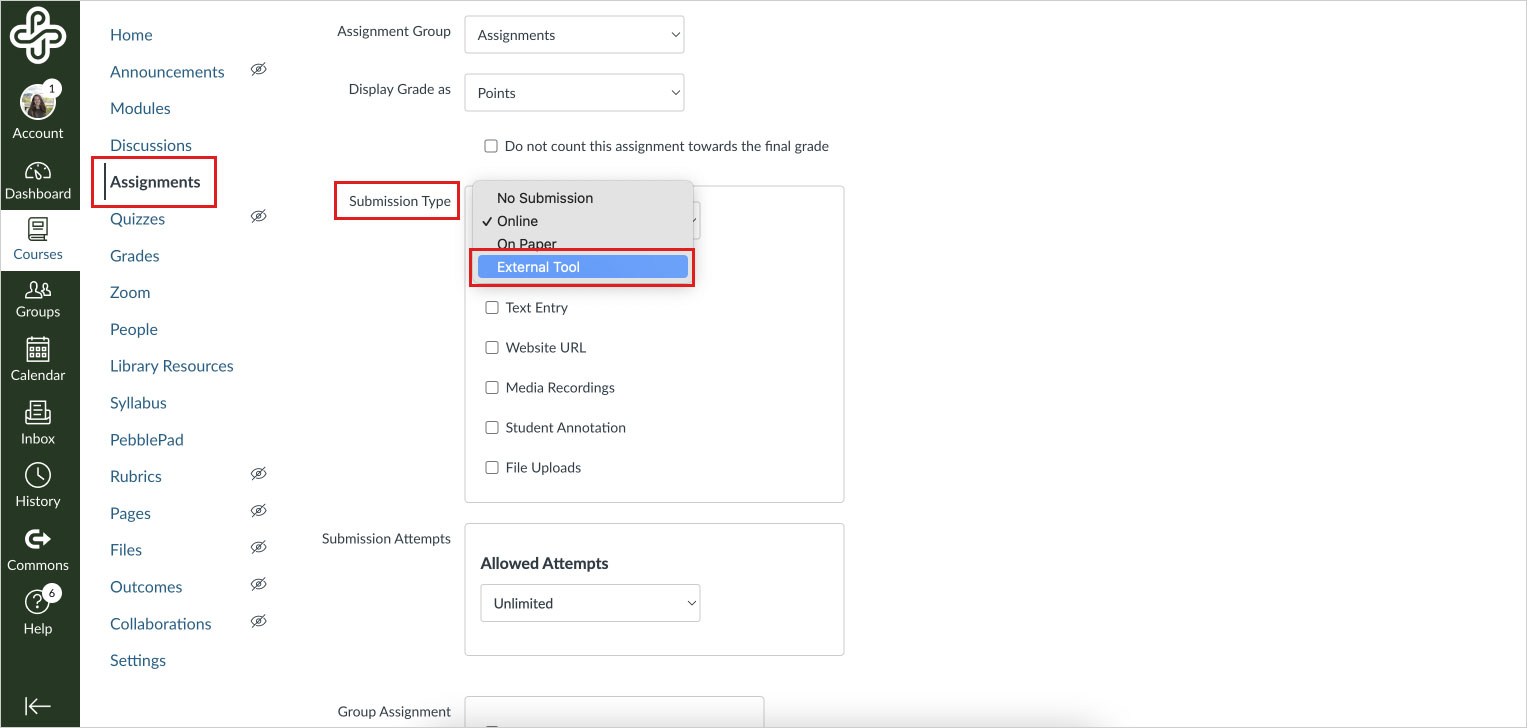
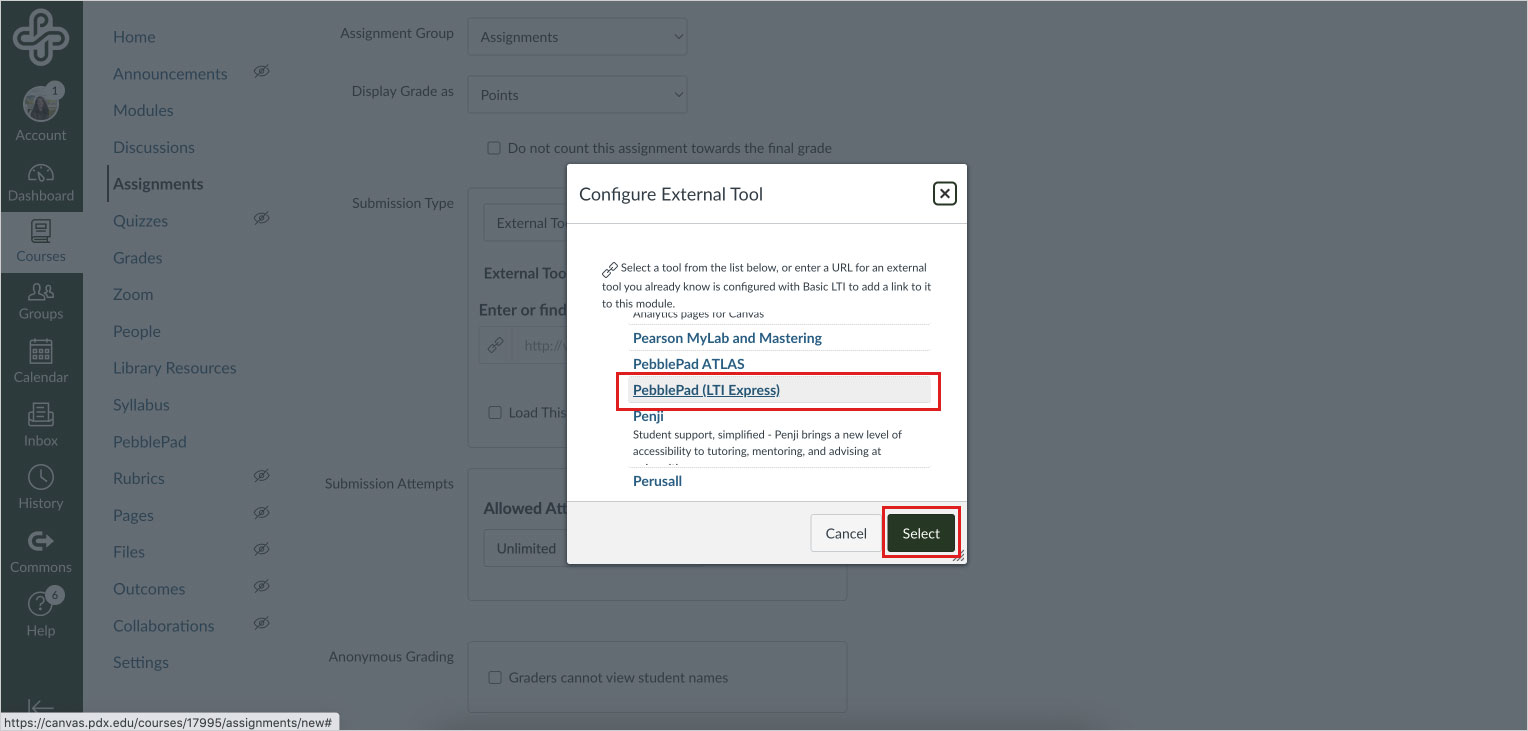
- Select the Find button and then scroll to PebblePad LTI Express.
- Use the Select button to create your LTI link and close the menu. Important: do not use the small X in the upper right corner to close this menu. It will close, but no LTI link to PebblePad will be created. In that event, delete the Canvas assignment and start over.
- Complete the Canvas settings for the assignment, including number of submission attempts and due date. Then choose Save (do not publish until you have set up the workspace).
Set up your ATLAS Workspace
- From the Assignments page, select the PebblePad LTI assignment link you just created and follow the prompts to load the page in a new window.
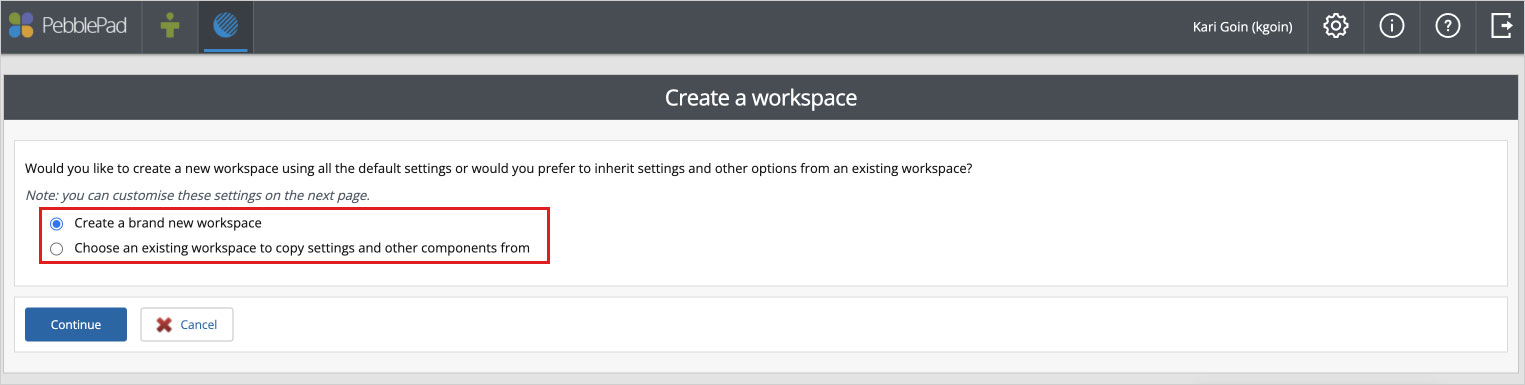
- If this is the first time you are adding a PebblePad link to this course, a page will appear prompting you to either create a brand new ATLAS Workspace or copy an existing one.
-
-
- If you have created a workspace in another course, you can choose it from the dropdown to copy the settings and skip to Step 4.
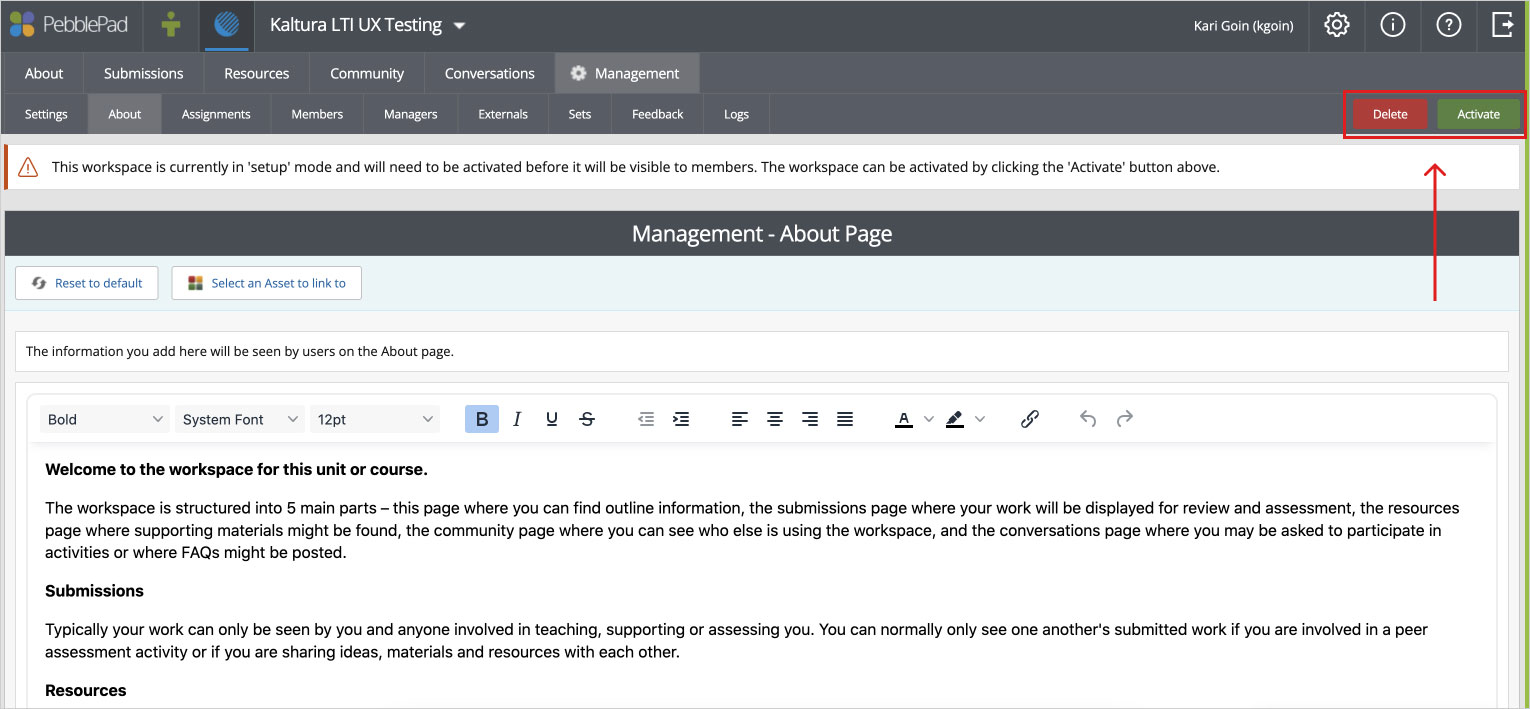
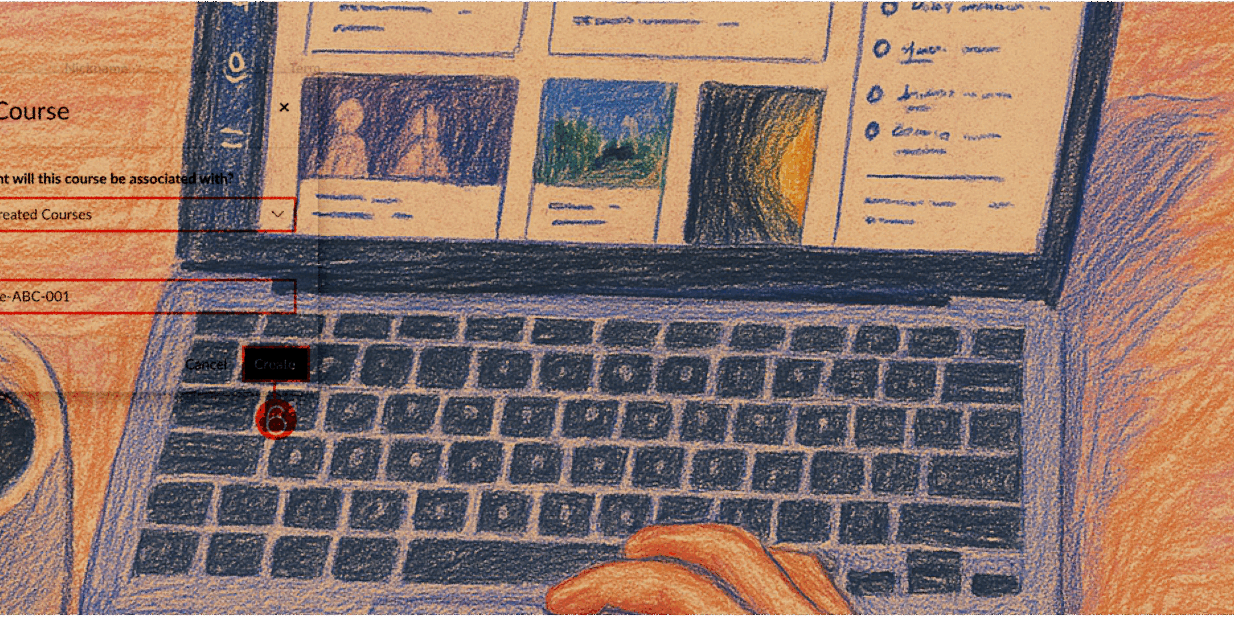
- If you choose to create a new workspace, you are presented a basic Workspace configuration with the name is prefilled based on the Canvas Course title, which can be changed before saving. Also, it is important to note that you can keep working on the Workspace in Setup Mode before activating it.
-
- Select each of the tabs to enter the relevant information for your Workspace:
-
- Basic Settings: Complete the naming of the Workspace, or accept the default one
- Advance Settings: Complete the other configuration options. Note: If copying an existing Workspace, this tab will not appear.
- Managers: Confirm that instructors from the Canvas course were added as Managers in the Workspace.
- Member: Confirm that students from the Canvas course were added as members of the Workspace.
-
- Select Finish.
- Select Activate and follow the prompts to confirm the status change. (Note: You may see a prompt, showing the number of users that will be created in PebblePad and the number of accounts that already have a PebblePad account. This is for information only.)
- When you are ready for students to begin accessing the workspace, make sure to Publish the link in the module or on the Assignments page. Once published both students and instructors can click on the PebblePad LTI Express link to be taken directly to the ATLAS Workspace to access Resources there like Portfolios or Workbooks and Templates. From this point on the linked ATLAS Workspace will sync enrollments from Canvas to ATLAS.
This article was last updated .

Teach online at Portland State
What does teaching online at PSU look like?
PSU offers course delivery in a variety of modalities. There are three specific modalities that utilize varying degrees of online delivery:
- Hybrid: Classes in which a significant amount of the course learning activity has been moved to the digital environment, making it possible to reduce the amount of time spent in-person in the classroom. In-person instruction is reduced but not eliminated.
- Online - Scheduled Meetings: Online courses that include required virtual meeting times, most commonly using Zoom sessions for the typical in-class lessons and lectures. Require students to log in during the published meeting times to interact with the class.
- Online - No Scheduled Meetings: Online courses that do not have required meeting times, shifting the delivery of content to a virtual format (typically Canvas), often including short video recordings to introduce key concepts. No specific meeting times are published or required.
Teaching online in any of these modalities, when courses are thoughtfully designed, can provide several benefits to students. Here are some key advantages to online instruction:
-
Flexibility: Online teaching allows both students and instructors to engage with course content on their own schedules (particularly in asynchronous formats), which can support work-life balance and accommodate personal and professional responsibilities.
-
Access: Students who may face barriers to attending in-person classes (such as those with disabilities, caregiving duties, or long commutes) often find online courses more accessible.
-
Transparency: Online courses require planning and organization, which can lead to clearer expectations, consistent routines, and centralized access to course information
Students in online courses can also encounter unique challenges in online courses, such as unclear expectations, limited opportunities for interaction with the instructor and/or peers, and difficulty managing their time without the structure of regular in-person meetings. The following sections provide strategies to counter these challenges and support your students’ needs.
Canvas is PSU’s learning management system. It serves as the central platform for organizing, communicating, and delivering all online course content. The following guides have helpful information about both designing and teaching your course within Canvas:
Teach with Canvas at PSU
This guide highlights key features and strategies for teaching with Canvas at Portland State University.

Design your course
Practical strategies, principles, and tools for course planning and teaching success.

Teaching Strategies for Digital Class Meetings
Explore tools, settings, and best practices for effective digital class meetings.
Foundational principles for online teaching success
Successful online teaching is grounded in a few key principles that support student learning, motivation, and engagement. There are many teaching and learning frameworks that can be incorporated into any online course approaches. This guide is most heavily informed by:
- Community of Inquiry
- Quality Assurance Standards (OSCQR)
- Federal Guidelines that define regular and substantive feedback
- PSU student feedback surveys
- Universal Design for Learning (UDL)
1. Be present
Student-instructor interaction is one of the strongest predictors of student learning and may be the primary variable for predicting online course learning outcomes (Arbaugh et al., 2009). When students feel that their instructor is engaged, responsive, and available, they are more likely to stay on track. To ensure you are “seen” by your students, consider the following strategies:
- Start each week with an announcement to preview the content for the week and important highlights. This could be a text-based announcement, or even a video announcement!
- Provide timely feedback on assignments. Set reasonable expectations about how long it will take you to respond to students’ work, ideally no more than a week.
- Check in with students throughout the term. You can create quick surveys in Google Forms to get feedback from your students about their course experience. Two simple feedback questions that can be effective are: 1) What is one thing your instructor could change to improve your learning in this course?, and 2) What is one thing YOU could change to improve your learning in this course?
More on staying present in your online courses
2. Plan for clarity and structure
Depending on your context, you might teach a course that’s already been designed for online learning, or be asked to develop a new online course. If you’re teaching a course that’s already been designed for online, review the course carefully to understand the structure and make any needed adjustments. Check with your department about what changes you can make to the course before making changes. If you’re designing a new course to teach online, check out Design your course for a comprehensive design approach, and contact OAI to request course design support.
Students thrive in courses that are easy to navigate and well-organized. Consistent and clear structure helps them manage their time and focus on learning rather than figuring out where to go or what to do next.
- Ensure a consistent weekly course structure. Creating a pattern of expectations (often referred to as a learning cycle) can help students establish a routine and plan ahead, which lowers anxiety and keeps students focused on learning. The best way to do this is by using Canvas Modules to organize your content.
- Be clear about the weekly expectations. When a student spends time looking for instructions, content, due dates, etc., they have less cognitive energy to focus on learning course content and skills.. Clearly state each week’s expected learning outcomes, required tasks, and how they’ll interact with you and other students.
- Make sure to include visible and accurate due dates. Not being able to easily tell when an assignment is due is one of the biggest frustrations students voice. Before publishing your course each term, make sure that dates are easy to find and the same, regardless of where they are in the course (i.e., syllabus, calendar, course schedule, Canvas assignments…).
- Review the course as if you were a student. Going through the course as a student not only helps you find outdated material and broken links, but also gives you the opportunity to ensure the course flow and workload are clear and appropriate. Make sure to not only review the content, but also try completing the assignments (you don’t have to write a five-page paper, but think through what it would mean if you did!)
More resources on planning for clarity and structure
3. Foster interaction and engagement
Opportunities for connection with peers and instructors can significantly enhance the learning experience for students and encourage the development of a strong learning community. Integrating group and peer-review assignments can support social, teaching, and cognitive presences in the online learning environment (SUNY Online Course Quality Review Rubric). If the course you are teaching allows the flexibility to implement additional and/or alternative activities, consider trying some of the following digital activities to support student engagement and build space for these interactions:
-
Create engaging online discussions. Use good discussion prompts that invite students to share their own point of view and personal experiences. These types of prompts can promote deeper student interaction, not only with the course content, but also with fellow students. Additionally, consider setting up an open discussion area for your class where students can reach out to their classmates about topics that are not specifically related to a weekly topic or a particular assignment.
-
Consider the benefits of small group work. Especially in larger classes, it can be challenging to connect with classmates. Offering opportunities to have discussions or work on collaborative projects with a smaller group of people can help both with classroom management as well as deepening the interactions among students.
-
Try a peer review activity. Peer review activities can encourage interaction and engagement by giving students a structured way to respond to each other’s work. Seeing how peers approach assignments can often lead to new perspectives and a deeper understanding of the course content, while also building a sense of community.
More about fostering engagement in online courses
Plan your course by the term
A time-based framework
The following sections outline key considerations at each stage of the academic term. This is not an exhaustive list, but it provides guidance on the basic tasks that should be completed at the beginning, middle, and end of the term.
In this section:
Before the term starts
Careful planning before the term begins can set you up for a smooth and successful quarter. Taking the time to thoughtfully structure your course content, communication plan, and Canvas environment will help reduce confusion and alleviate stress for both students and the instructor.
Share a detailed syllabus and course schedule
A detailed syllabus should serve as a contract between you and your students, helping to clarify expectations and set the tone for your course. Additionally, either within the syllabus or as an additional element, a week-by-week course schedule that aligns course activities with learning outcomes can help keep your students on track!
-
Many departments require at least one office-hour appointment per week during the term. For online courses, schedule these in Canvas via Zoom. To increase office hours attendance, consider these strategies for reconceptualizing virtual office hours!
-
Be sure to include an Initiation of Attendance requirement! Every course on campus, regardless of modality, must include an activity to document participation during the first two weeks of a class. More information about how attendance is initiated and which activities can be used to satisfy this requirement can be found in the Faculty Guide to Initiation of Attendance.
Get up to speed with technology
Students report that a challenge to their success is the instructor’s lack of familiarity with the required course technology. You can get up to speed by enrolling in this Canvas course: Growing with Canvas. Next, think about your technology needs and contact the library if you need to borrow any tech items to teach your course.
Set up your Canvas course shell
All courses at PSU, regardless of modality, are automatically issued a Canvas course shell. Using Canvas as a hub for your course helps to ensure that students can easily find materials, assignments, and important updates, reducing confusion and allowing students to stay focused on their learning.
-
If you’re teaching a course that your department regularly offers online, a Canvas template for the course may already exist. Check with your department chair to find out and to request access to a sandbox copy.
-
You may receive an email from the Disability Resource Center (DRC) that one or more of your students has an accommodation. Review the email carefully to understand and implement each accommodation. Have questions? Learn more about how to support students with DRC accommodations.
-
Even though your course is online, if possible, place a copy of your textbook on course reserve at the PSU Library, for students on campus.
-
By default, courses are set to open on the first day of the term as soon as they have been published. However, you can also change the start and end dates manually if you want to open your course sooner.
Welcome your students to the course
Many students will be able to find your Canvas course on the first day of the term, but for those new to the university or to online instruction, it may be helpful to share a welcome message. Here are a couple of ways you can welcome the students to your course:
-
Email your students before the first day. Use Google Groups to send a message to all the students in your class about expectations for the first week, including the date the Canvas course will be available, and attach your course syllabus/schedule. For some examples of what these emails might look like, check out Email templates for the start of term.
-
Record an overview video. This video could be shared in a Google group email or embedded on the homepage of your course. Either way, sharing a video can be the first step in establishing a learning community with your online students.
Important administrative tasks for the first two weeks
- Don’t forget your waitlist! On the first day of the term, the automated waitlist function will stop. You’ll need to manage the waitlist in Banweb. For more details on the waitlist process at PSU, refer to Understanding Waitlists for Faculty.
- Record the initiation of attendance information. Instructors are required to record this information in Banner for each student in every class. You must check the box as soon as they initiate participation via Banweb, but you will be able to check the box through the seventh week of the term
During the term
Regular interaction between students and instructors is one of the most important factors in influencing student learning in online courses. Being present in your online course is key to keeping students engaged, leading to overall student success. Here are a few ways to create this presence:
Establish an online learning community
Take some time at the beginning of the term to build mechanisms into your course that support open communication and promote regular and substantive interaction to help create and strengthen online community, which in turn can increase student engagement with your course. One way to get this started is by asking students to participate in an online ice-breaker!
Maintain weekly communication
Post regular announcements, including notification about any delay in feedback or grading. Keeping interactions with students on a predictable schedule can help students establish routines and reduce stress.
Tips for Canvas connection
Canvas has many tools to help you keep connected to your students throughout the term. Some of these tools include the Announcements, Inbox, and Calendar. You can also monitor student engagement to help identify when to reach out to students through the Gradebook and Analytics tools.
Provide timely feedback
Providing students with feedback is crucial to their learning and also helps foster a positive student–teacher relationship. It gives students a feeling that someone is there who cares about their progress (Bonk & Khoo, 2014). Help students set reasonable expectations for receiving feedback and keep them updated when there is a delay. A great way to deliver feedback is via rubrics; in Canvas, you can add a rubric to an assignment, a graded discussion, or a quiz. When applicable, also provide guidelines for incorporating that feedback back into their work.
Complete a midterm check-in
Consider creating a midterm feedback survey with an anonymous survey tool such as Canvas or Google Forms. If you collect feedback, address it before the end of the term. You don’t have to implement every requested change, but you should acknowledge the feedback you receive and provide transparency around any changes you make in response.
End of term
As you near the end of the term, take a moment to check in with your students about their course experience. Consider a reflective discussion activity or exit survey to discover ways you may be able to improve future iterations of the course. Integrating this into a closing communication can help bring the course to a close.
You’ll also want to make sure to finalize all of your grades, feedback, and student communications so students know their final standing in the class. Also, make sure you complete the following administrative tasks:
- Submit final grades. The grades in your Canvas gradebook are a way for students to keep track of their progress in the course. Final grades must be input into Banner by 5 p.m. on the Tuesday after Finals Week.
- Contact your department about any students taking an incomplete. Students who have met specific criteria may be assigned incomplete grades at the discretion of the instructor.
Now take some time to relax and celebrate your course success! In most cases, this won’t be the last time you teach this course. Take a moment to reflect on the past term and think about ways you might be able to enhance your course for future terms.
- Document frequently asked questions. Did students frequently ask certain questions that may come up again in the future? If so, create short video or text responses to share with future students ahead of time.
- Review course evaluations for common themes and areas to consider adjusting in future offerings.
- Seek mentorship within your department and inquire about connecting with other colleagues.
- Review the OAI workshop schedule for any future offerings
Arbaugh, J. B., Godfrey, M. R., Johnson, M., Pollack, B. L., Niendorf, B., & Wresch, W. (2009). Research in online and blended learning in the business disciplines: Key findings and possible future directions. The Internet and Higher Education, 12(2), 71-87.
Bonk, C. J., & Khoo, E. (2014). Adding some TEC-VARIETY: 100+ activities for motivating and retaining learners online.
👋Need more help?
Submit a support request through our Faculty Support portal for assistance.
You might also like


Organize Content in Canvas
Organize content in Canvas
Using Canvas as a hub for your course materials can create a more consistent and supportive learning experience for your students. By organizing materials clearly and making them accessible, you can reduce confusion, keep students engaged, and help them focus on learning.
Why upload my content into Canvas?
Canvas isn’t just for online classes. PSU students increasingly expect course materials to be available there, regardless of how the course is delivered. More than half of PSU courses now use Canvas to share files, assignments, and key resources.
Even in in-person and hybrid classes, Canvas offers a consistent space for accessing materials, submitting work, and tracking progress. A well-organized Canvas course extends learning beyond class time, reduces uncertainty, and supports student engagement.
For instructors, Canvas streamlines communication and course management. Instead of juggling multiple platforms or email threads, you can post announcements, provide feedback, and track progress all in one place.
Canvas provides instructors with a space for sharing a wide variety of content to support student learning and engagement. The table below outlines the types of things that can be shared in a Canvas course:
| Content type | What is it | Example use cases |
|---|---|---|
| Pages | Informational pages created directly in Canvas with the Canvas Rich Content Editor (RCE) |
|
| Files | Files created elsewhere and uploaded into Canvas |
|
| Assignments, Discussions, and Quizzes |
Activities built directly into Canvas for students to submit work |
|
| External URLs | Links to sites outside Canvas |
|
| External Tools | Other platforms that are integrated into Canvas (learn more about third-party tools at PSU) |
|
Why use Canvas Modules?
When students don’t have to search for materials or wonder where to find what they need, they’re better able to focus on the content itself. Modules are the most effective way to organize course materials in Canvas.
What are Modules?
Modules are essentially Canvas-specific folders or containers that help students navigate your course content in a clear, structured way. Unlike the Files page, which simply lists uploaded documents, Modules let you organize content by week, topic, or unit, helping students understand how everything fits together.
Modules are like folders or containers that give you the ability to organize materials by week, topic, or unit, helping students see how everything fits together.
How do I construct a Module?
- Create a module. You can add as many modules as needed, but be intentional. A weekly structure is the most common and often the most helpful for students, as it clearly outlines expectations and pacing throughout the term.
- Prepare your content. Since Modules hold links to materials created elsewhere in Canvas, it helps to build those first (e.g., discussions, pages, files).
- Tip: Use the Weekly Course Flow Template to organize your materials and streamline the building process!
- Add items to the module. Once materials are ready, add them to the module in a logical sequence to support student learning. You can reorder the module items as needed.
- Repeat this process to continue developing Modules. You can reorder modules if necessary to achieve a logical sequence.
Tips for customizing Modules
- Create subsections. Use text headers and indent items to create visible sections in your modules.
- Customize the course navigation menu. If you organize everything in Modules, consider hiding links to Assignments, Quizzes, Pages, and Files in the student view to reduce confusion.
- Create weekly overviews using Pages. Creating weekly overview pages allows you to share course materials with more context and different organizational structures than are possible in modules alone. Remember to add created pages to your modules.
- Include a “General Course Information” module. Consider adding a module to the top of your list that includes all the basics, like the syllabus, general discussion board, and other information students may need to access throughout the term.
- Try a checklist! You can make your module function as a checklist by adding requirements that help both you and your students track their progress.
A Note on Files and Pages
While Files and Pages are useful for sharing content, leaving them visible in the Course Navigation can create confusion. By default, these areas aren’t organized intuitively, which can make it hard for students to find what they need.
To support student success, organize content in Modules and hide Files and Pages from navigation.
What about the course homepage?
Your course homepage is the first thing students see when they enter your course. Canvas offers several homepage options, each with unique benefits that can support your teaching style and help students navigate your course. The following table describes your options and highlights the benefits of using each in different types of courses:
| Homepage option | What it shows | Best for |
|---|---|---|
| Course Activity Stream | Recent announcements, discussions, and course updates | Courses that rely heavily on announcements and discussions |
| Pages Front Page | Custom landing page that can include key links, information, and graphics. | Instructors who want a welcoming, visually engaging home page |
| Course Modules | Organized, sequential view of all course content | Courses with a clear weekly or unit structure |
| Assignments List | All assignments and dates in one list | Courses centered on independent work |
| Syllabus | Canvas Syllabus content with auto-generated assignment list. | Courses that use the Canvas syllabus tool to share information |
At PSU, the default homepage is the Modules page, and this is often the best choice. It provides a structured, intuitive view of all course content and helps reduce student confusion.
If you’re not using modules to share content, a custom Page Front Page can create a more visual and welcoming homepage. Consider including:
- a welcome message
- links to key information (e.g., syllabus, course schedule)
- instructor contact information
- class meeting times and office hours
Mobile access consideration
On phones, students may need to tap to view a Pages Front Page. To ensure they don’t miss key info, also include your homepage in a module.
Canvas Commons
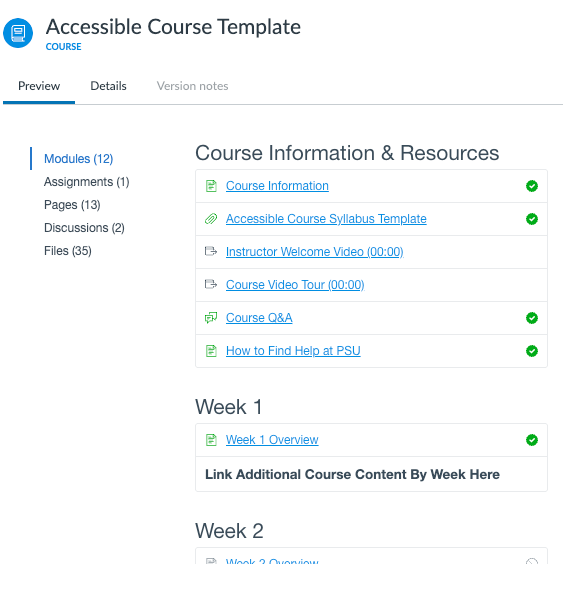
Access PSU Course Content Templates!
The Office of Academic Innovation offers a collection of Canvas templates for Portland State faculty to help you build accessible, easy-to-navigate courses.
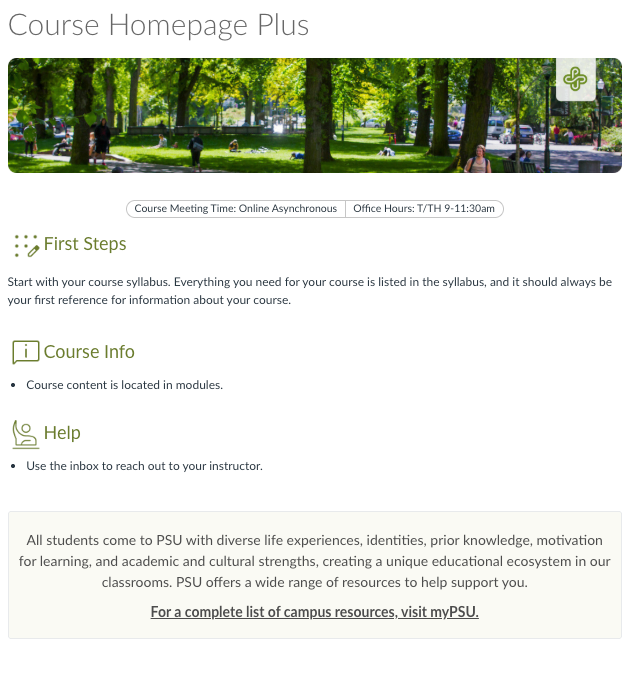
Course Homepage Plus
Includes sections for course meeting times, recommended first steps, course info, and help resources.
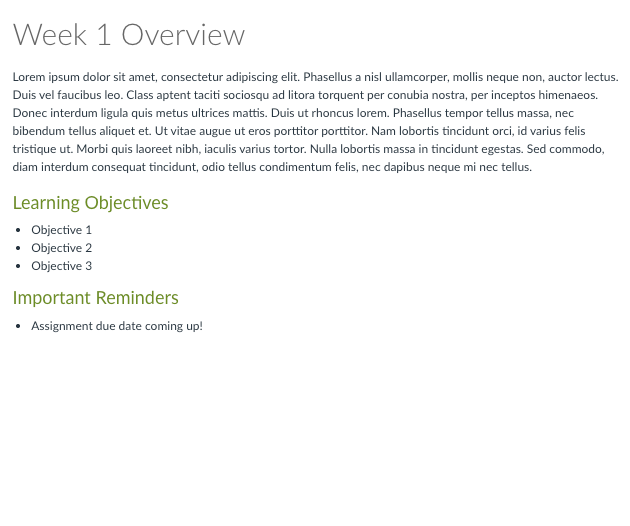
Weekly overview page
Includes sections for brief overview text, learning objectives, and course reminders.
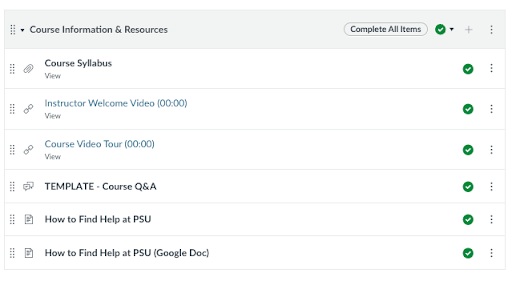
Course information & resources module
Includes sections for course meeting times, recommended first steps, course info, and help resources.
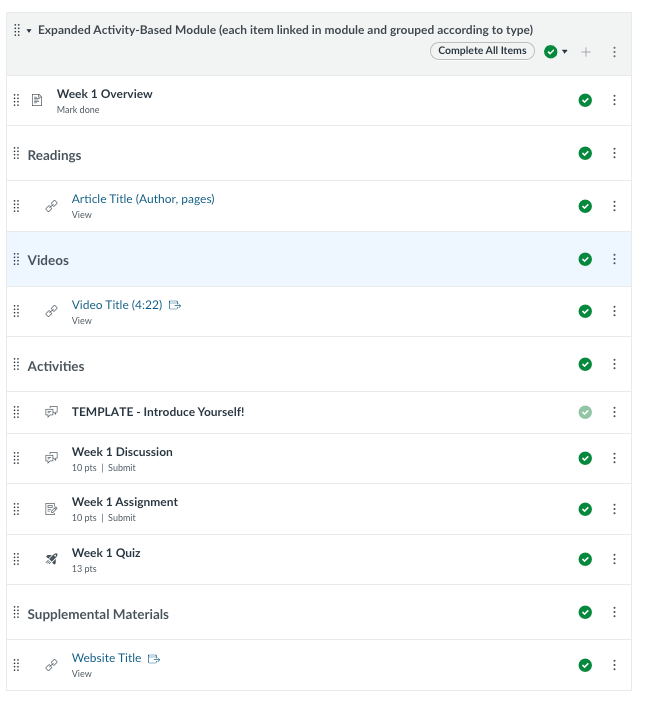
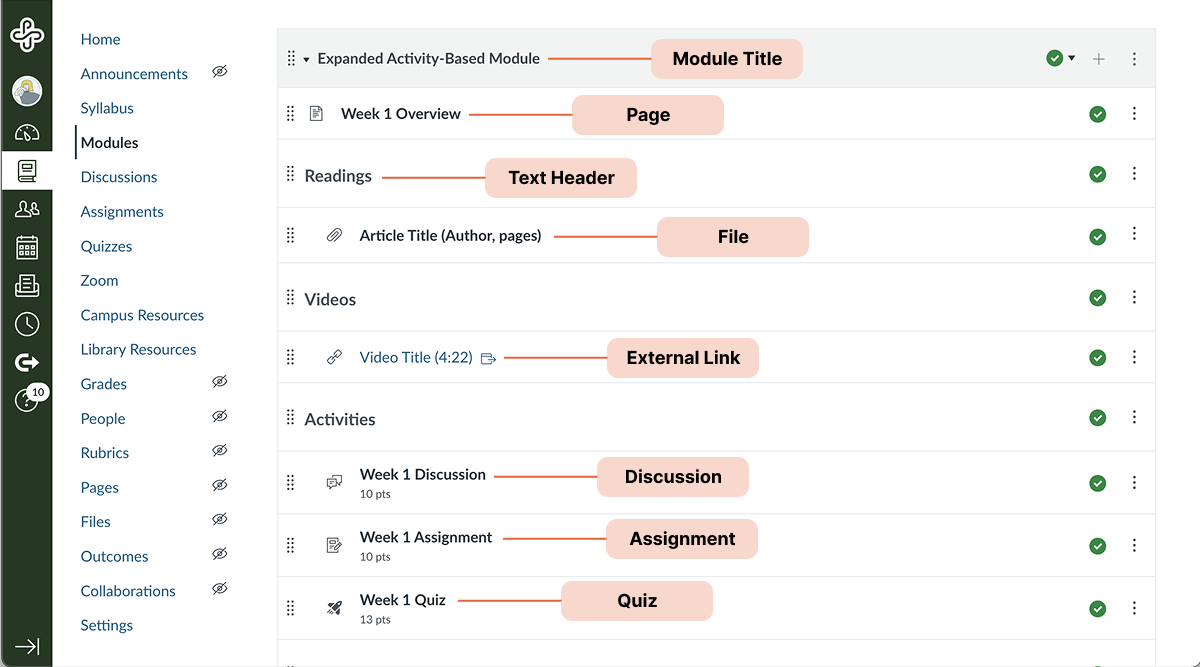
Expanded activity-based module
Detailed module with placeholders for an overview page, linked readings and videos, Canvas discussions, an assignment and quiz, and supplemental websites.
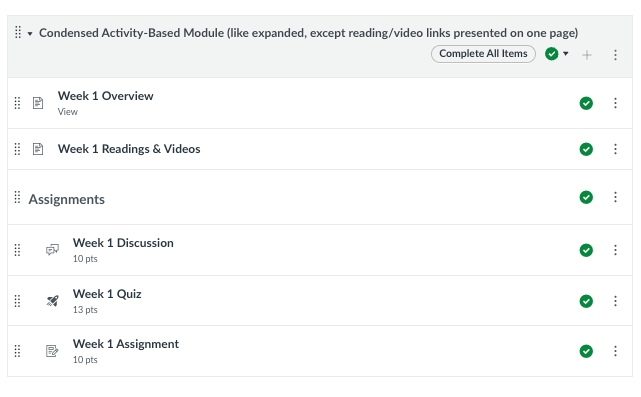
Condensed activity-based module
Simple module with placeholder for weekly overview and content pages, plus a Canvas discussion, quiz, and assignment.

Time-based module
Action-oriented module with placeholders for a weekly overview page and sequenced learning activities including readings and videos, plus a Canvas discussion and assignment.
Video Discussion Template
Example class introduction assignment with links to support materials for your students.
To access these templates, log in to Canvas and select Commons in the global navigation menu on the left. Then, Filter the results by toggling on the “Only Portland State University Approved Resources” switch. Learn more about how to download Canvas Commons resources!
More about Canvas at PSU
Teach with Canvas at PSU
This guide highlights key features and strategies for teaching with Canvas at Portland State University.

How to support students with DRC accommodations
Learn how to effectively support students with Disability Resource Center (DRC) accommodations at Portland State.
Design your course
Practical strategies, principles, and tools for course planning and teaching success.
This article was last updated .

Supporting Students through Difficult Classroom Conversations

Contributors: Megan McFarland, Harold McNaron, Lindsay Murphy, Grant Scribner, Kendra Woodstead
The classroom can be a place to explore controversial topics including equity, identity, religious beliefs, and political views. These topics may come up as part of your curriculum, or through external factors and events. You may or may not choose to engage students in difficult classroom conversations — but either way, it’s important to prepare and know how to offer student support.
Notice your own responses and emotions surrounding a topic and recognize that you and your students may not be able to show up as your best selves for these conversations. One approach to this might be transparency with your students, acknowledging how challenging the topic is and giving everyone space to process before moving forward with a conversation.
If you do choose to engage students, it will be important to acknowledge the range of perspectives and intense emotions that are likely present in your classroom. The following tips may be helpful for framing a conversation where students with diverse experiences and points of view can engage productively with one another.
Establish community agreements before discussing difficult topics.
Encourage your students to help create these collaboratively. They might include one or more of the following agreements:
- Addressing ideas rather than people
- Taking and making space to ensure everyone has a chance to speak
- Entering the conversation with a spirit of curiosity and good will
- Welcoming correction and reflection
Identify a clear purpose for the conversation.
Is the class interested in exploring a question, better understanding the context of a recent event, reflecting on the impact of current events, or something else? There is no right answer, but it is helpful for students to agree on a focus and purpose before diving in.
Provide space to summarize the discussion.
Provide space to summarize the discussion, receive student feedback, and allow students to reflect on their feelings and experiences. This might look like a brief exit email or poll, a word in the Zoom chat, or a Google Doc with reflection notes.
Recognize that difficult topics may impact students differently.
Your students likely experience a range of emotions when responding to difficult topics, informed by a range of factors including their lived experiences, intersecting identities, and feelings of safety in the class space. Particularly during uncertain and highly stressful circumstances, some students may be more at risk for marginalization connected to race, ethnicity, gender, sexual orientation, age, or region/country of origin.
- It may help to encourage a discussion of students’ relevant experiences while being mindful to not ask students to self-disclose information they may not be ready to share.
- Consider asking students to complete an anonymous poll about their questions or concerns (or email you privately, if an individual response is needed). Options include Google forms, discussions, and survey tools. Find out whether students feel they are making progress, if they are having difficulties with the course, and if they have specific suggestions for addressing any challenges they identify.
Acknowledge the impact on your students.
- Begin by recognizing that different people have strong emotions from a variety of perspectives, and it may be hard to focus.
- Give your students a chance to write for a minute or two to process their thoughts and feelings, and/or identify people they want to reach out to for the types of connections and processing that would benefit them. Then move on to your plan for the day.
- Note the difficulty of focusing and of controlling strong emotions and let students know they can feel free to take a brief break to refocus.
If a student raises a topic when you had not planned to discuss it, classroom discussion agreements might provide guidance to have a productive and respectful conversation. If you do not feel prepared for a conversation, you can recognize that the student might want to have the conversation, but explain that you want to think further about whether and how to engage it as a class.
Seek support on and off campus.
- File a discrimination/harassment claim.
- Refer to this resource regarding threatening or suspicious behavior on campus.
- Refer to SALP resources about free speech and communication.
- Consider completing a Bias Incident Report Form to notify and get support from PSU’s Bias Review Team. The form can be filled out anonymously if needed.
- Consider completing a referral form to alert the PSU Cares Team that a student may be in crisis and/or need timely support.
- Refer to the Office of Academic Affairs academic freedom website and their resource guide for responding to challenges or threats to freedom of expression.
- Are your students engaging in protest? If so, review these policies and protocols related to protest and speech on PSU’s campus.
- Consult relevant language from the Code of Conduct:
- Discriminatory Harassment: verbal comments, graphic or written statements, or physical conduct by a student based on Protected Class(es) that is so severe, persistent, or pervasive that it interferes with or limits a student, employee, volunteer, or PSU community member’s ability to participate in or benefit from the university’s educational and/or employment opportunities, programs, or activities.
- Disruptive behavior: any behavior that interrupts the normal operations of the University, including teaching, classroom activities, research, administrative functions, disciplinary procedures, or other authorized University activities.
- Harassment: a course of conduct, including intimidating, coercive, or verbally abusive behavior, directed at a specific individual(s) that causes, or is intended to cause, emotional or physical distress and serves no legitimate purpose.
- Threatening communication: Threats made verbally, online or through electronic communication with sufficient content such that it causes fear of injury or other harm are prohibited.
Community Spaces that Support Students
These PSU resources may be useful to students navigating difficult topics and conversations:

Mindful Meanderings
By PSU Campus Rec and SHAC