
Upload to MediaSpace from a mobile device
You can share media recorded on your phone or tablet using Kaltura’s KMS GO application. The application is available for Android and iOS mobile devices. It allows you to upload audio, video, and images from your device to your PSU Kaltura MediaSpace account. Once uploaded and published as Unlisted, you can share that media in Canvas or via email.
Begin by going to the Apple Store or Google Play Store, and search for “Kaltura MediaSpace GO – Education” (do not select “KMS GO for regions“).
- Install the application and select Open.
- The app asks if you want to allow notifications. Select Don't Allow or Allow.
- You'll see a prompt to log in. Enter https://media.pdx.edu. This connects the application to the PSU Kaltura platform, but you're not yet logged into your own MediaSpace account.
- You may see a prompt asking if you want to allow KMS GO to "make and manage phone calls." We recommend you select Don't Allow.
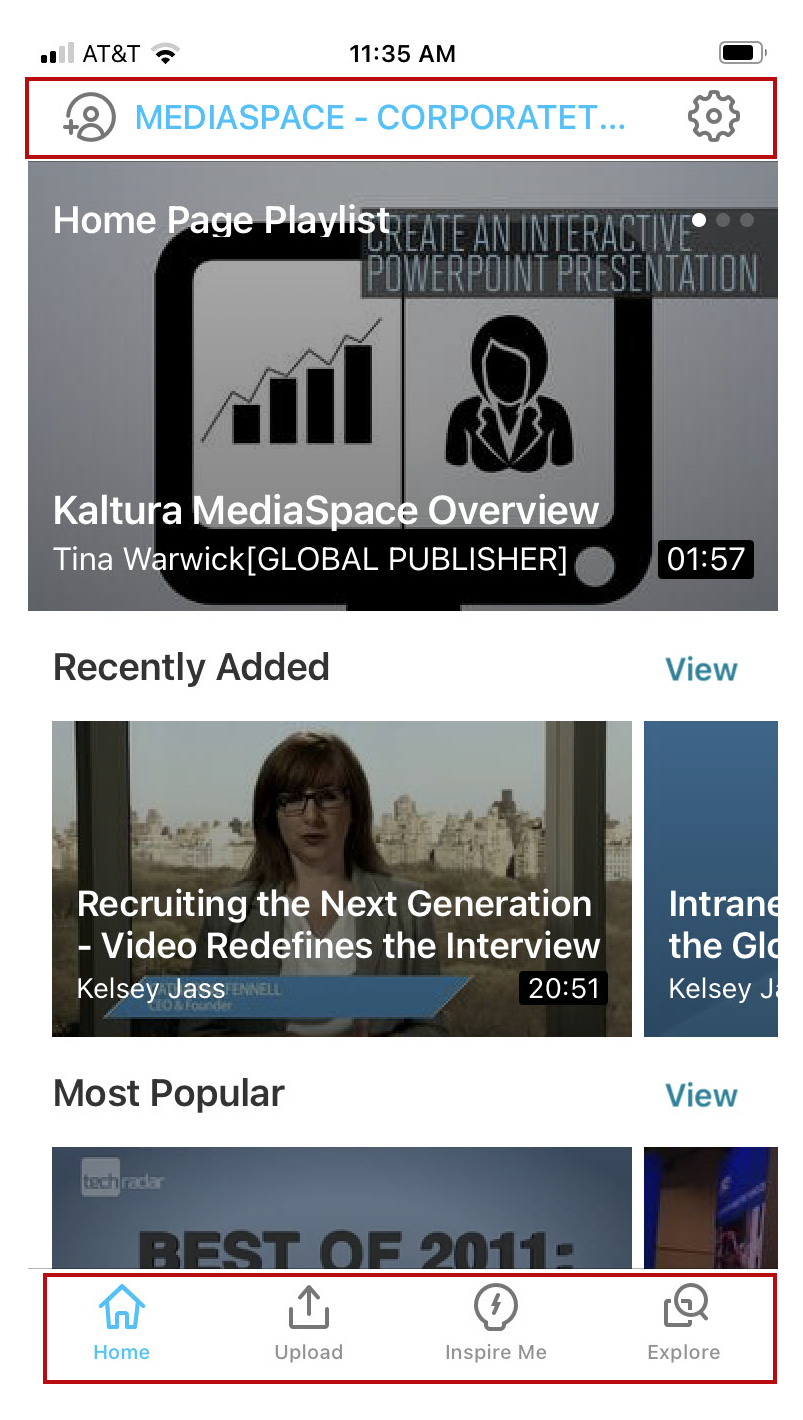
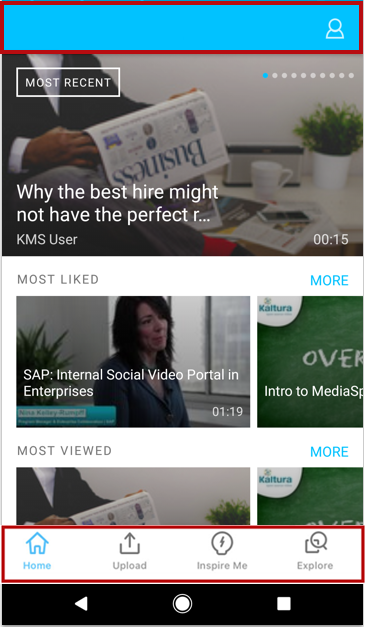
- Your display will now show that you're connected to PSU MediaSpace. To log in, select the Profile icon. If you're uploading media you may select the Upload icon, which will also prompt you to log in.
- Sign into MediaSpace with your PSU Odin/password and authenticate with Duo. You'll now see Settings and Profile icons. Select Profile to see your current media list. You'll also see icons for:
- Home – returns you to the homepage.
- Upload - select to upload media.
- Inspire me - shows publicly available media.
- Explore - lets you search shared PSU videos on MediaSpace.
- Select the Upload icon and choose the type of media you want to upload: video, audio, or image.
- You'll be asked to allow KMS GO to access media on your device. Select Allow.
- From the options shown, select the area of your device where the media is stored.
- Enter a title for your media and select Upload.
- Agree to the copyright protection prompt.
- When the upload is complete, you'll be prompted to publish the media now or later. If you want the video to remain private, select Later. To share the video, select Yes.
- The media will display with these publishing options: Private (default), Unlisted, and Public. To share your media in a Canvas course or via email, select Unlisted. This makes the media viewable by those with the link or in your Canvas course.
- Select UPDATE.
- You'll be prompted to copy the media's URL to your device clipboard. To share, select Yes.
- Open your email or Canvas course account to share your URL. To paste the URL, press and hold within your email or Canvas text field. For more information on how and where you can share media links in Canvas, please see Add media files to Canvas.
This article was last updated on .

Use the Canvas-Google integration
The Canvas-Google integration (LTI 1.3) allows users to login to Google from Canvas. Instructors can create Google Assignments, which students complete in Google files but submit for grading in Canvas. Instructors can also create Collaborations, which generate a Drive folder assigned to selected students/groups and automatically shared with the instructor.
- Create a Google Assignment, which lets you send a copy of a Google drive file to each assigned student. This can be a Google Doc, Sheet, or Slide.
- Create a Canvas Collaboration using shared Google Docs, Sheets, or Slides. Each student or group in the Collaboration has access to the shared files, along with the instructor.
Previous options are still available for linking Canvas activities and content to Google files:
- Embed or link to Google Drive documents in the Canvas Rich Content Editor.
- Allow students to submit Google documents to an assignment. These can be graded and annotated in SpeedGrader.
- Link to Google Files directly from Canvas modules.

Waitlisted students in Canvas
Students who register for a course waitlist are now admitted to Canvas courses as Observers during the add/drop period. This is the view-only “Observing: nobody” role you’ll see in your course People list. This allows waitlisted students the opportunity to view course content, but not interact or otherwise engage in Canvas course activities. If a space opens up and they become registered, they’ll gain full access to the course and be assigned the normal Student role. Waitlisted students who don’t get a spot in the course by the end of week one will be automatically removed from the course.
Note: a current Canvas bug is that students who drop a course and become Inactive are not always removed from Canvas Groups that were created when they were enrolled. If you’re using student Groups in Canvas, check your group enrollment at the end of the add/drop period. Go to the People area and select the Groups tab(s), then open each group. If you see inactive students, drag their name out of the group, to the left-side “unassigned” area. You can then re-balance group enrollment, if necessary, by dragging name tiles between groups.
This article was last updated on .

Add a PSU Canvas user to a concluded course
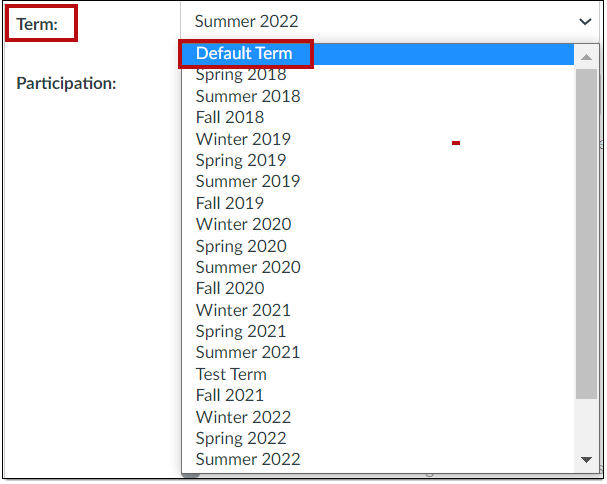
If a course is set to a past term the +People button will be greyed out. To make it active, you change the dates of the course so it’s no longer concluded. There are two options for this: setting the course to Default Term, or switching from Term to Course dates with and End Date in the future.
- Open the course and select Settings in the course navigation menu. This puts you in the Course Details tab.
- Option A: scroll down to the Term menu. This is where you can select Default Term. Doing so will change the position of the course in your All Courses list, which is chronological.
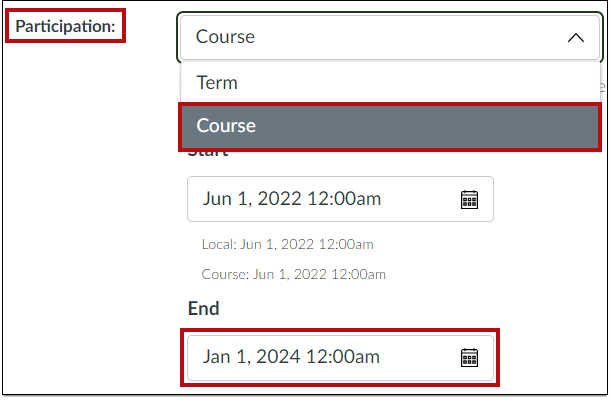
- Option B: in the Participation menu, select Course in stead of Term. In the date fields below, set both a Start and End date, with the end date in the future. Added users will only have access to the course up to this date.
Note: leaving the end date blank does not make the course-open ended, it will default to the previous end date of the the course term. - Scroll down to the bottom of the page and Save.
This article was last updated on .

Create a Google Assignment
With the Google Assignment external tool, students can either create a Google file (Doc, Sheet, or Presentation) to submit, or the instructor can attach a Google file that acts as a template for a student’s assignment submission. Each student received their own copy of the attached file. These files are stored in a Google Drive folder called Assignments, which is generated in each student’s Drive, along with the Instructor’s. Submissions can be graded in SpeedGrader, with annotations and comments made directly in the Google file.
Note that, while a Canvas rubric can be added to a Google Assignment, the rubric must be added before the assignment is set to use an external tool. Students can view the rubric in the assignment details page (accessed through their Grades page), and instructors can view the rubric in SpeedGrader.
- Create a new assignment with the +Assignment button.
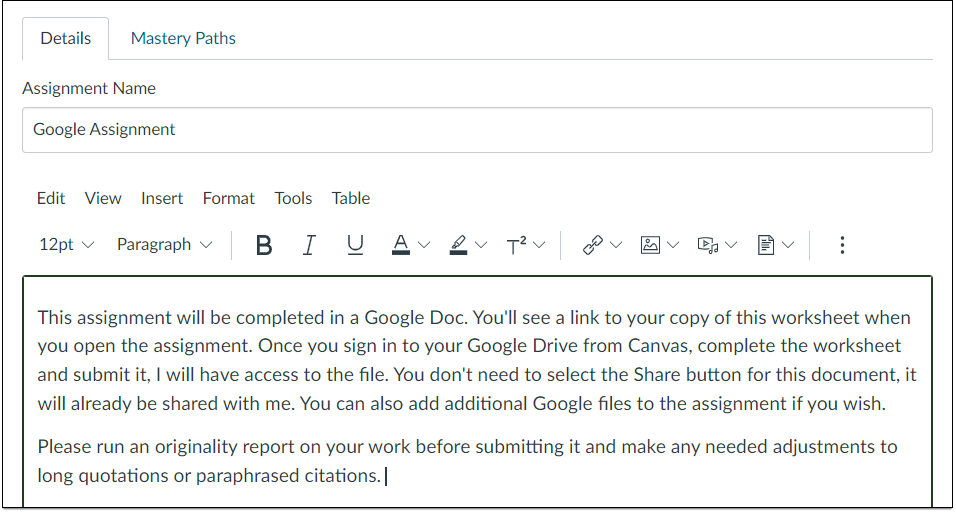
- Name the assignment, enter a point value and a due date. Since your students may be new to using Google files through Canvas, we recommend adding a short explanation to your assignment description.
- The next step is to select the Google Assignment LTI as an external tool for your assignment. However, once you do this the Canvas interface changes and you can no longer access the +Rubric button.
If you want to use a rubric in SpeedGrader, you need to save your new assignment before applying the LTI selection. If you don’t need a rubric, go directly to step 7.
Adding a rubric
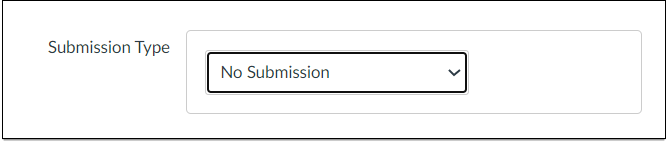
- In the Submission Type menu, select any option other than External Tool, and save your assignment. This is a temporary setting so you can save the assignment and return to the Assignment Details screen.
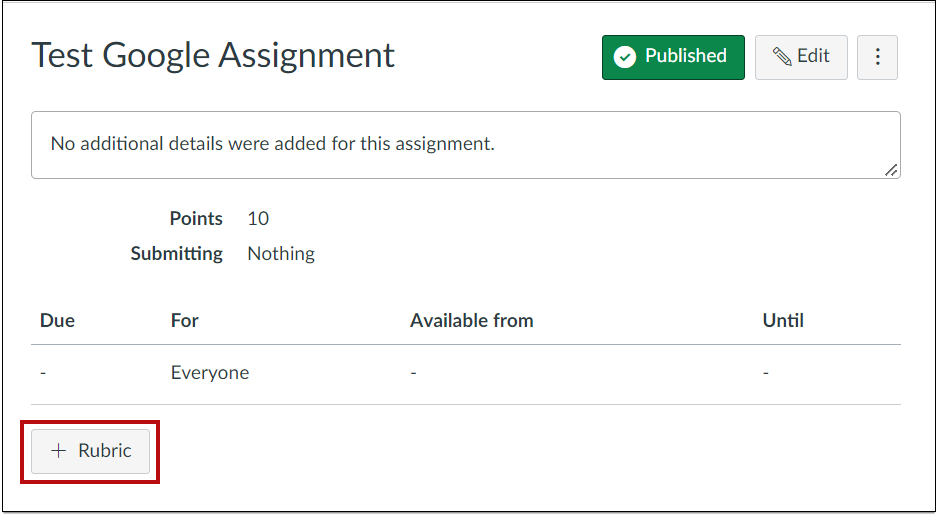
- In the saved assignment Details tab, select the +Rubric button and add your rubric.
- After saving the rubric to your assignment, select the assignment Edit button.
Complete the Google Assignment settings
- In the Submission Type menu, select External Tool.
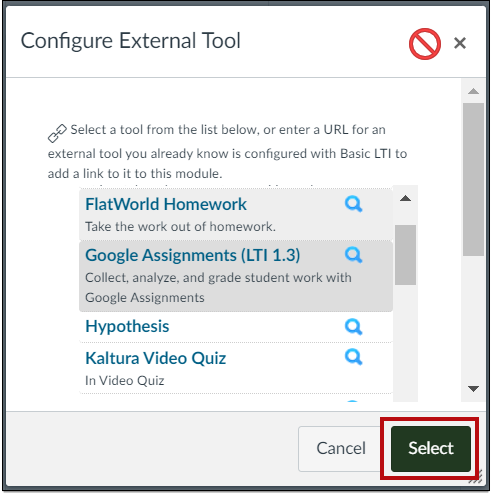
- Select the Find button and then scroll to Google Assignments LTI.
- A pop-up window will appear asking you to sign in to your PSU Google account.
- After you sign in, a new popup window will open with the Google Assignment setting options.

- Check plagiarism. This compares student submissions with Google’s content database.
- Attach a file. This file will be distributed to each student as their own copy in their Google Drive. This can be a worksheet or other assignment resource, and can be a Google Doc, Sheet, or Slide. You can also create a new file to attach.
- Grade in Google Assignments or SpeedGrader. If you use the Canvas gradebook you’ll want to grade in SpeedGrader. Grades input to the Google Assignment interface will be seen by students but don’t transfer to Canvas.
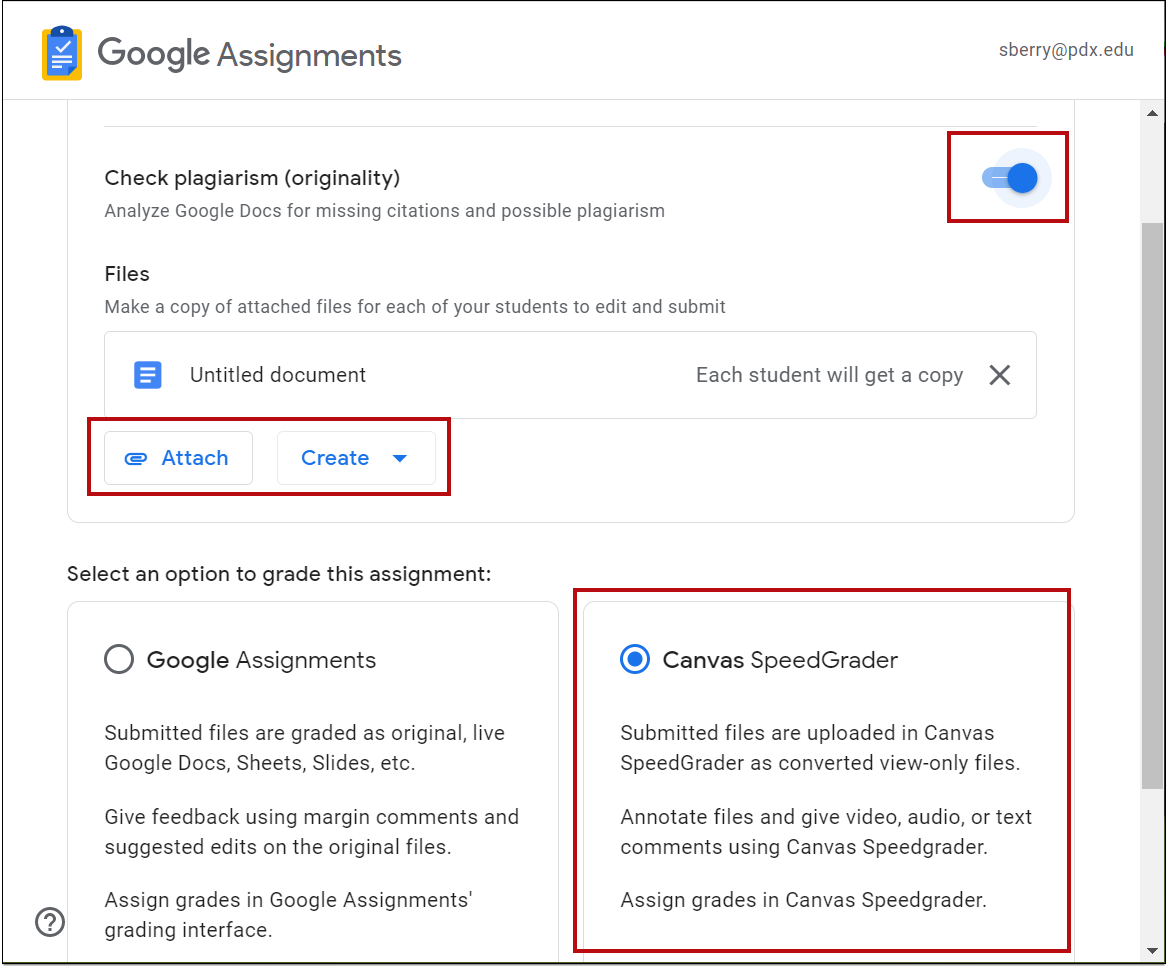
- After choosing your settings, select the Create button.
- The Google popup window will close and you’ll see the Canvas Configure External Tool menu again. Use the Select button to create your LTI link and close the menu.
Important: do not use the small X in the upper right corner to close this menu. It will close, but no LTI link to Google will be created. In that event, delete the Canvas assignment and start over. - Complete the Canvas settings for the assignment, including number of submission attempts and due date. Then choose Save.

Grading a Google Assignment
- The Canvas assignment screen will show the description field and, below it, a button to Launch Google assignment in a new window. You'll also see buttons to edit the assignment or launch SpeedGrader.
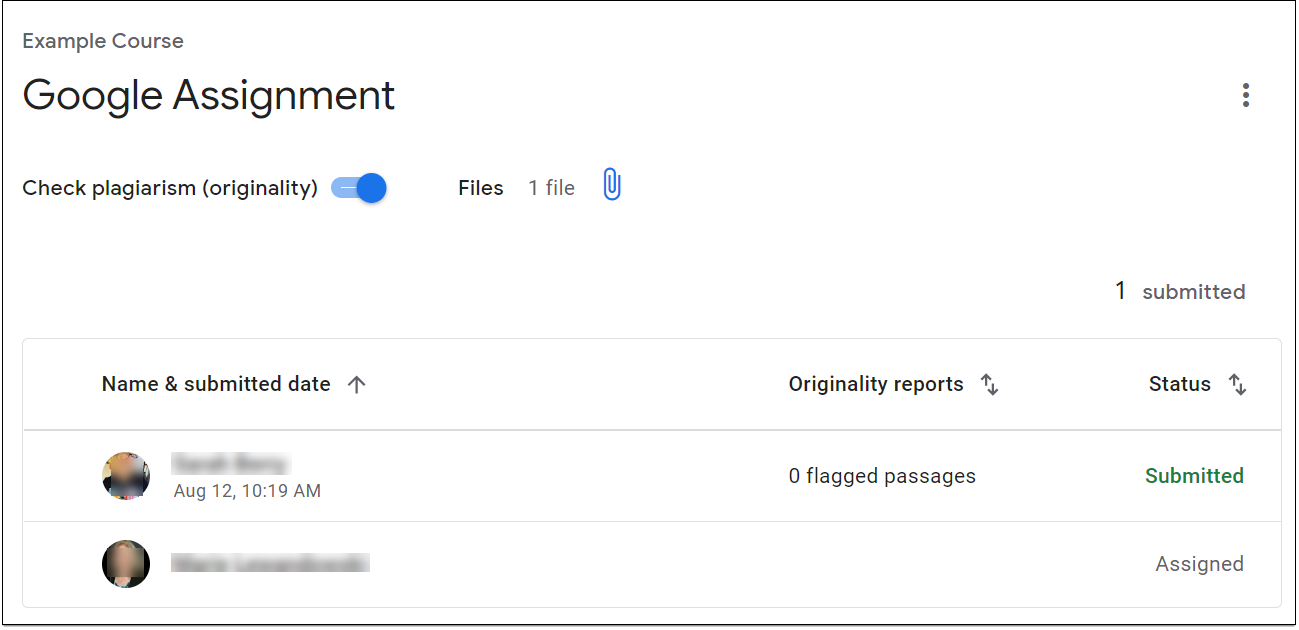
- Once students have submitted their Google files, you can view submissions and plagiarism reports by selecting the Load Google Assignment in a new window button. When you select a student’s name, a popup window appears with a link to their file.
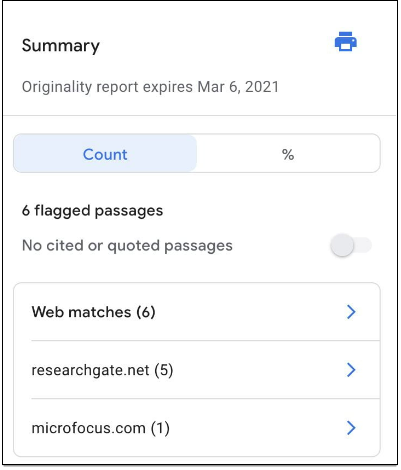
- If a student’s report has any flagged passages, select that link to view details in a sidebar.
- To view and grade submissions in SpeedGrader, open the assignment in Canvas and then select the SpeedGrader button. You don’t need to launch the Google Assignment, the student files will appear in the Canvas Document Viewer.
This article was last updated on .

See a student view of Grades
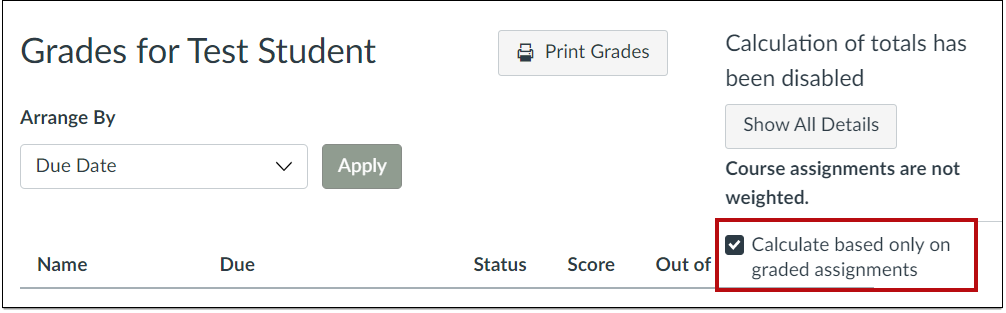
The Student View button is not active in the Canvas Grades area. To see your gradebook as a student does, you need to select a student’s name from the Grades roster. A good way to see if grades display as expected is with the Test Student account. This is the last entry in your Grades roster. In that row, enter the maximum point value for each graded activity. Then select Test Student and Grades to see a student view of your current grade visibility and display settings. For more details on the student grades page, see How do I view a student’s Grades page in a course from the Gradebook?
Note: checking your students’ Grades page part-way through the term is also a good way to get an overview of their course progress.
- Open your course and select Grades.
- Select a student's name or scroll to the bottom of the roster and select Test Student. This opens a new partial window on the right of your browser.
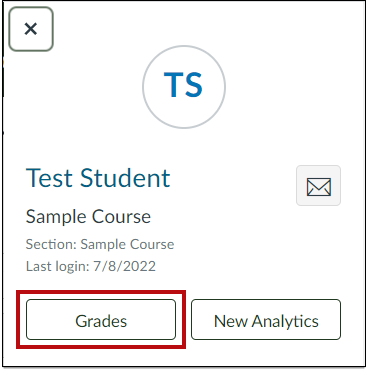
- Select the Grades button. This opens a pop-up window with a list of graded activities and grades displayed as per your settings. If these are not displaying correctly, check the tutorial on how to Set up your gradebook. Note: the student view, by default, has "Calculate based only on graded assignments" selected. This means that, unless you set your gradebook to treat missed assignments as zero, student may see an inaccurate total. See Set up your gradebook for instructions.
This article was last updated on .

Set up your gradebook
Preparing your gradebook in Canvas prior to the start of term will help you avoid last-minute changes. Five setting areas to consider are below. After you make your selections in each area, a good way to see if grades display as expected is with the Test Student account. This is the last entry in your Grades class roster. In that row, enter the maximum point value for each graded activity. Then select Test Student and Grades to see a student view of your current grade visibility and display settings. For details check See a student view of Grades.
- A grade posting policy
- A rule for calculating missing assignments
- A course grading scheme
- Assignment grade display (points, percentage, or letter)
- Assignment groups, with options to weight or drop grades
A grade posting policy
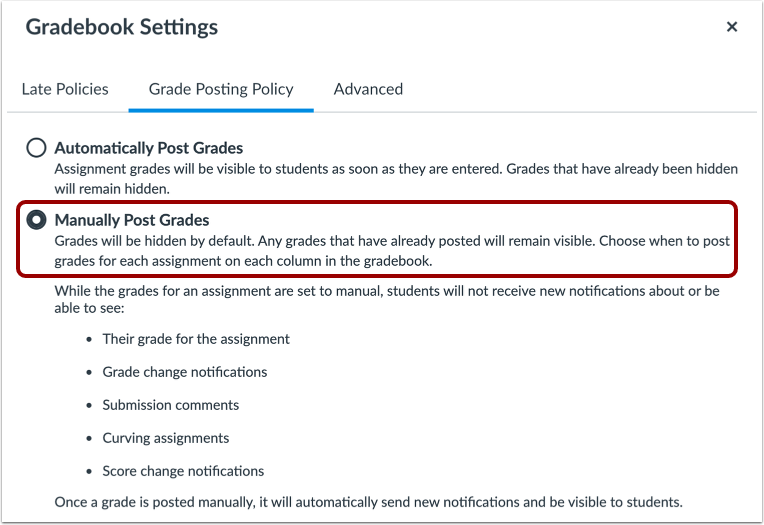
By default, Canvas will post grades to students automatically as you enter them. You can change this setting so that grades are posted manually, when you choose to make them visible to students. This setting can be made at the gradebook level (the policy affects all assignments), or the individual assignment level.
Note that If you copy a course and include course settings as part of the import, the course posting policy from the original course will be copied into the new course. This will override any grade posting policy settings you have in the new course. Additionally, imported assignments will retain their assignment posting policy from the original course.
A rule for calculating missing assignments
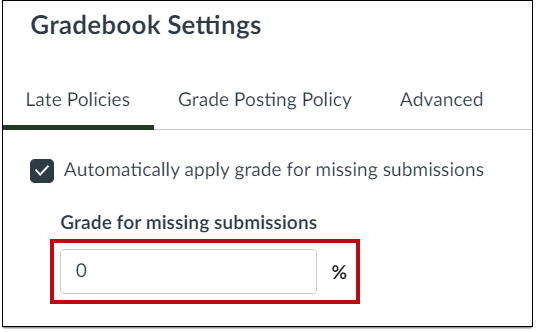
By default, the Canvas gradebook totals only positive scores. Missing assignments are not automatically calculated as zero. This can give students a misleading grade view. To change this you set missing assignments to a percentage value of 0%. This affects all assignments in the course, and is applied once the due date has passed. If a missing assignment is submitted, the new submission must be updated in the gradebook or the grade will not change.
Apply a missing submission policy for all course assignments
Your course grading scheme
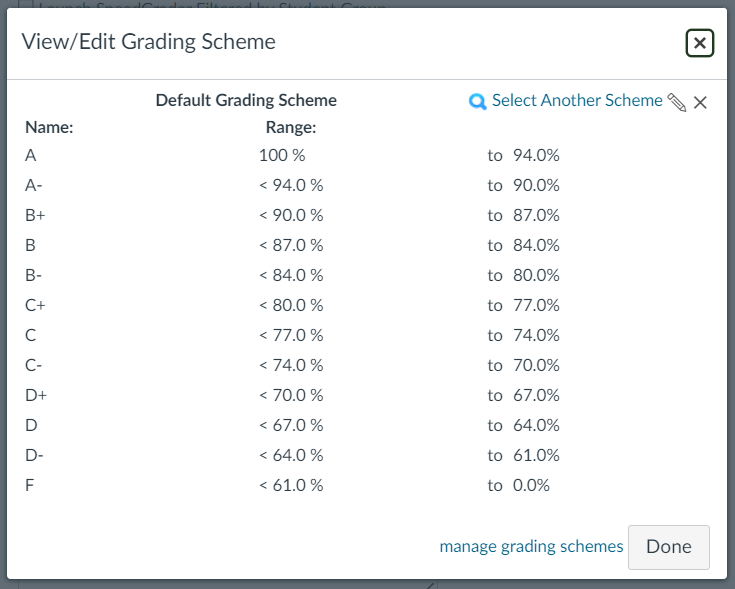
In Canvas Grades, student scores are shown by default as a percentage. If you want to display a letter grade, you select a grading scheme. You can enable the default grading Canvas scheme or create your own, as long as it conforms with the Portland State grading scale. You can customize your grading scheme, or select the default, in course Settings. Instructions are here: How do I add a grading scheme in a course?
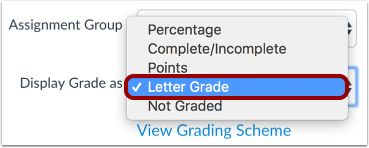
Assignment grade display (points, percentage, or letter)
Each graded assignment you create automatically generates a column in the gradebook. You can also select how you want the grade displayed. By default, it will be displayed as a point value. You can change this to a percentage, complete/incomplete, or to a letter grade by applying your grading scheme to the assignment. Note that selecting a grading scheme in Settings (as above) will display a letter grade in the course Total column, but not individual assignment columns. To do that, you must select the Letter Grade display setting for each assignment.
By default students can also view grade distribution statistics for a course. To hide that data from students, follow these steps: How do I hide grade distribution scoring details from students?
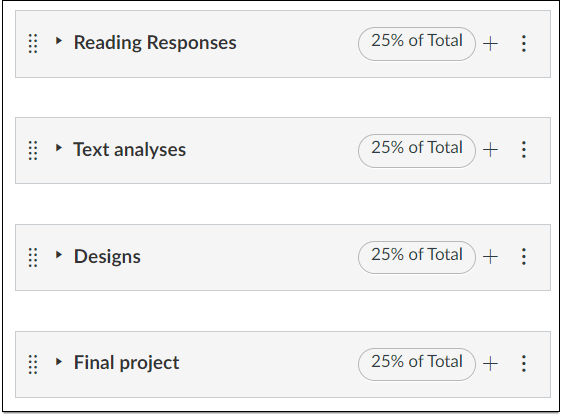
Assignment groups, with options to weight or drop grades
It’s helpful for students if you organize assignments into categories like quizzes, papers, homework, etc. You can do this with assignment groups. Each group creates a new column in your gradebook. That column displays each student’s percentage of the total points available in the group. You can also use assignment groups to set up a weighted grading system, with each group given a percentage value for the course. This is helpful if you need a high point value for an activity that is not a high percentage of the grade – as with frequent low-stakes quizzing. Lastly, you can use assignment groups to create rules, such as dropping the lowest score in a group. Find detailed instructions below on:
- Organizing assignments by category
- Weighting grades as a percentage of the course total
- Creating group rules that calculate assignment scores.
This article was last updated on .

Canvas media recorder troubleshooting
When attempting to record media using the Rich Content Editor, you may encounter problems with your browser or operating system. To troubleshoot, try the following steps.
Check your browser
- Use either Firefox or Chrome (Safari doesn’t work with the Canvas media recorder). Make sure the browser is up to date by checking here: Chrome updates; Firefox updates.
- Clear your browser cache. OAI recommends doing this each term, or more often. This may clear saved passwords, so back them up elsewhere. Clear your cache in Chrome; clear your cache in Firefox.
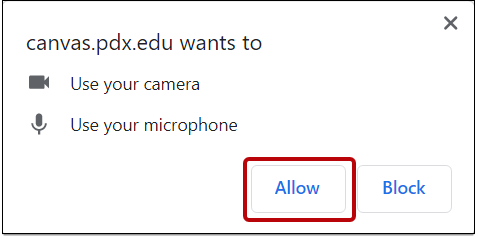
- Check your browser permissions. On first use of the recorder, a pop up message appears requesting access to your camera and microphone. It's easy to dismiss this alert instead of allowing access. To correct that, follow these steps: Chrome permissions for camera and microphone; Firefox permissions for camera and microphone.
Check your operating system
Make sure your computer’s operating system is up to date.
For PSU managed computers
- Check for operating system updates by launching the "Self Service Software" or "Software Center" application: https://www.pdx.edu/technology/self-service-software.
- If your computer is managed by your area’s TAG or OIT, contact them directly.
For non-PSU managed computers

If you’ve gone through all the steps above and are still having issues getting the Canvas media recorder to work, please submit a request to OAI Support with a brief description.
This article was last updated on .

Module release options
You can use Canvas modules to set conditions on how and when students move through coursework. For example, you can lock upcoming modules until a specific date and time.
Additional conditions you can use include releasing a module only:
- After another module has been opened and completed
- After students view a file and mark it as done
- After students participate in a specific discussion
- After students submit an assignment or quiz
- Once students achieve a minimum score on an assignment or quiz.
The process for releasing modules conditionally has two parts. The first step is to create a module containing the required activity/content that students must complete. The second step is to create a subsequent module with prerequisite settings. This module remains locked until the requirement module tasks are complete.
Step One: Create a module for required work and select requirements
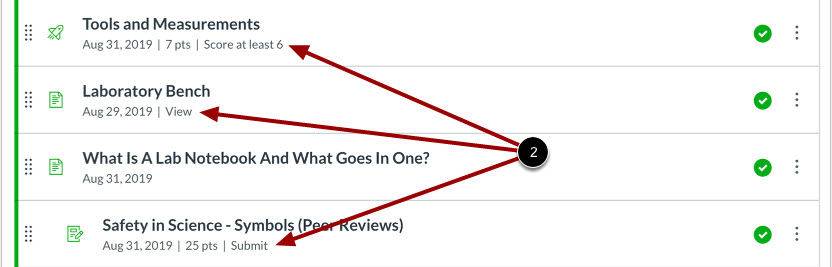
Depending on the type of coursework, you can require students to:
- View the item
- Mark as done
- Contribute to the page
- Submit the assignment
- Score at least…
Step-by-step instructions on setting module requirements are here: How do I add requirements to a module?
Students will see module item requirements in the details area below each item name.
Step Two: Create a subsequent module with prerequisite settings
Once required work is defined and inside a module, you can use it as a prerequisite for a subsequent module. Note that this is just a prerequisite module selection: details on what students must have completed in that module are defined in the requirements.
Step-by-step instructions are here: How do I add prerequisites to a module?
Students can see the prerequisite module in the heading area.

This article was last updated on .
Recover deleted Canvas items
If you accidentally delete an activity or page in Canvas, there is a way to check and see if it can be retrieved. This will not work 100% of the time, but it’s always worth trying.
- Open the course in Canvas.
- Locate the URL field in your browser. This will begin with canvas.pdx.edu:

- Put your cursor at the end of this URL address and add: /undelete (you must include the forward slash character).

- Enter return. The resulting list of items are those available to restore to your course.
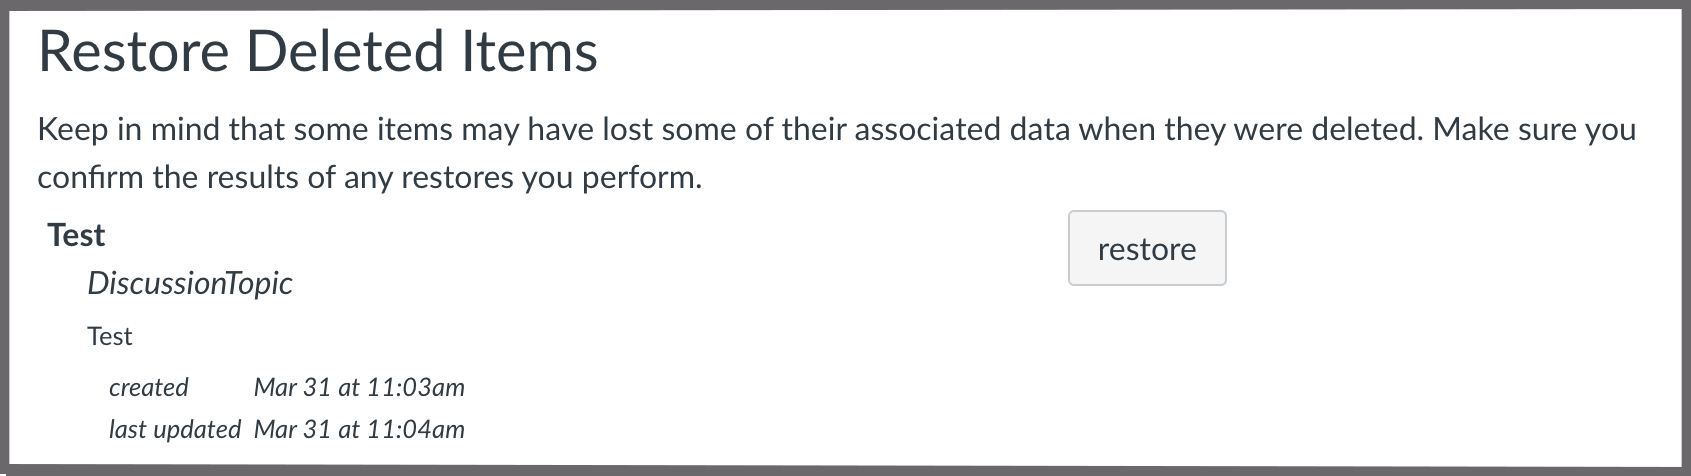
- Select the restore button for any items you want to undelete.
This article was last updated on .