
Get Started with Google Forms
You can use Google Forms to create forms, surveys, or even quizzes.
- Login to your PSU Google account.
- Navigate to https://docs.google.com/forms
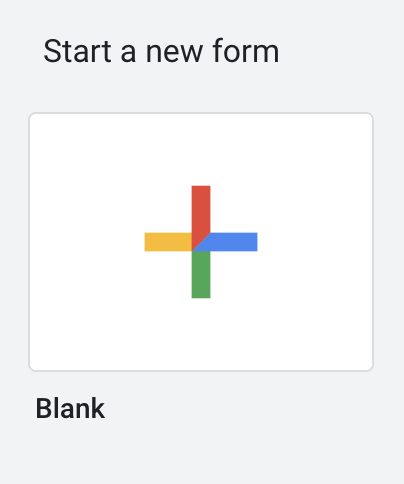
- Click the icon to start a new blank form.

- Add a title, optional description, and questions to your form.
- To add collaborators to help you develop your form, click the More menu (three vertical dots) in the upper right corner, and select Add Collaborators.
- When you are ready to collect responses, click the Send button for distribution options.
- For additional documentation, see Google Forms Support.

This article was last updated on .

Create accessible course materials

Contributors:Kari Goin
When course materials — readings, videos, slides, websites, etc. — are accessible, all students benefit.
- Students with disabilities can engage with your course materials without barriers, often using assistive technologies such as screen readers or closed captioning.
- Even students without disabilities often use more than one device — such as a phone, tablet, laptop, or desktop — and may not have reliable internet access. Accessible materials help them, too.
To support all learners and comply with the Americans with Disabilities Act, it’s important to include accessibility throughout your course.
Note: At times, you may need to discuss accommodations with the Disability Resource Center.
Images, graphics, diagrams, charts, and tables are key communication tools and can greatly enhance learning. For each image, include alternative text (alt-text) to describe the image to someone who uses a screen reader. Write your alt-text to describe:
- The intended meaning or use of the image
- Any included text or visual information (especially in diagrams)
Example: For an image of a course banner on the homepage of a course, the alt-text would include any text in the banner and the name of the course.
It’s important for alt-text to convey the same information as the image — so it’s best to include information-heavy items as readable text rather than images.
- Rather than images of tables, include readable text-based tables. Make sure the tables have headings.
- Write mathematical equations using the math editor in Canvas.
Note: Ask the Disability Resource Center about access to EquatIO, an institutionally licensed mathematical equation writing software.
Color in a digital environment requires sufficient contrast between text and background — but don’t use text color as the sole means to communicate information. For example, “assignments in red are due on Thursday” would not be accessible. It would exclude people who don’t see the color red or who use screen readers. Instead, use bold or italic to emphasize or highlight important information.
Another consideration is to use darker bolder colors for text used against a white screen. For best usability and accessibility avoid neon and bright colors in course content.
For anyone who navigates from a keyboard, headings are important to quickly move through content on a page.
- Use heading style H1 for only one heading on each page — typically the title or main subject of the page.
- Use heading styles H2 through H6 to identify subsections.
- Follow a logical nesting order and don’t exceed six levels.
Ordered and unordered lists are commonly used in content authoring. Be sure to use list tools to create them.
For ordered lists — in which numbers or letters indicate chronological or hierarchical items — a common mistake is typing each number or letter rather than using the list tool. This does not create a structured list that screen-reading software can use.
Don’t rely exclusively on lists for organization. For example, use accessible headings to begin each major section.
Document types such as PowerPoint, PDF, Word, Google Docs, etc. are often part of course content. Consistency among documents is important for readability and findability. Here are a few guidelines to consider.
Make sure PDF documents are selectable, searchable, properly tagged, and in accurate reading order. If you create them by scanning paper, use OCR (optical character recognition) instead of creating an image. OCR allows each letter and word to be read by a screen reader and makes all text searchable. You can scan with OCR in the PSU library.
For all document types:
- Don’t use underlined text for emphasis. It can be mistaken for a link. Use bold and italics instead.
- Use the same style and navigation in all documents.
- Make a document’s title easy to understand — both in the file name and in the H1-level heading within the document.
Canvas has a built-in accessibility checker! Anywhere Canvas has a rich content editor you can run the checker to flag potential issues and accessibility errors. The checker will then prompt you to fix each item it flags. Learn to use the accessibility checker in the rich content editor in Canvas.
Microsoft products such as Word and PowerPoint also have built-in accessibility checkers. Learn about the accessibility checker for Word and PowerPoint.
Resources for creating accessible materials

Using Open Educational Resources (OER)

“Open Educational Resources (OER) are teaching, learning, and research resources released under an open license that permits their free use and repurposing by others. OER can be full courses, course materials, lesson plans, open textbooks, learning objects, videos, games, tests, software, or any other tool, material, or technique that supports access to knowledge.” — SPARC (Scholarly Publishing and Academic Resources Coalition)
Consider using OER to:
- Reduce textbook costs for students.
- Increase access to course materials (e.g., available on-demand across devices).
- Build collaboration (between educators, between students and educators).
- Improve flexibility and material quality (e.g., tailored material for specific purposes, adding current content).
OER reduce barriers to education while increasing the quality of teaching and learning.
Where to Find OER Textbooks
- In online textbook collections. OpenStax has free learning modules and textbooks both developed and peer-reviewed by educators. Open Textbook Library is another collection that pulls titles from multiple OER sources.
- By discipline. OER textbooks serve many fields, including commonly required coursework and high-enrollment classes. The PSU Library curates materials by discipline.
- By PSU faculty. PSU has its own publishing initiative, PDXOpen, which supports faculty in developing open-access textbooks.
- Using search engines. Two great options to begin your search are OASIS and Mason OER Metafinder (MOM), which search across OER repositories and thousands of entries. These are particularly helpful for more advanced or specialized courses.
How to Use OER
- Share existing work: Because OER are licensed under Creative Commons (CC), you can share them at no cost. Just follow the terms laid out by the creator.
- Modify existing work: Modifying an Open Textbook: What You Need to Know is a five-part, step-by-step guide for faculty and those who support them.
- Author your own work: Authoring Open Textbooks is a helpful guide for “faculty, librarians, project managers, and others.”
- Involve students in authoring collaborative work: A useful starting point is A Guide to Making Open Textbooks with Students.
Where to Find Other Forms of OER (and Free Teaching Materials)
- Khan Academy: A collection of instructional videos, practice exercises, and other educational videos across many subject areas.
- Moving Image Archive: Over a million free films, movies, and other videos. Many (but not all) are available for free download. Be sure to check for permissions information in the video description.
- YouTube Education University: Primarily a collection of lectures in various disciplines. YouTube offers a filter so you can search for videos published under Creative Commons licensing.
- Wikimedia Commons: Openly licensed and public domain images and visual media hosted by Wikimedia.
- Flickr: Many photos on Flickr are available for free use and editing with a Creative Commons license.
- Unsplash and Pixabay: While all photos on these sites are free to use, photographers appreciate being credited to help expose their work. Crediting can simply be including the photographer’s name and a link to their profile and/or photo.
- Bloomsbury Academic: A collection of books and digital resources in the humanities, social sciences, and visual arts.
- Project Gutenberg: Over 58,000 free eBooks digitized and proofread by volunteers, with a focus on older works for which U.S. copyright has expired.
- OER Commons: “A public digital library of open educational resources,” including syllabi, lesson plans, assignments, modules, textbooks, etc.
Learn More Elsewhere

Use Advanced Tips and Tricks in Kaltura Capture
Use Advanced Tips and Tricks in Kaltura Capture
In-recording advanced controls
- Keyboard Shortcuts
- Start Recording Command (Mac) or Control (Windows) + Shift + R
- Stop Recording Command (Mac) or Control (Windows) + Shift + S
- Cancel Recording Command (Mac) or Control (Windows) + Shift + C
- Go to Management Command (Mac) or Control (Windows) + Shift + M
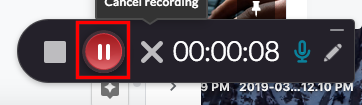
- Click the pause icon to pause a recording in process. Click it again to restart recording.
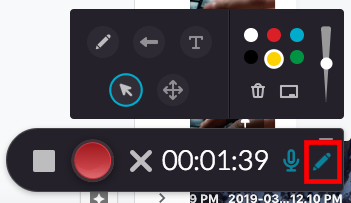
- Click the pencil icon to use the screen annotation tools.
Enable multi-stream recording
Advanced users may need to record more than one screen or video steam at time. This tutorial will walk through how to enable multi-screen recording, but you will follow similar steps to enable other multi-video recording.
NOTE: Kaltura Capture enables a maximum of 2 video sources, so you may record screen and camera, 2 screens, or 2 cameras.
- Login to MediaSpace and launch Kaltura Capture.
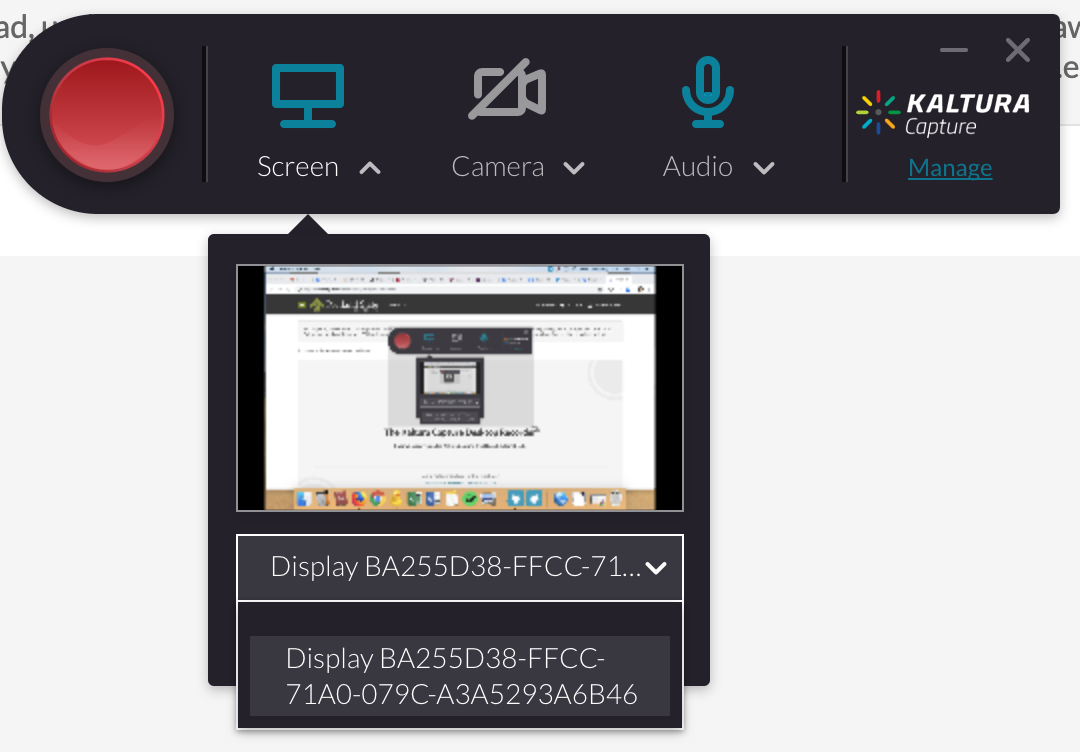
- Click the word Screen and select your first screen input from the available options.
- Click the word Camera and select your second screen input from available options. NOTE: “Camera” will change to “Screen” once you select a screen input.
- Proceed to record as usual.
This article was last updated .

Add a Collaborator in MediaSpace
In addition to sharing media via a channel or a link, you can share media and delegate collaboration privileges to your media through MediaSpace Collaborator roles.
- Log in to your My Media at media.pdx.edu
- Click the media item to which you would like to add a collaborator.
- Click Actions and select Edit.
- Select the Collaboration tab.
- Click the + Add Collaborator button.
- Search for the person you wish to add by name or Odin.
- Select the role(s) for the collaborator.
- Click Add.

Collaborator Roles and Definitions
- Co-Editors – can edit the entry’s details and metadata, trim media, replace media, edit captions, edit chapters and edit slides. Co-editors cannot delete media or add new co-editors and co-publishers. Co-editors can see the analytics page for the media they co-edit.
- Co-Publishers – can publish media to their entitled Categories or Channels. Group support may be enabled for the Media Collaboration features. When enabled, you can select groups that may be assigned as co-editors/publishers for an entry.
- Co-Viewers – are only able to view media and do not have editing permissions nor are allowed to view unlisted entries, unless they are also co-publishers or co-editors of that entry.
This article was last updated on .
Create a Media Recording with Kaltura Capture
The default recording in Kaltura Capture captures both your screen and a webcam recording of you. You can also create Screen only, Camera only, or Audio only recordings.
NOTE: Before you begin, you will need to Install Kaltura Capture, if you haven’t already.
- Log in to media.pdx.edu
- Click + Add New, then select Kaltura Capture.
- Read and confirm the Copyright policy notice.
- The Kaltura Capture Desktop Recorder will pop up.
- Click the word Screen to verify or select your Screen recording settings.
- Repeat for Camera and Audio settings.
- Click the red button to start recording.
- A 3-second countdown will appear on screen.
- Once the countdown disappears, your recording will begin.
- Click the square button to stop the recording.
- Confirm that you want to stop the recording.
- The Kaltura Capture Menu will pop up.
- Optionally adjust the title, description, and tags for your video.
- Click Save and Upload to upload to MediaSpace.
- Wait for the upload to finish, and follow the link to view.
Create Screen Only, Camera Only, or Audio Only Recordings
To create a recording other than the default screencast with webcam feed, disable the screen and/or camera feed in the Kaltura Capture Desktop Recorder.
- Log in to media.pdx.edu
- Click + Add New, then Kaltura Capture.
- Read and confirm the Copyright policy notice.
- The Kaltura Capture Desktop Recorder will pop up.
- Click the screen icon to disable screen recording, click the camera icon to disable webcam recording, and/or click the microphone to disable audio input.
If you want to record video of just yourself, disable the screen recording by clicking the screen icon.
If you want to record video of just your screen, disable the webcam by clicking the camera icon.
If you want to record silent video, disable the microphone by clicking the microphone icon. - Click the red button to start recording.
- A 3-second countdown will appear on screen.
- Once the countdown disappears, your recording will begin.
- Click the square button to stop the recording.
- Confirm that you want to stop the recording.
- The Kaltura Capture Menu will pop up.
- Optionally adjust the title, description, and tags for your video.
- Click Save and Upload to upload to MediaSpace.
- Wait for the upload to finish, and follow the link to view.

If you capture both your screen and your webcam, MediaSpace stores them as two separate files that can be configured to play only a single view, a side-by-side view, or a picture-in-picture view with either image large or small. Note: these options cannot be locked. Students will have the same options when viewing the video.
This article was last updated on .

Download and Install Kaltura Capture
Kaltura Captures runs from your computer, rather than your web browser. Download the application for the the operating system you are using – you do not need administrative privileges to install Kaltura Capture on Windows.
Note: always begin using the Kaltura Capture application by logging in and launching it with the steps below. This will ensure that you’re using the most up-to-date version. Launching an older version from your computer may result in recording problems.
Login to PSU MediaSpace
- Browse to https://media.pdx.edu/
- Click on PSU User.
- Click Login.
- On the PSU Single Sign-On page, enter your Odin username and password.
Download and Install Kaltura Capture For Windows
- Once logged in to PSU MediaSpace, click + Add New, then Kaltura Capture.
- Read the Copyright notice and click the box to agree to terms and conditions.
- Click the Download for Windows link to download the installation file.
- Once the file has downloaded, run the file to install.

Windows System Requirements
- Windows 7 -10 (64 bit) and above
- Memory – 4GB RAM
- Storage – 1GB min available
- See the most up-to-date system requirements through Kaltura directly.
Download and Install Kaltura Capture for Mac OSX
- Once logged in to PSU MediaSpace, click + Add New, then Kaltura Capture.
- Read the Copyright notice and click the box to agree to terms and conditions.
- Click the Download for Mac link to download the installation file.
- Once the download is complete, run the file to install.
- Drag and drop the CaptureSpace Desktop Recorder to your Applications folder.
Mac OSX System Requirements
- MAC -10.10-10.13
- Memory – 4GB RAM
- Storage – 1GB min available
- See the most up-to-date system requirements through Kaltura directly.
Adjust Your Recording Settings (Before Initial Use Only)
- Log in to media.pdx.edu
- Click + Add New then select Kaltura Capture.
- The Kaltura Capture Desktop Recorder will pop up.
You may need to approve a browser dialogue box to allow Kaltura Capture to open. - Click manage.
- Click the gear icon to access the settings panel.
- Change camera recording quality to 1080p.
- Change the screen recording quality to 1080p.
- Click save.
- You may now create a recording.

This article was last updated on .

Use a PebblePad Workbook or Template a Faculty Colleague Has Shared
Note: This tutorial assumes your colleague has already shared a resource with you. See Share PebblePad Workbooks and Templates with Your Faculty Colleagues to learn how to share resources for your faculty colleagues to use.
- Log into PebblePad from http://pebblepad.pdx.edu/
- Click on the burger menu (three stacked lines like a hamburger) in the upper left corner of your screen.
- Click Resource Store from the menu that appears from the left.
- Find the resource that you want to share in the list, and click the i icon in the right-most column.
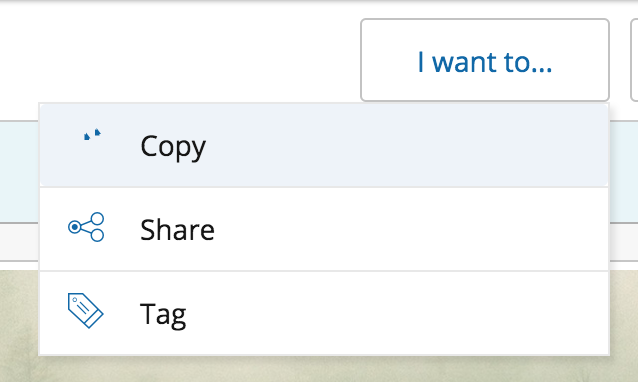
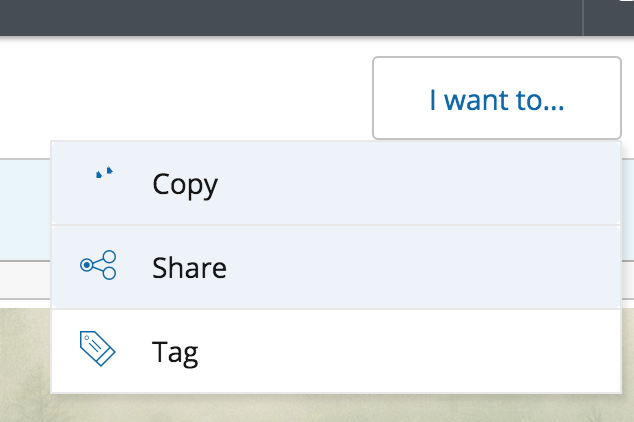
- Click I want to…
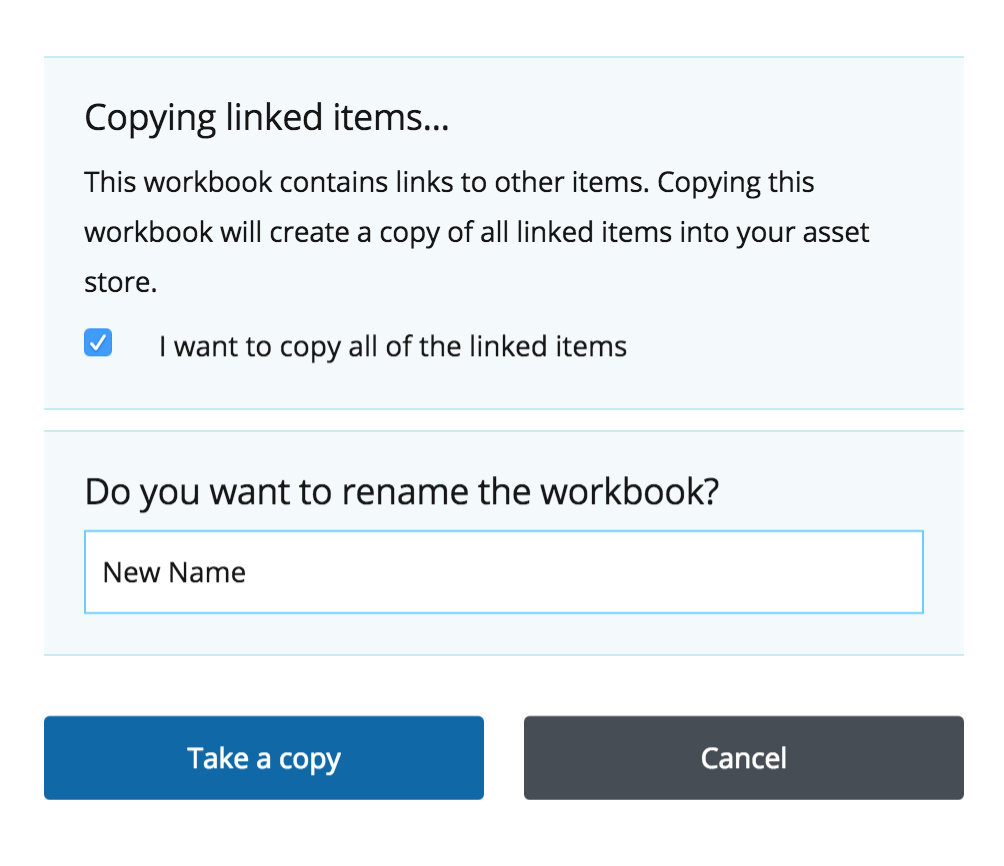
- Select Copy
- Optionally rename the copy through the dialogue box and select Take a copy.
- You now have a copy of the Resource which you can deploy in your course.
Share PebblePad Workbooks and Templates with Your Faculty Colleagues
- Log into PebblePad from http://pebblepad.pdx.edu/
- Click on the burger menu (three lines stacked like a hamburger) in the upper left corner of your screen.
- Click Resource Store from the menu that appears from the left.
- Find the resource that you want to share in the list, and click the i icon in the right-most column.
- Click I want to…
- Select Share
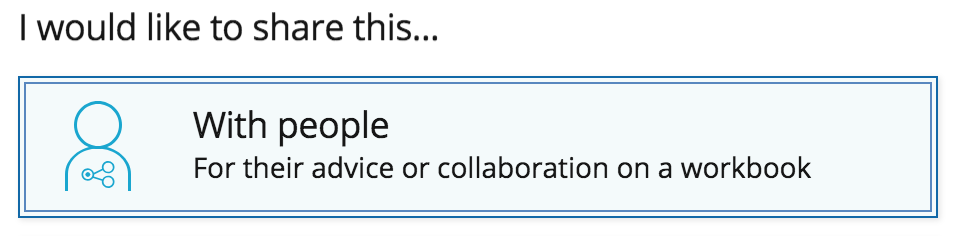
- Click I would like to share this…With people
- Find the person/people with whom you want to share your resource.
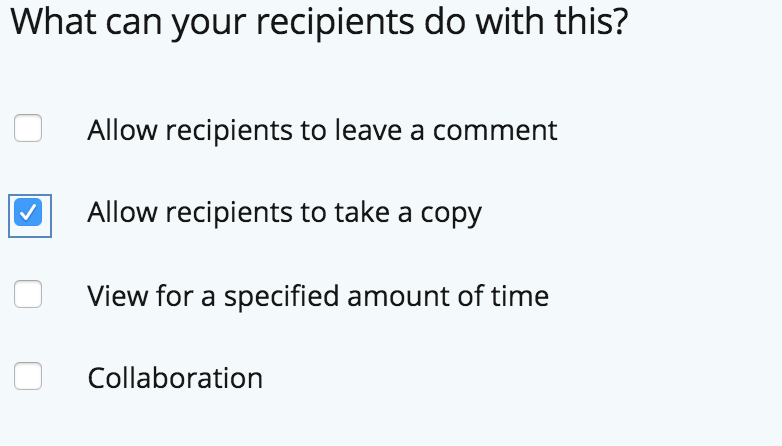
- Select the option to Allow recipients to take a copy.
- Your selected recipients will now need to make a copy of the resource to use it with their classes.
See Use a PebblePad Workbook a Faculty Colleague Has Shared to learn how to use a resource a faculty member has shared.
Create an Alumni Account
All PSU active account users can create a free PebblePad Alumni account before they separate from PSU. This is a self-service process completed within PebblePad. To make an alumni account, take the following steps before you lose access to your PSU accounts.
- Log into pebblepad.pdx.edu with your PSU Odin credentials.
- Click in the top left “burger menu” icon with 3 vertical lines.
- From the left slide out menu click Additional Settings.
- From the exposed menu click Free Alumni Accounts.
- A new browser window will appear with a pop up box in the middle.
- Click Continue in the pop up box to make it got away.
- Fill out the form using a personal email address and password.
- Click Continue.
- Choose your subject expertise and career destination (optional).
- Read the Terms and Conditions then click the check box.
- Then click Continue.
- A confirmation screen will display the information you entered.
- After verifying that it is correct click Confirm.
- You will be presented with a completion screen.
- Bookmark the login URL for your alumni account before logging in.
See PebblePad support documentation for additional detail.
This article was last updated on .