
Use Your Zoom Personal Meeting Room for Office Hours
Use your Zoom personal meeting room for office hours
You can use Zoom’s Personal Meeting Room feature to have a dedicated URL to use for virtual office hours on demand. This functionality makes it easy to share a single URL to use across terms and classes, without the need to schedule individual Zoom sessions for scheduled office hours.
Note: to schedule office hours with your Zoom Personal Meeting Room, you need to schedule that directly in the Zoom Desktop App or the Zoom portal at pdx.zoom.us and then import the meeting to the Canvas Zoom area.
- Sign in to Zoom at pdx.zoom.us with your PSU Odin.
- Click the Meetings link on the left navigation.
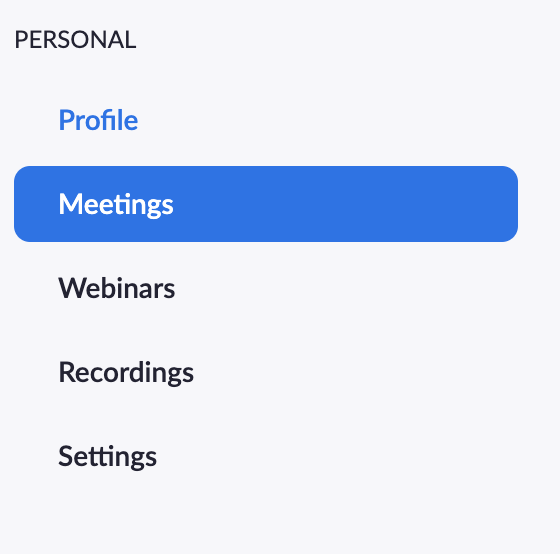
- Click the Personal Meetings Room tab from the top navigation.

- Scroll to the bottom of the page and click the Edit this Meeting button.
- For office hours, we recommend the following Meeting Options:
- Disable Join Before Host. This means you will need to start the meeting before participants can join.
- Enable Waiting Room. This means you will need to allow individual participants to join the meeting one-by-one.
- This is critical to maintain student confidentiality and meet FERPA requirements.
- Enable Only authenticated users can join.
- Restrict to Signed in with a Portland State account (Odin).
- Adjust other Meeting settings as desired. (See recommended settings for preventing Zoom-bombing.)
- Click Save when done.
- On the Copy the Invitation link from the Personal Meeting Room Information page.
- Copy the invitation information and save in a convenient location.
- Share the invitation URL with students as your office hours location.
Note: Students will be able to click the link at any time but will be in a holding space until you (1) start the meeting and (2) let them into the meeting. You may receive “Your Attendees Are Waiting” email notifications when students click the URL if you are not in the meeting.
This article was last updated .

Host and Archive Media
Host And archive Media
Depending on whether you need a hosting site for your media or a storage site to archive and/or backup your file, you might use MediaSpace and or Google Drive.
Host with MediaSpace
We recommend uploading your videos to a media hosting platform. MediaSpace (media.pdx.edu) is the media hosting platform PSU contracts with. See step-by-step instructions for uploading media to MediaSpace.
- A media hosting platform stores your video on a server, which provides a url where the video can be accessed, that you can share with your audience. Learn more about sharing your media.
- The hosting platform transcodes your full size video into many ‘flavors’ of different resolutions and sizes. When a user accesses your video, the hosting platform will automatically provide them with the best ‘flavor’ for optimal quality, based on the device they are using and their internet connection. For example, a user on a smartphone does not need to see the full resolution for an optimal experience on that device, so the hosting platform will serve them a smaller resolution size, which will load more quickly, ensuring playback is not interrupted.
- You can control sharing settings. In MediaSpace these are called publication settings. Learn more about publication settings.
This article was last updated .
Archive and backup with Google Drive
If you think you will want to use your video in the future in a different way or you would like to create a backup of your file, you should also consider creating a backup of your video file. We recommend uploading your video to your PSU Google Drive, which provides unlimited file storage on the cloud.
- Access Google drive at drive.pdx.edu.
- Create a folder specifically for your course or project.
For example, if you developed your media during the Winter 2020 term make a folder in Google Drive following this pattern: DEP ### Term Year. For example: (PSY 311 Winter 2020).If you have other documents you are backing up in this location, you might decide to make a sub folder called ‘Multimedia.’ - Upload media files from your computer or device to the Google Drive folder.
The best practice is to use clear naming conventions for your video file name that will help you identify what it is without having to watch it. For example: PSY-311-W2020-Module1-CourseAssignments (DEP-###-TYYYY-OrgUnit-DescriptiveName).

Encouraging student agency through alternative assessments

Research shows that the more we give students qualitative feedback and withhold quantitative grades, the more students are able to absorb that feedback and improve their learning (Schinske & Tanner, 2014). Alternative assessments can support that process.
Building trust with your students is foundational for developing alternative assessment practices that work. It’s important to explain to students why you chose your assessment methods. Wherever possible, provide clarity and transparency around your decisions and expectations. Keep in mind that your students may have spent most of their academic careers growing familiar and comfortable with standard assessments.
Questions to inform your assessment decisions:
- What does it look like when students are learning?
- How can you clearly communicate your expectations to students?
- How can you give students opportunities to reflect and assess their own learning?
Reflecting on your answers to the above questions can help you prioritize where and how to include alternative assessments in your course.
Alternative assessment examples
The five-point system is a compromise between students wanting everything graded and instructors who know that grades can distract from learning. Students earn five out of five points for every assignment, big or small, as long as they do three things:
-
- Submit it on time.
- Follow the directions.
- Do the work completely.
The work doesn’t have to be correct or high quality; it just has to be done. Students receive not just points, but feedback in multiple ways throughout the term: peer review, instructor comments, self-reflections, and comparing their work to models and examples. This helps students learn from their effort and progress. Points averaged over the term are the “effort grade.” At the end of the term, students write a final reflection letter to the instructor explaining what they’ve learned and making the case for the grade they think they deserve. Their proposed grade is averaged in with their effort grade, and that is the grade they earn for the class.
Popularized by Danielewicz and Elbow (2009), contract grading clearly lays out — at the beginning of the class — the tasks students must complete and the behaviors expected of them. The instructor attaches a grade to the contract so students know exactly what to do to earn that grade.
Asking students to give feedback to their peers gives them an opportunity to learn from one another and think critically about their work. Consider giving students specific elements to focus on during peer review and model what good feedback looks like. It helps to provide students with a rubric, checklist, or series of questions to answer as they examine their peers’ work.
Possibly the most radical of alternative assessment methods, student self-assessment requires a paradigm shift for both the instructor and the student. It requires students to truly believe they have the freedom to determine their own grade and the instructor to truly believe that students are capable of doing so fairly. Students can self-assess in large or small courses when they are taught how, and doing so deepens their learning and motivates them to keep learning. Self-assessment can happen in a variety of formats:
-
- Exam wrappers
- e-Journals
- Blogs
- Weekly reflections/check-ins
- e-Portfolios
Implementing alternative assessments
Any use of alternative assessments is likely to be new for at least some of your students. As you implement alternative assessments in your course, it can help to prioritize clear communication around students’ process and progress, and your expectations — even when you and students have designed those pieces collaboratively.
Give students regular feedback on their process work that is not linked to points or grades. Students are more likely to remember feedback and incorporate it into future work if it is not paired with a grade. Check out these research-based tips for giving students meaningful feedback. Low stakes, formative assessments that give you and your students feedback about their learning come in many forms:
-
- Practice quizzes
- Zoom polls during presentations
- Follow-up surveys
- Google Doc reading quote and question collection
- Discussion-forum-based, student-led Q and A
- One-on-one check-ins
Give students clear guidelines, examples, and rubrics that describe the desired learning outcomes for a given assessment. Allow time and flexibility for students to ask questions and make suggestions about how they might meet the learning outcomes in more than one way. Employing a Universal Design for Learning strategy will serve a diversity of learners.
Danielewicz, J., & Elbow, P. (2009). A Unilateral Grading Contract to Improve Learning and Teaching. College Composition and Communication, 61(2), 244–268. https://stats.lib.pdx.edu/proxy.php?url=https://www.jstor.org/stable/40593442
Schinske, J., & Tanner, K. (2014). Teaching More by Grading Less (or Differently). CBE Life Sciences Education, 13(2), 159–166.

Record Meetings in Zoom
Zoom recordings are created within a PSU-sponsored platform and must be created and used in compliance with all applicable laws and PSU policies. These include, but are not limited to: FERPA, the PSU Acceptable Use policy, and the PSU Student Code of Conduct. Recordings may only be used and distributed for academic purposes. Before recording class sessions, please review Videoconferencing, recording, and FERPA. It includes guidelines on protecting student privacy and a recommended syllabus statement on class recordings.
Zoom Cloud recordings are saved for 90 days. All Zoom recordings are also automatically uploaded to the MediaSpace account of the Zoom host. They can only be located if you’ve previously logged into your MediaSpace account, which you can do at https://media.pdx.edu/ Once you’ve initiated your MediaSpace account, Zoom recordings you host are kept indefinitely in your My Media area. You can also record your Zoom meeting locally, which will save the file to your computer rather than the Zoom Cloud and MediaSpace. This is a good option if you plan to edit the video before uploading and sharing it on MediaSpace. You can also do basic video editing in MediaSpace, but it’s limited to removing selected part of the video or trimming either end.
Record your Meeting
Note: you must be a host or co-host of a meeting to record it. Before you start, make sure the Zoom desktop “client” (application) is downloaded to your computer and updated to the latest version.
- Let your participants know you’ll record the meeting ahead of time. See the Zoom Recording and Student Privacy tutorial for tips on recording only your presentation, and address any student concerns about the reuse of the video.
- Test your webcam and lighting before you start a meeting you’ll record. You’ll need to be a host or co-host of the meeting to have recording privileges.
- Start the meeting and then select Record from the Zoom control panel.
Note: If you enabled the option to Record the meetings automatically, the recording will start once you enter the meeting. This setting is found in your Zoom account at pdx.zoom.us. - You will now see a recording icon in the corner of your screen. This indicates your meeting is being recorded.
- Click the stop or pause icons to stop or pause recording but continue the meeting.
- Unless previously stopped, the recording will end when the meeting ends.
- The recording takes time to process and is not available immediately. You will receive an email when the recording is available in the Zoom cloud. The recording will also be available in MediaSpace.
View and Share your Recording
- Sign in to the Zoom web portal at pdx.zoom.us
- Click Recordings from the left navigation.
- Find the recording from the list of available recordings. (If you do not see your recording, it may not have processed yet. Processing time can vary depending on recording length, selected recording settings, and Zoom traffic.)
- Click the meeting title to view/download available recording files.
- Click the Share button to view/adjust share settings and copy the shareable URL.
Caption your Recording
- If students are required to view the recording, request captions through OAI. Our captioning service is set up for MediaSpace, so you will need to share the MediaSpace recording link for captions.
- If you need to request captioning on behalf of a student registered with the DRC, please request captioning through the DRC: Accessible Media Transcript/Caption Request for Student Registered With DRC.
- If students are not required to view the recording and you have no students registered with the DRC who need captions, generate machine captions in MediaSpace.
This article was last updated on .

Edit Captions in MediaSpace
Edit Captions in MediaSpace
This article was last updated .
Whether you have machine-generated or professional captions, the process to edit captions in MediaSpace is the same.
Note: Editing captions will change the transcript automatically.
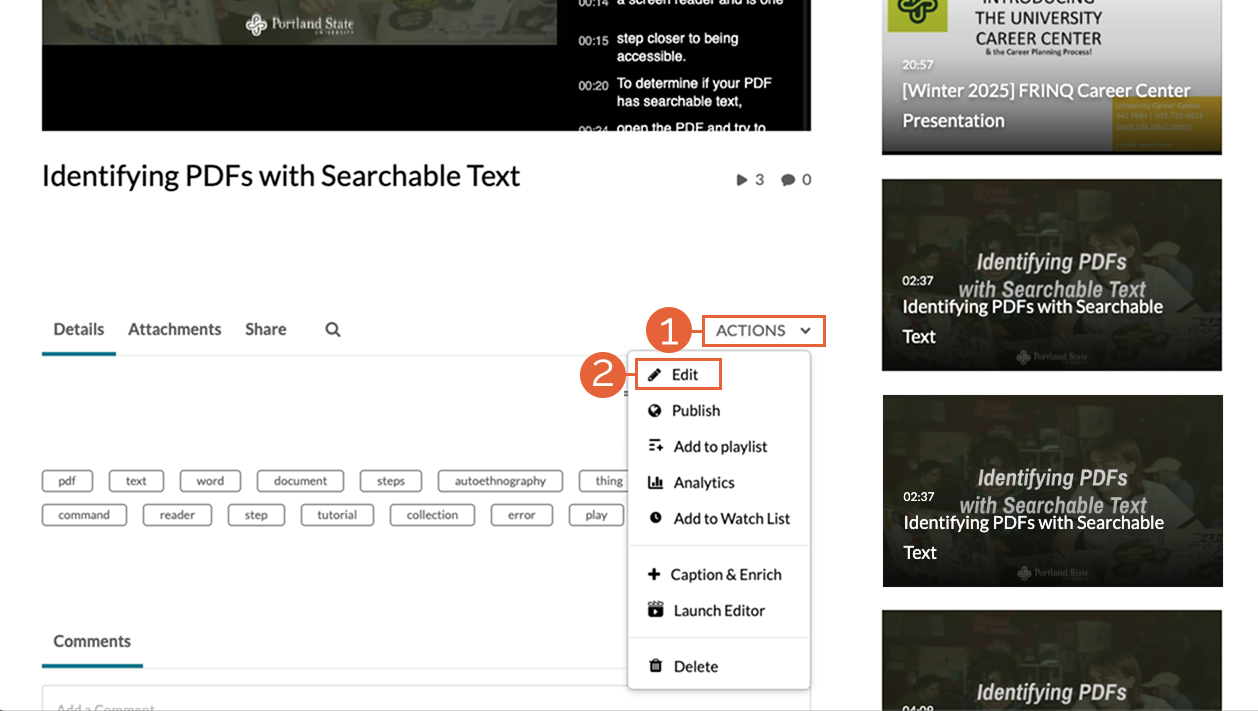
- Select the media from your My Media list.
- Select Actions (1).
- Choose Edit (2) from the dropdown menu.
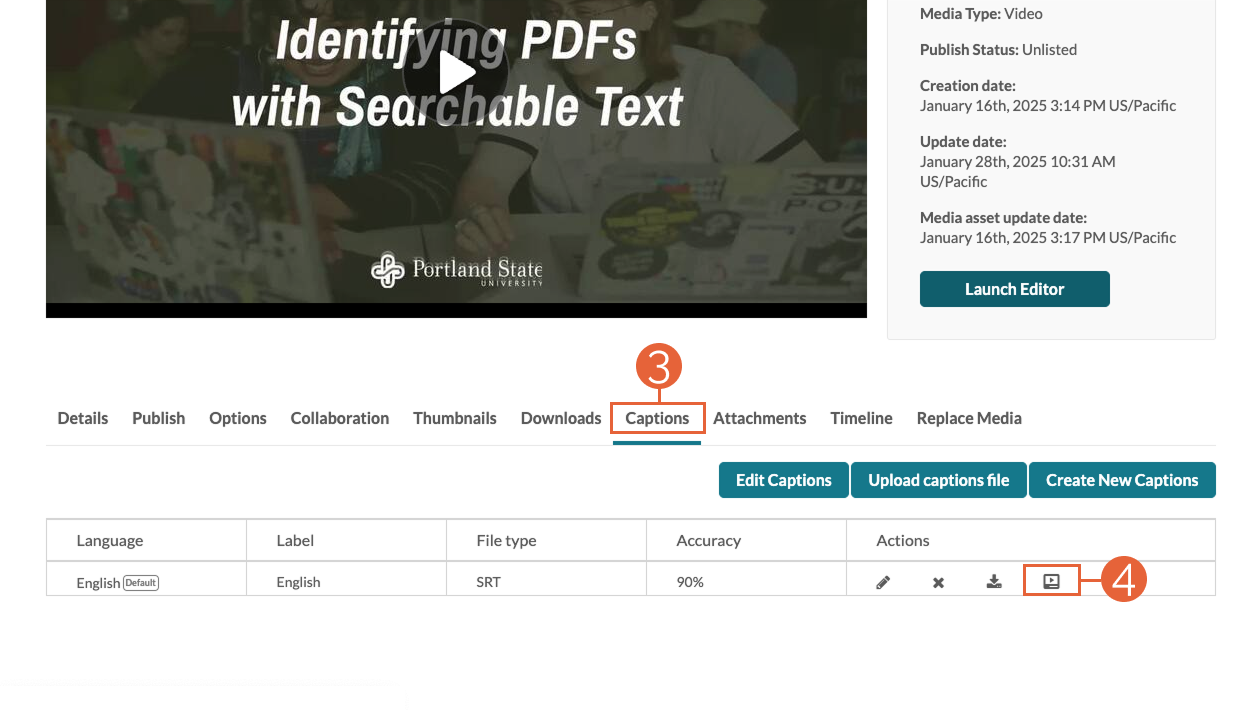
- Select the Captions tab (3) below the media.
- Select the Edit Captions button (4).
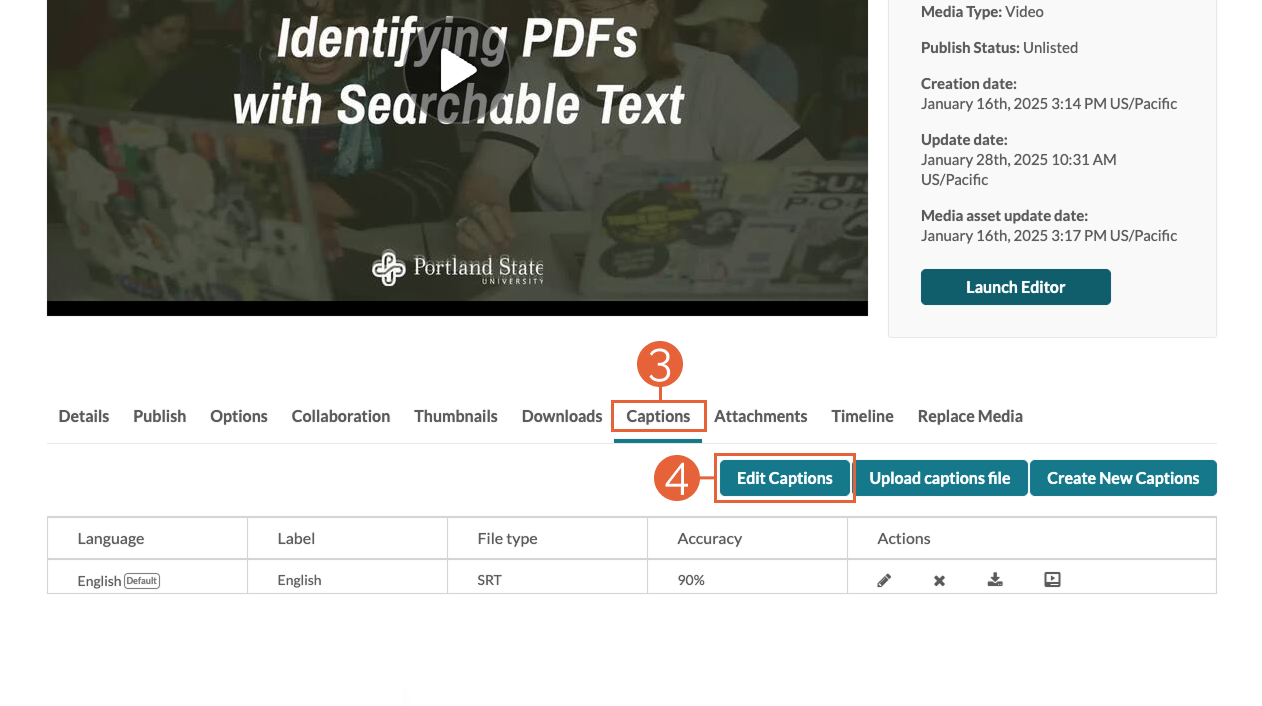
- The timestamped captions will appear alongside your video. Start the video to determine where edits to your captions are needed. When you find an error, select the text to the left and make the change.
- Once you’ve made all your changes, be sure to select Save.
Note: There is no autosave function and inactivity may cause the editor to time out. To ensure you don’t lose progress, try to save frequently while you are working.

Add Captions to MediaSpace Videos
Adding Captions to MediaSpace Videos
This article was last updated .
Adding captions to videos improves accessibility for all viewers, regardless of their physical abilities. Captions can help enhance viewers’ comprehension in noisy or quiet environments, and boost engagement by making content easier to understand.
There are two main ways captions are added to your MediaSpace videos: automatically machine-generated, or through a request for professional captioning. The sections below outline the reasons for utilizing each and how to decide which is best for your video.
Using Machine Captions
At PSU, machine captions are automatically generated for all videos uploaded into MediaSpace. This includes both manually uploaded videos as well as those automatically migrated into MediaSpace from Zoom recordings. Machine captions are a great starting place when you don’t have time to wait for professional captions to be created or when you create a video that will only be used once. However, they usually do not meet ADA accessibility requirements due to their lack of accuracy.
To ensure that your machine captions are ADA accessible, you should always review the default captioning and edit where necessary. You can learn more about editing your captions by reviewing Edit Captions in MediaSpace.
Enabling Machine Captions Settings
Once you’ve confirmed that your captions are accurate, you will need to enable them to be viewable on your video. To do this:
- Select the desired media from your My Media list.
- Open the Actions menu (1) and select Edit (2) from the dropdown menu.
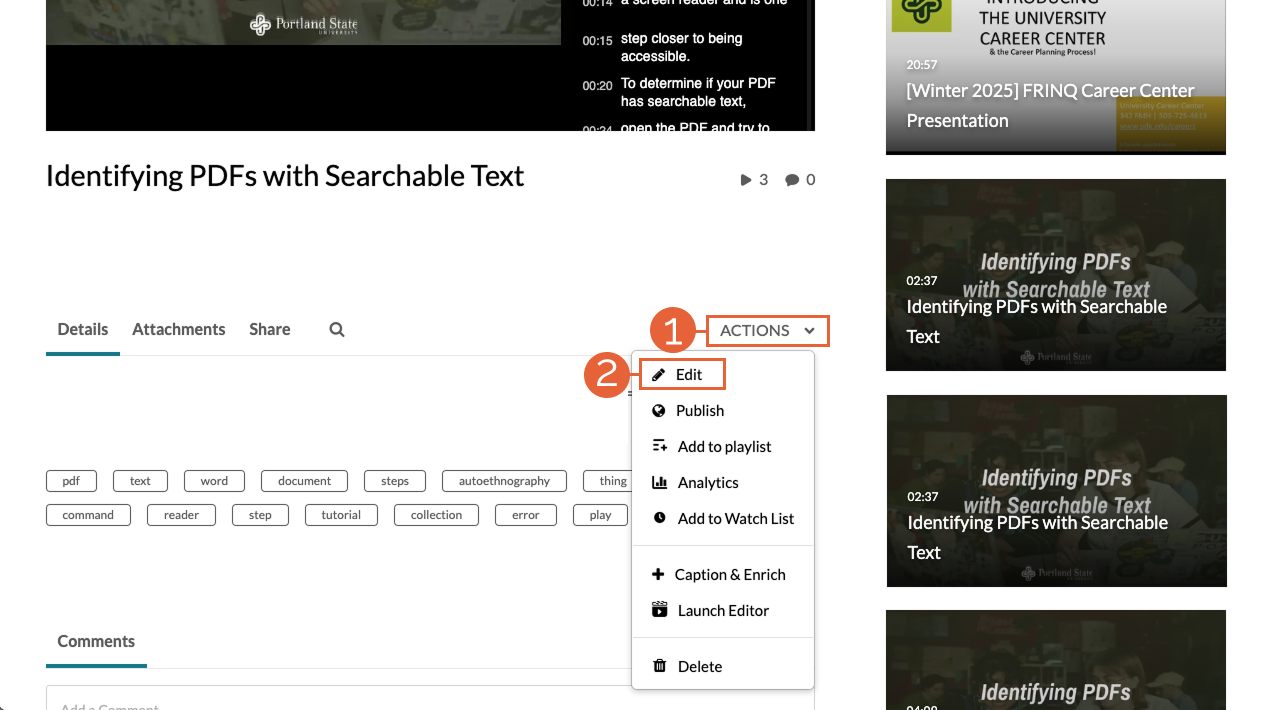
- Choose the Captions (3) tab below the media.
- A table appears that shows your caption file. In this table to the far right is the Show Captions on Player icon (4). Use this icon to toggle your captions on.
Request Professional Captions, when appropriate
Professional captioning is a paid service with a per-video-minute captioning rate. Professional captions meet higher accuracy standards than machine captions because a professional captioner reviews and edits the captions for accuracy.
Professional captioning may be requested through the Office of Academic Innovation (OAI), the Disability Resource Center (DRC), and the Office of Information Technology (OIT), depending on the nature of your multimedia content. Please refer to the options below for details:
- If you are a faculty member requesting captioning for academic course content you own that will be reused, is required for students, and is located in your MediaSpace account, please request captioning through the OAI: Caption Request Form (for Academic Content).
Note: Because of our service billing process, you will need to submit a separate request for each video you would like to have captioned.
- If you are a faculty member requesting captioning on behalf of a student registered with the DRC, please request captioning through the DRC: Accessible Media Transcript/Caption Request for Student Registered With DRC.
- If you are a pdx.edu content developer and you are planning to share multimedia content via the public-facing pdx.edu website, please request captioning through the OIT: Caption Request for pdx.edu Multimedia.
Note: Professional captions are automatically enabled on your video once they have been created.
Start or Join a Zoom Meeting in Canvas
Start or Join a Zoom Meeting in Canvas
Zoom meeting links will prompt you to open the Zoom desktop client/application. Be sure to download it prior to your meeting.
Links may also allow you to “join from your browser,” but many features only work in the Desktop client. For example, students cannot be preassigned to breakout rooms if they join from a browser instead of the app.
- Login to Canvas at canvas.pdx.edu
- From your Dashboard, open the course in which the Zoom meeting is scheduled.
- Select Zoom in the course navigation menu.
- Find your meeting from the list of upcoming meetings and click Start or Join.
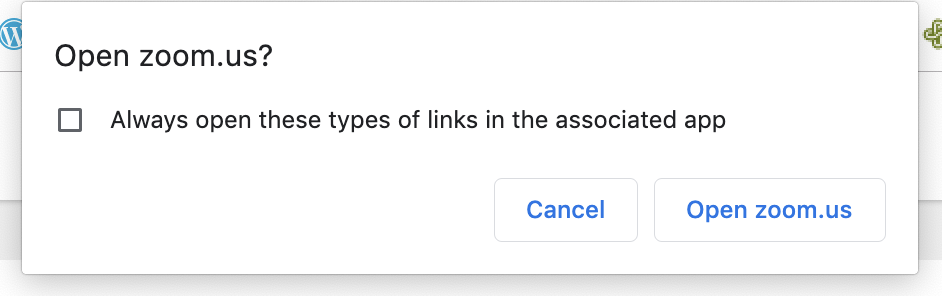
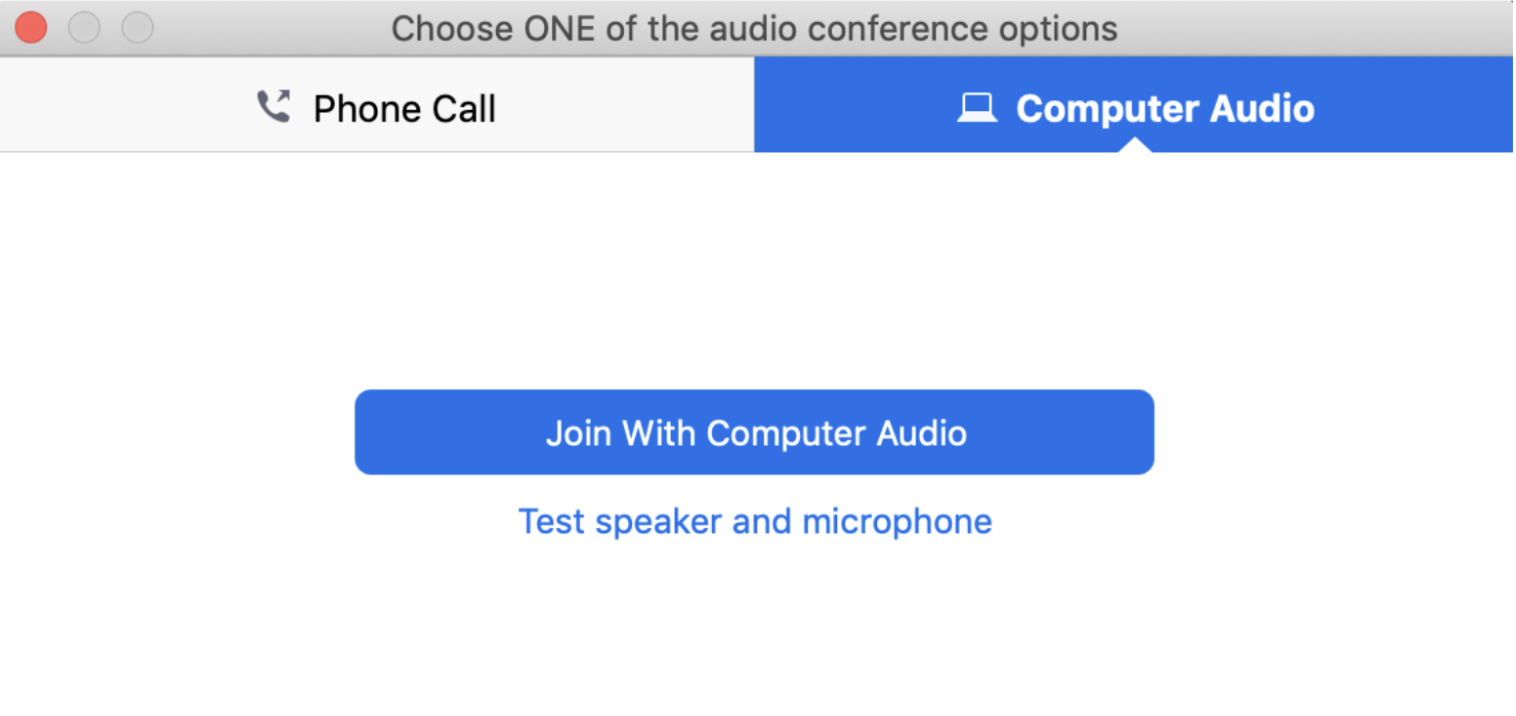
- Confirm the browser dialogue to launch Zoom.
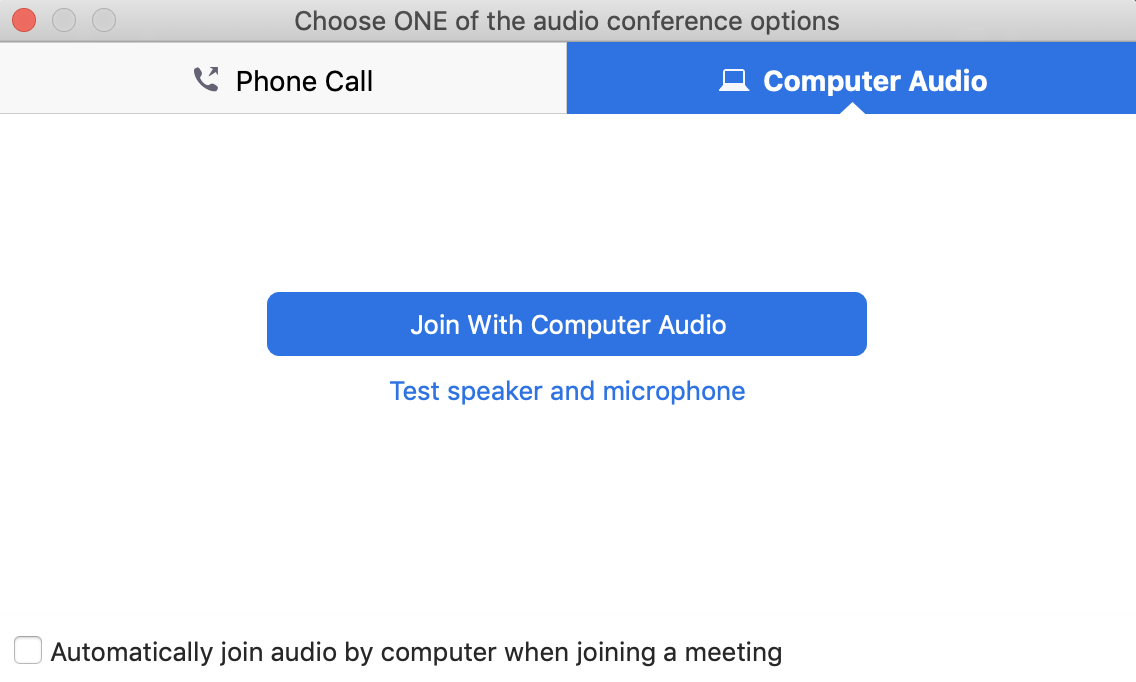
Note: You may wish to check the box to “Always open these types of links in the associated app.” Select your audio conference options. In most cases, you should choose “Join With Computer Audio,” which may be your only option.
This article was last updated .
Schedule a Zoom Meeting in the Client/Application
Schedule a Zoom Meeting in the Client/Application
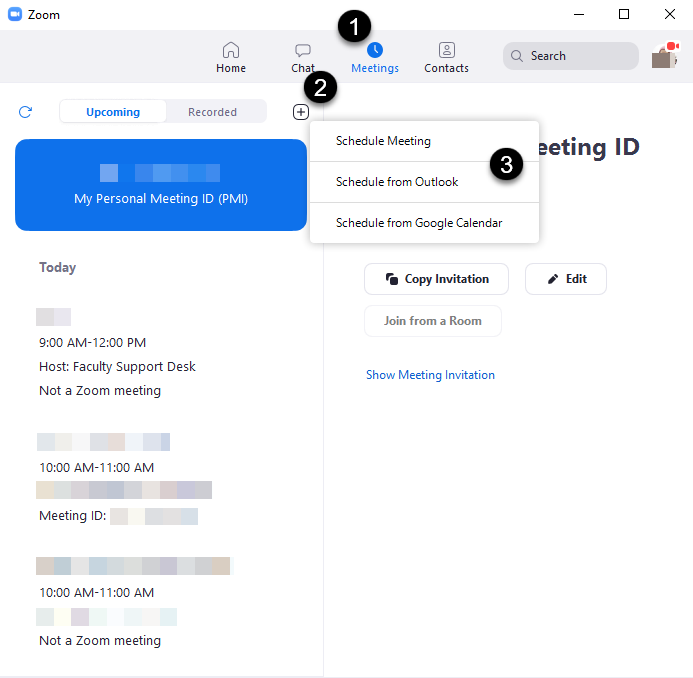
Open the Zoom desktop client. Download and install it if needed and then sign in with your PSU credentials. The application has four tabs at the top: Home, Chat, Meetings, and Contacts.
- Select Meetings.
- Just below the row of tabs there is a small plus sign icon. Select that to open a menu.
- From the menu, select a scheduling option.
- Title: Enter a descriptive title.
- Description (optional): Enter an optional meeting description.
- When: select date and time for the meeting to start.
- Duration: Enter your planned duration. This will not cut off the meeting if you run over.
- Time Zone: Confirm or select the correct timezone.
- Recurring Meeting: Select this option to create a recurring meeting. Once selected, you’ll have the option to choose how often the meeting recurs, and when to stop repeating. Each occurrence will be listed in Canvas, but they will use the same meeting URL.
- Registration: Deselect unless you need detailed attendee information from external guests.
- Video: Choose whether the meeting host (you) and participants will join the meeting with video enabled or disabled. Users can enable or disable their video feed at any point during the meeting.
- Audio: Ensure Both is selected.
- Mute participants on entry (recommended for large classes).
- Enable waiting room. This can be set to hold only non-PSU guests in your settings at pdx.zoom.us.
- Select Record the meeting automatically in the cloud to share a recording link with students.
- Restrict to authenticated users signed in with PSU Odins. You can adjust this for specific meetings when you expect external guests.
Select Save. In the Meetings window you can now select the Copy Invitation button to share your meeting link with guests.
This article was last updated .
Join a Zoom Meeting
Join a Zoom meeting
Note: Zoom works best via the Zoom app. You do not need administrator privileges to download and install the Zoom app on your computer. If you cannot download the app, you may join a meeting via the Zoom Web Client, which runs best in Google Chrome. (View more information about Zoom and browser compatibility.)
Note: Zoom works best via the Zoom app. You do not need administrator privileges to download and install the Zoom app on your computer. If you cannot download the app, you may join a meeting via the Zoom Web Client, which runs best in Google Chrome. (View more information about Zoom and browser compatibility.)
Download the Zoom App
Download the appropriate Zoom app for your device at https://zoom.us/support/download
Note: This step is only required the first time you join a meeting from your device. Once installed, you do not need to install the Zoom app for subsequent meetings.
Join the Meeting
- Click the Zoom link for the meeting you would like to join.
- The link will be shared with you from the meeting organizer.
- If you are the meeting organizer, you can find the Zoom meeting link in your upcoming meetings list.
- Confirm the browser dialogue to launch Zoom. (Note: you may wish to check the box to “Always open these types of links in the associated app”.)

- Select your audio conference options. In most cases, you should choose “Join With Computer Audio,” which may be your only option. (Note: you may wish to check the box to “Automatically join audio by computer when joining a meeting”.)
This article was last updated .
Getting Started with Zoom
Getting Started with Zoom
Zoom is videoconferencing software available to the PSU community. In addition to these instructions Zoom has a robust support site, including video tutorials.
Download the Zoom desktop “client” application
To effectively create and join Zoom meetings, you’ll download the Zoom Meeting Client (in this context, “client” means a small desktop application). Zoom meeting links can allow guests to “join from your browser.” We encourage you to deselect this option in your Zoom settings, since many features only work in the Desktop client. For example, students cannot be preassigned to breakout rooms if they join from a browser instead of the app.
Download the application here: https://zoom.us/download. You do not need administrator privileges to download and install it. You should also check for updates monthly. Zoom is adding features regularly and older versions may not support them.
Install and sign in to the desktop client
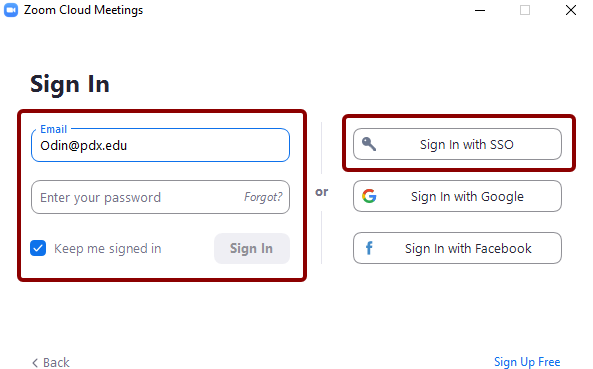
- To install, navigate to where you downloaded the installation file and open it. This will open a pop-up window.
- Select Sign In, then enter your Odin account information and authenticate with Duo.
- If prompted, confirm the browser dialogue box to open the application.
Install and sign in to the desktop client
- To install, navigate to where you downloaded the installation file and open it. This will open a pop-up window.
- Select Sign In, then enter your Odin account information and authenticate with Duo.
- If prompted, confirm the browser dialogue box to open the application.
Settings in Zoom
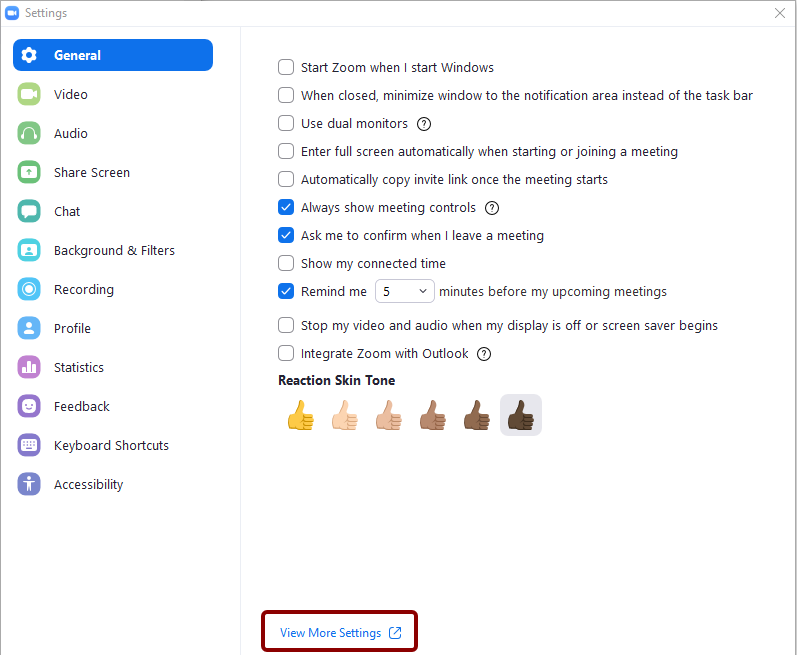
In the upper-right corner of the Zoom application there is a small gear icon. Selecting this will open an application window with a range of setting options. For the full set of options you can select the blue View More Settings link at the bottom of this screen. This will launch the PSU Zoom web portal at pdx.zoom.us. This is where you can customize detailed meeting settings, edit scheduled meetings, see details about past meetings, and access your Zoom cloud recordings. Cloud recordings are saved for 90 days, but are also backed up in your PSU MediaSpace account at media,pdx.edu (make sure your account is active).
Zoom in Canvas
If you are using Canvas, we strongly recommend scheduling course meetings within Canvas using the Canvas Zoom meetings integration. This stores meeting links and recording links in your course, making it easy for students to find them. Some meeting functions must be configured in the web portal, but it’s always best to create them in Canvas if you’re teaching there.
Note: OAI recommends the inclusion of a syllabus statement if you plan to record any of your Zoom meetings. See a recommended syllabus statement and learn more about FERPA implications of Zoom in our Zoom and FERPA guidance. You may also want to learn consider Zoom recording and student privacy.
This article was last updated .