After you upload a recording to MediaSpace, you may discover unwanted or unnecessary moments, such as false starts or flubbed lines, that need to be edited. The MediaSpace platform includes a built-in, browser-based video editor that allows you to make these edits without downloading additional software, making the process simple and accessible.
This tutorial covers the built-in MediaSpace Video Editor, which can only be used to edit videos that have been uploaded to MediaSpace. If you recorded your video on another platform and want to use this editor, you can easily upload video or audio to your MediaSpace account. PSU Zoom recordings are uploaded to MediaSpace automatically.
If you are looking for help updating your video captions, visit the Edit Captions in MediaSpace tutorial.
How do I access the MediaSpace editor?
- Log in to your MediaSpace account.
- Select your name in the top right corner and then select My Media.
- Find the video you wish to edit and select its title. This will open the video’s main page.
- Select Actions and then select Launch Editor.
How do I use the MediaSpace editor?
For a more detailed overview of the Kaltura MediaSpace Editor, visit the Kaltura Video editing tools tutorial.
The Video Editor screen is divided into three sections:
- The viewer (1): Located in the upper right, the viewer is where you can watch and preview your edited video.
- The media bin (2): Found in the upper left, the media bin displays basic details about your imported video files. To create more space, you can hide this area by selecting the collapse panel icon.
- The timeline (3): Located at the bottom of the page, the timeline is your primary workspace where you will perform all video edits and trims.
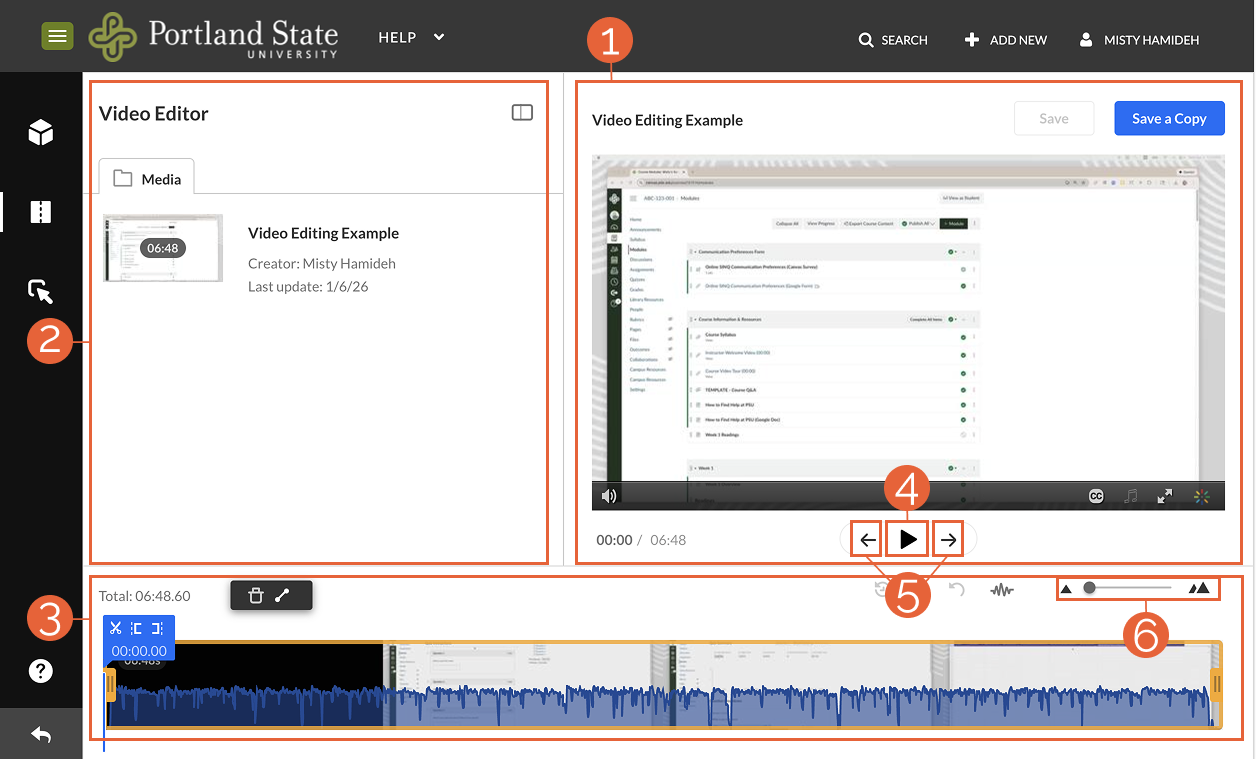
To review the video and identify where you want to make edits, use the following methods to navigate the video:
- Play the video. Play or pause your video using the space bar on your computer or by selecting the Play/Pause button (4) underneath the Viewer.
- Jump to a specific point in the video. Use the arrows on either side of the Play button (5) to move to the beginning or end of your video, or use the mouse to select a point directly on the timeline.
- Pinpoint the exact frame. Use the zoom slider (6) to zoom in on the timeline for increased precision.
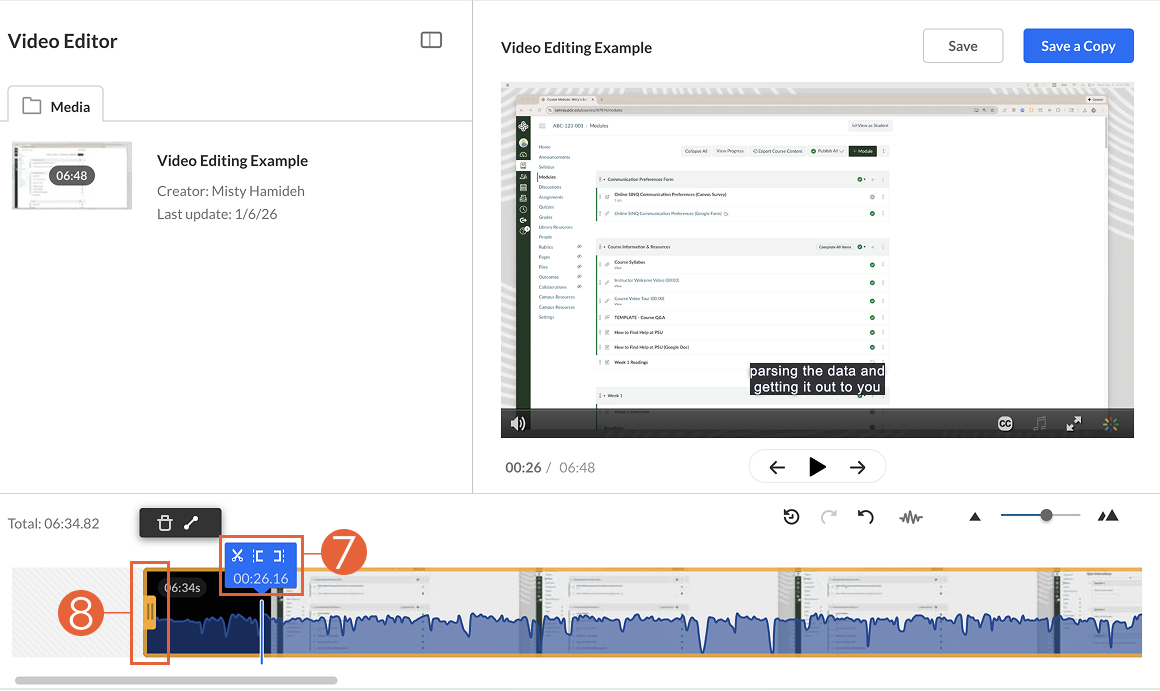
- Play the video from the beginning and pause it at the point you would like your video to start. Note the six-digit timestamp (7) shown on the blue flag in the timeline. Note: To identify the location more precisely, use the zoom slider to zoom in on the Timeline and drag the timestamp flag to adjust its position as needed.
- Once you have your starting position placed, select the orange handlebar (8) at the beginning of the timeline and drag it toward the starting point you identified. The handlebar will snap to the blue flag.
- Repeat these steps at the end of the video. Select the final frame you want to include, then drag the handlebar at the end of the timeline to that position.
- Finally, play the video to confirm the edits. Adjust the handlebars as needed, and when you are satisfied, save a copy of your edited video.
- Play the video and pause it at the point where you would like your cut to begin. Note: To identify the location more precisely, use the slider to zoom into the video for more granularity and drag the timestamp flag to adjust this position as needed.
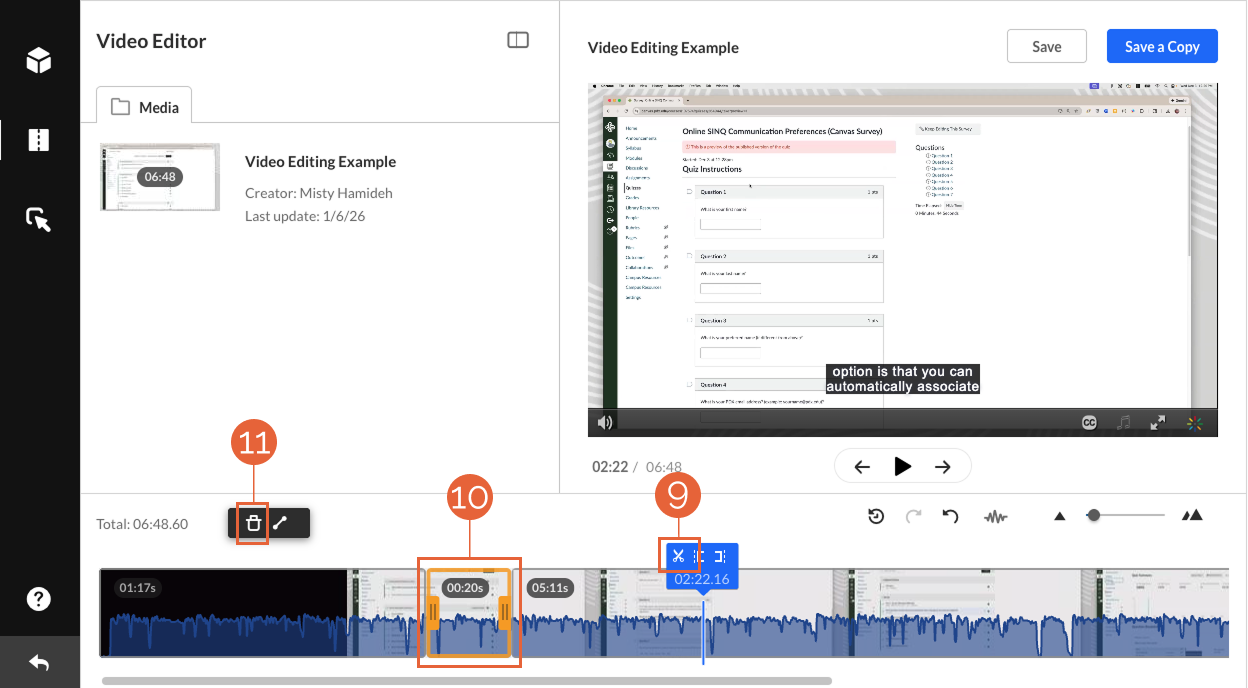
- Select the scissors icon (9) found on the blue flag in the timeline to split the video into two segments. Repeat this step at the end of where you want to make the cut.
- There will now be a small video segment between the orange handlebars (10) in the middle of your timeline. Select this segment, then either select Delete on your keyboard or the trash icon (11).
- Play the video to confirm the edits. When you are satisfied, save a copy of your edited video.
The timeline will show a gap whenever you remove sections of your video, representing the footage that used to be there. Do not attempt to move your trimmed video to close these gaps. MediaSpace will remove them when saving your edited copy.
These “jump cuts” may make it seem like something is missing, but students are familiar with them from other media. With experience, you may find you want to create jump cuts as part of your video strategy. Don’t be afraid to experiment!
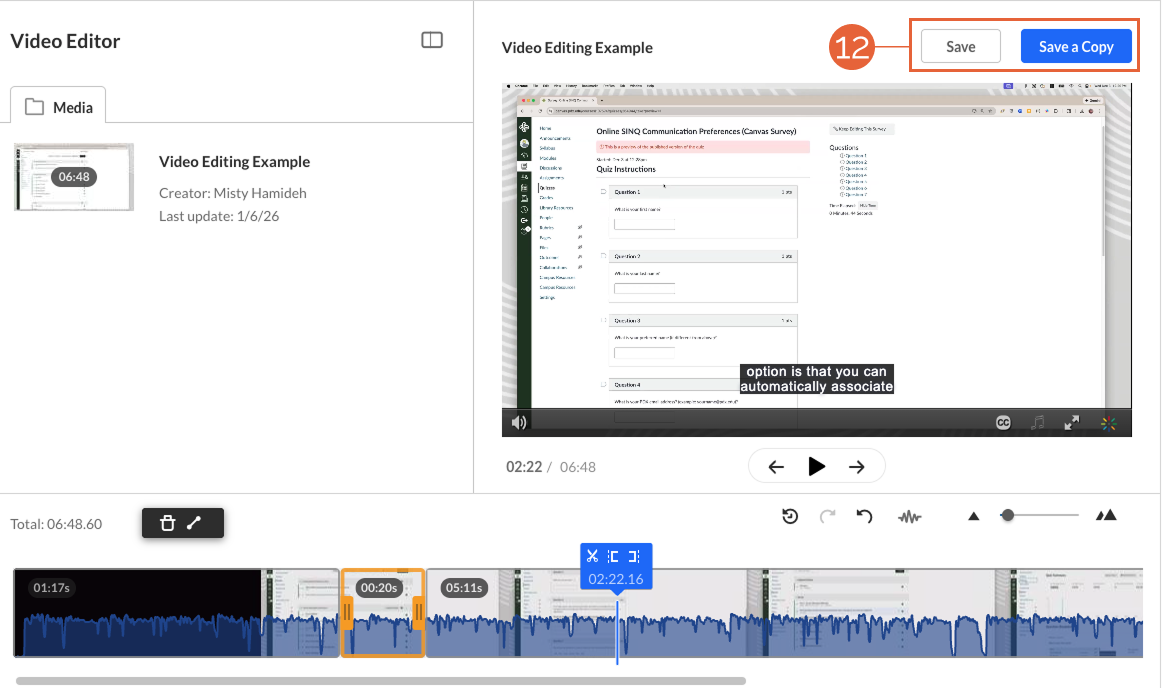
Once your edits are complete, you can either Save or Save a Copy (12):
Save a Copy - a safer option.
Choosing the Save a Copy option creates a new video and saves it to your My Media. The original video will still be available if you ever want to go back to it, which makes it non-destructive. However, you will need to update any previous links or embeds to the new video in order to see the edits.
Save - proceed with caution!
Selecting the Save option will permanently alter the video by removing the material you have edited out. This is destructive, which means it actively deletes video segments and is irreversible. You will be given a chance to confirm that this is what you want to do before finalizing.
Why use this option? If you have already embedded this video in multiple places, this option will preserve those links and will only update the video itself.
Both of these options require several minutes to complete, depending on the length of the video and the edits made. The video editor will indicate when it is safe to close the browser window.
This article was last updated .
You might also like


👋Need more help?
Submit a support request through our Faculty Support portal for assistance.