logo
  • Find resources
        • Teaching Guides
          • Assessment
          • Course design
          • Engagement
          • Inclusion
          • Multimedia
          • Teaching strategies
          • Teach with Canvas
          • All teaching guides
        • Technology
          • Canvas
          • Google Workspace
          • MediaSpace
          • PebblePad
          • Zoom
          • All platforms
        • Get Help
          • Instructor support
          • Teaching at PSU
  • Portland State University
Back to Mediaspace tutorials

In this article

In-recording keyboard shortcuts

In-recording annotation tools

Enable multi-stream recording

👋 Contact Support

Use Advanced Tips and Tricks in Kaltura Capture

This tutorial outlines the main in-recording controls and how to enable multi-stream recording in Kaltura Capture.

In-recording keyboard shortcuts

If you are making many recordings in Kaltura Capture, you may find it helpful to use the keyboard shortcuts to quickly control recording functions. It may be useful to write down your preferred controls on a sticky note attached to your computer for easy reference while recording.

These keyboard shortcuts are only available once you launch Kaltura Capture.

  • Start, Pause, or Resume Recording: Command (Mac) or Control (Windows) + Shift + R
  • Stop Recording: Command (Mac) or Control (Windows) + Shift + S
  • Cancel Recording: Command (Mac) or Control (Windows) + Shift + C
  • Go to Management: Command (Mac) or Control (Windows) + Shift + M

In-recording annotation tools

Kaltura capture includes a number of digital annotation tools you can use to mark up your screen while recording.

These keyboard shortcuts are only available once you launch Kaltura Capture.

Select the pencil icon (2) to use the screen annotation tools.

Kaltura Annotation Tools

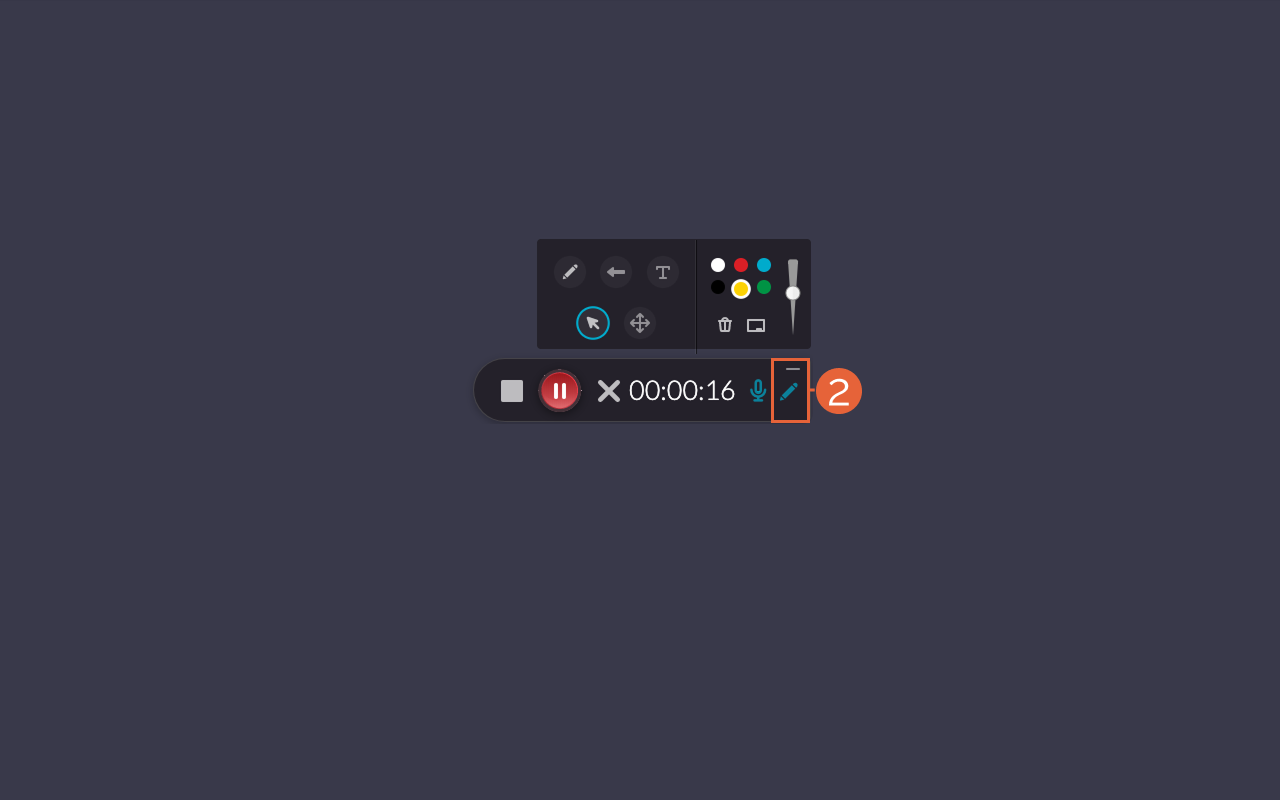
The annotation tools in Kaltura available to you include:

  • A pencil for freehand writing and drawing
  • An arrow for highlighting specific parts of your screen
  • A type tool for adding typed text
  • A color selector to change the colors of your annotations
  • A size bar to change the size of your text, arrow, or thickness of your freehand line
  • A trash bin which will clear all your annotations
  • A pop-up whiteboard

Enable multi-stream recording

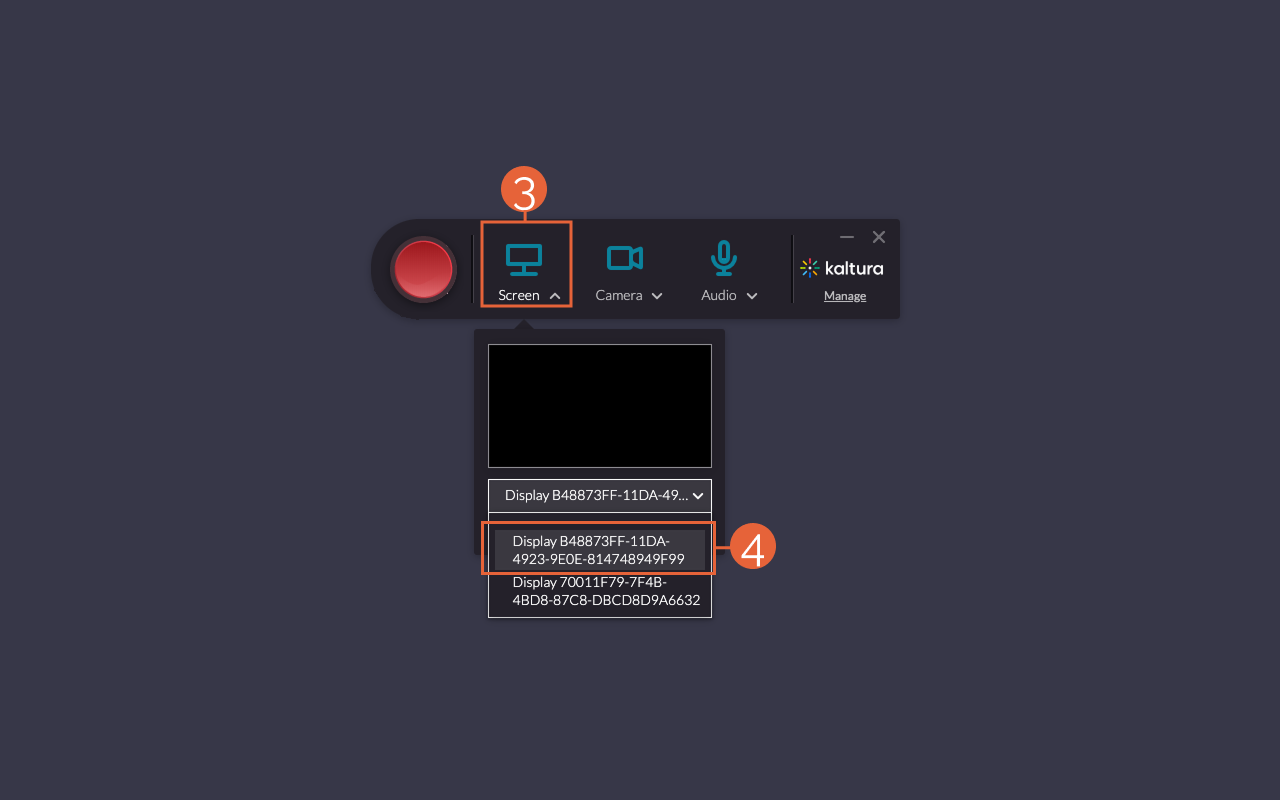
Advanced users may need to record more than one screen or video steam at time. This tutorial demonstrates how to enable multi-screen recording, but you will follow similar steps to enable other multi-video recording.

NOTE: Kaltura Capture enables a maximum of 2 video sources, so you may record screen and camera, 2 screens, or 2 cameras.

  1. Log in to MediaSpace and launch Kaltura Capture.
  2. Select the word “Screen” (3) and select your first screen input (4) from the available options.
Kaltura Screen Selection
  1. Select the word Camera and select your second screen input from available options. NOTE: “Camera” will change to “Screen” once you select a screen input.
  2. Proceed to record as usual.

This article was last updated Dec 31, 2025 @ 3:06 pm.

You might also like

Create a Media Recording with Kaltura Capture

Download and Install Kaltura Capture

👋Need more help?

Submit a support request through our Faculty Support portal for assistance.

Contact support

The Office of Academic Innovation

OAI+ is the self-service resource website of Portland State University’s faculty support unit, the Office of Academic Innovation (OAI).

Get in touch

Request Support 

Collaborating with OAI+

Newsletter

Sign up for the Teaching @ PSU newsletter and stay informed on pedagogical insights and faculty development opportunities.

Socialise

Creative Commons by attribution, non-commercial

Except where otherwise noted, this work is licensed under a Creative Commons Attribution-NonCommercial 4.0 International License.

Privacy Preference Center

Privacy Preferences