Schedule a Zoom meeting in the client/application
There are several ways to schedule a Zoom meeting. The following tutorial demonstrates how to schedule a Zoom meeting through the desktop client or application. You can also schedule a meeting through the Zoom web portal or through the Canvas Zoom LTI for class Zoom meetings.
- Open the Zoom desktop client. Download and install it if needed and then sign in using the SSO option with your PSU credentials. The application has four large buttons on the left – New Meeting, Join, Schedule, and Share Screen.
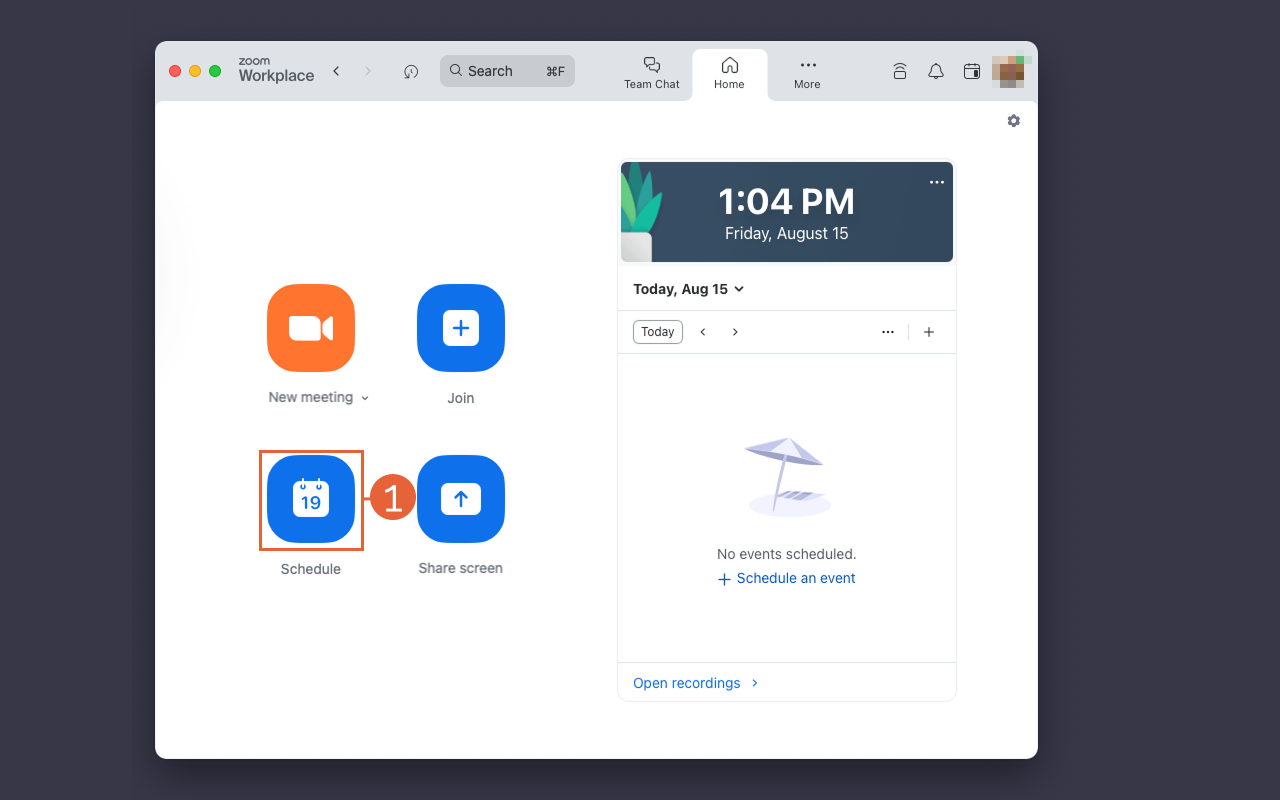
- Select Schedule. (1)
- Enter meeting details:
- Title: Enter a descriptive title.
- Time and Date: select date and time for the meeting to start and end. You can also make the meeting a recurring meeting in this section.
- Invitees: Enter the names of the people you wish to specifically invite to the meeting. They will receive an email. This is an optional step, you can always share a link to the meeting with larger groups.
- Type: Leave this set to “Zoom Meeting.”
- Rooms or Locations: Leave empty. Use Google calendar to schedule PSU room locations.
- Add Meeting Agenda: (optional) This is a space to add an item description or any other links to documents you may wish all participants to have beforehand.
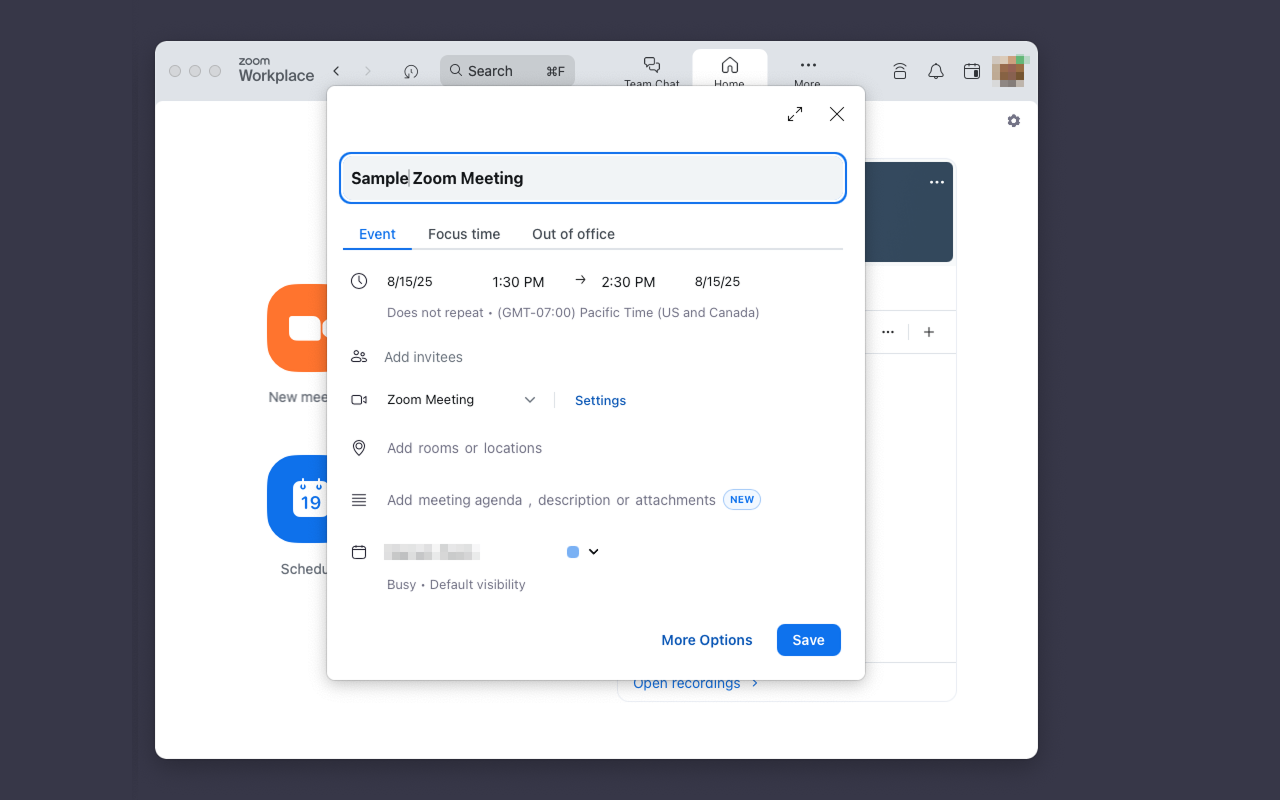
- Select Save in the bottom corner of the window.
- You should now see your meeting on the right side of the window as part of your daily Zoom calendar. Select the three dots (2) in the bottom corner of your meeting.
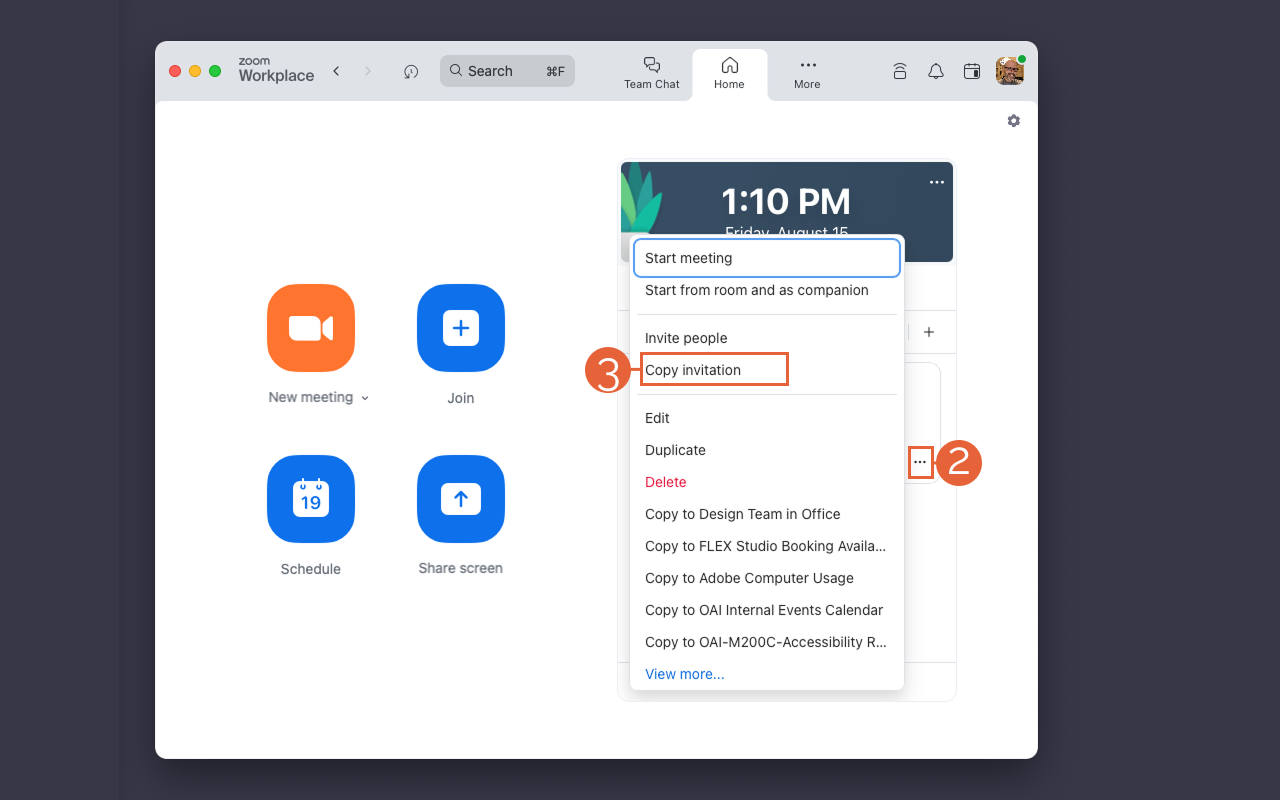
- Select Copy Invitation (3). This will copy the meeting information to your clipboard for easy sharing with guests. Note that the information not only includes the main meeting link, but various phone numbers people without Zoom available can use to call into the meeting if necessary.
This article was last updated .


👋Need more help?
Submit a support request through our Faculty Support portal for assistance.