
Add Video to Canvas with MediaSpace
Once you’ve uploaded a video to My Media in MediaSpace, you can share it with students in your Canvas course. Your Zoom Cloud recordings are also saved to your MediaSpace after you’ve logged into your account at least once.
Publish your video to Unlisted
The first step is always to make sure your video is published as Unlisted, not Private.
- Go to http://media.pdx.edu
- Click on PSU User.
- Click Login.
- On the PSU Single Sign-On page, enter your Odin username and password, then confirm with Duo.
- In MediaSpace, click your name in the upper right corner, and select My Media.
- Find your video in the list, and click on it.
- Find the Actions menu in the lower right.

- Click the + Publish option in the list.
- In the publishing settings below the video, make sure that your video is set to Unlisted.
- Click Save.
Media maybe added to a Canvas in several ways, depending on the source and how you want it displayed. When sharing media from Kaltura MediaSpace you must publish that file to unlisted rather than private.
- Upload a media file to play in a Canvas page.
- Record a media file to play in a Canvas page.
- Link to an external media source in the Rich Content Editor (note that the YouTube “App” option is not available).
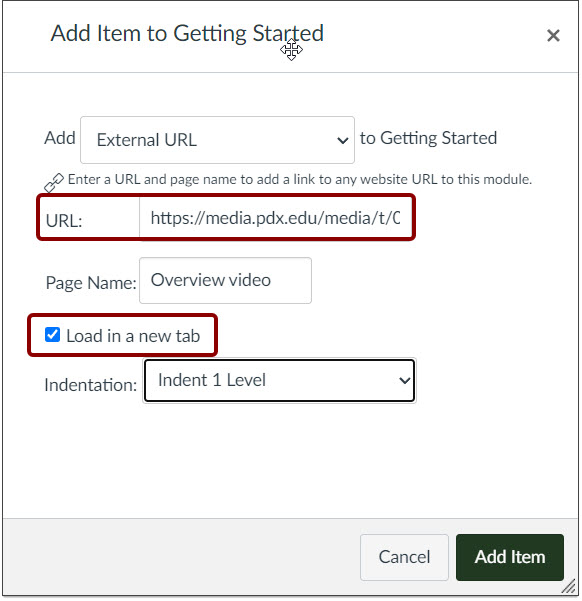
- Link to an external media source from a Module.
Note: for MediaSpace files and most other media hosts, select the “Load in a new tab” checkbox.
- Embed external media by inserting embed code into the Rich Content Editor. (This works for MediaSpace videos with the same results as the next option).
Embed a MediaSpace video or audio with the Kaltura LTI menu option
- In your course, navigate to the page where you want to embed a file from your My Media list (make sure the file is published to unlisted).
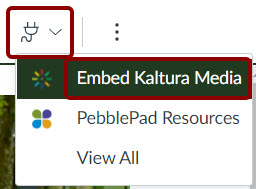
- Select the Apps icon (an electrical plug) and select Embed Kaltura Media.
- Search for the media file you want, position your cursor in the Rich Content Editor where you want the media, and select the blue </>Embed button.
- Save and publish your page.
Note: the Kaltura Media Gallery option is not recommended for use in Canvas. Kaltura Video Quizzes may be used, but because browser settings can prevent some students from being assessed, it’s not recommended as a graded activity.
This article was last updated on .

Share an Asset With Other PebblePad Users
Assets are the building blocks of PebblePad. Simply put, assets are files: They can be portfolios that include many pages, pages themselves, images, templates, and more. Once you’ve created an asset, you can share it with other PebblePad users. You decide how much access they have to the file. These instructions are for sharing assets with other users via Pebble+.
- Log into PebblePad from http://pebblepad.pdx.edu/.
- Click on the burger menu (three stacked lines like a hamburger) in the upper left corner of your screen.
- Get used to using this menu; it’s the quickest way to jump from place to place in Pebble+.
- Get used to using this menu; it’s the quickest way to jump from place to place in Pebble+.
- Click Asset Store from the menu that appears from the left.
- Find the asset that you want to share in the list, and click the i icon in the right-most column.
- In the tab that opens from the right, click the I want to… button.
- Click Share from the drop down list.
- From the pop up window, in the I would like to share this section, click With people.
- Search for the person you’re sending the file to in the Who are you sending this to? section:
- Use the Look for other PebblePad users option if the person doesn’t show up right away in the search.
- Make sure the person you’re sending the file to has logged into PebblePad at PSU before. Accounts aren’t created until one logs in for the first time.
- To share with additional people, repeat the search options.
- In the What can your recipients do with this? section, check as many options as needed.
- In the Why are you sending this… section, you can add an optional message to the recipient.
- Click the Share asset button when you’ve gone through all options. This sends an email notification to the people you’re sharing with, and gives them access to the file.

Note: PebblePad provides additional in-depth help guides.

Allow Others to Create Clips of Your Video
Clipping is disabled for other users by default. Unless the video owner allows clipping, only the owner of the video will be able to create clips.
- Click on your name > My Media in the upper right corner.
- Find the video in the list and click Edit.
- Click the Options tab.
- Check the box for Clipping: Enable everyone to create clips from this video.
- Click Save.
This article was last updated on .

Remove Media From a Playlist
- Click on your name > My Playlists from the upper right corner.
- Click on the playlist from the left column.
- Find the media item you want to remove from the list, and click the X in the right corner
- Click Delete in the pop up window.
This article was last updated on .
Upload Video or Other Media to a Channel
Use these instructions to upload a video, audio file or image directly to a channel. For private materials that you don’t want to publish, upload to My Media.
- Click on your name > My Channels from the upper right corner.
- Click on a channel.
- Click the + Add Media button.
- Click Add New > Media Upload.
- Check the box to agree to terms and conditions for PSU’s copyright policy.
- Click the + Choose a file to upload button.
- Find your video and click add or open.
- Once the upload completes, enter a Name for the media.
- Enter a brief Description as needed.
- Enter Tags.
NOTE: Tags are not required, but can make searching for your media easier. - Click Save.
- Click Go To Media, and make sure everything looks ok.
This article was last updated on .

Turn Comments Off or On
- Click on your name > My Media in the upper right.
- Click the Edit button to the right of the video or media item you want to change.
- Click the Options tab.
- Check or uncheck the box for Disable comments for this media.
This article was last updated on .
Create a New Portfolio
A Pebble+ portfolio is made of a collection of pages, images, and other assets that tell a story about you and the work that you do. Combine existing assets or start from scratch to make your portfolio.
Note: Editing and adding content within a portfolio page is just like working on any page in Pebble+, so it’s not covered here. If you need help, check out our additional tutorials, or use the Help button in the lower right corner of any Pebble+ page.
Create a Portfolio
- Log into PebblePad at pebblepad.pdx.edu
- Click on the burger menu (three stacked lines like a hamburger) in the upper left corner of your screen, and click Asset Store from the home page.
Get used to using this menu; it’s the quickest way to jump from place to place in Pebble+.
- Click Get Creative and then Create a portfolio.
Create Structure
You have lots of options when it comes to putting the structure of your portfolio together. This section will show you how to create two different structures: Menus that include other assets that expand top to bottom and menus that can be added from left to right.
Note: These instructions will only work for brand new portfolios; if you’re working with an existing portfolio, settings will vary. Use this as a basic guide, but feel free to try options that aren’t described below.
Top to Bottom
- Click the + (plus) icon on the New page tab.
- Click the Add a new page here or Add an existing asset button to include pages and other assets in the top to bottom menu.
- Once you have your pages added, you can click the gear icon next to each item to rename. Click Confirm.
Left to Right
You can add additional top to bottom menus, starting from the left to right. You can think of each of the top to bottom menus as a mini “portfolio,” organized by topic, or whatever makes sense to you.
- Click the stand-alone + icon to the right of the last portfolio tab.
- Click Add a new page here.
- From here, you can add additional pages in the menu under the new page you just added, following the top to bottom instructions above, or you can just have a single page linked to the navigation bar.
Reuse Pages
If you create a page or portfolio within your new portfolio, it’s not automatically available in your asset store. You will need to allow the page to be reused in order for it to be available in your asset store.
- Open your portfolio, and navigate to the page you want to reuse.
- Click the Properties button, from the top right.
- In the Reuse Pages section, check the boxes to include the current page, and/or current portfolio in the asset store.
Note: You’re working within a ‘portfolio,’ but the top to bottom menus we talked about in the last section are also called ‘portfolios.’ Think about the top to bottom menus as ‘sub-portfolios.’ These ‘sub-portfolios’ will only exist as a separate object in your asset store if you follow the steps we just outlined to reuse pages. The same goes for pages that you create directly in a portfolio. Pages you create independent of a portfolio will already be available for reuse in your asset store.
This article was last updated on .

Add Media to a Playlist
- Find a video or media item that you want to add to a playlist.
- Click on the video, and click Actions > + Add to Playlist.
- Check the box next to your playlist under the Select Playlists section.
- Click Save.
This article was last updated on .

Add Video From My Media to a Channel
- Click on the button in the upper right that says your name and click My Channels from the list.
- Click on a channel.
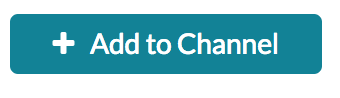
- Click the + Add to Channel button.
- Select the check box to the left of the video you want to add.
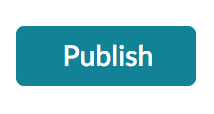
- Click the Publish button.
NOTE: You must be an owner or manager of the channel to add media. You can only add media that you own (have uploaded) to your channels. Videos that you can see that are owned by other users can only be added to Playlists.
This article was last updated on .

Adjust Media Permissions (Make Media Private or Shared)
- Click on your name > My Media from the upper right corner.
- Check the box next to the video you want to edit.
- Click Actions > + Publish in the upper right corner.
- Select your desired privacy setting (see options below).
- Click Save, and OK to confirm in the pop up window.
Media Permission Levels
- Private: Private media is viewable in your account only. No other account can see a private video.
- Unlisted: An unlisted video is viewable by anyone with the direct link. This is the recommended setting for sharing videos with your students.
- Published: If you have a situation where you need to set very specific access to a video, you can create a channel, and publish a video to that channel. If, for example, you want to share a video with a select group of students, but don’t want any one else to see it, you can use a channel.
To share media access with others, you need to change the default Private setting to Unlisted. Instructions are in this Share Media Via URL tutorial.
Channel Membership Roles
- Channel Owner: The channel owner is the person who created the channel. Only the owner can delete the channel.
- Channel Manager: A channel manager can view channel content, add media to the channel, moderate channel content, and manage users.
- Channel Moderator: A channel moderator can view channel content, add media to the channel, and moderate channel content.
- Channel Contributor: A channel contributor can view channel content and add media to the channel.
- Channel Member: A member can view the channel content.
Channel Types
- Private Channel: media in a Private channel can only be viewed or modified by by channel members.
- Restricted Channel: media in a Restricted channel is viewable by any PSU user. The channel can be accessed via URL or by searching in MediaSpace. Only users who are invited to join a Restricted channel can add to or edit its media.
This article was last updated on .